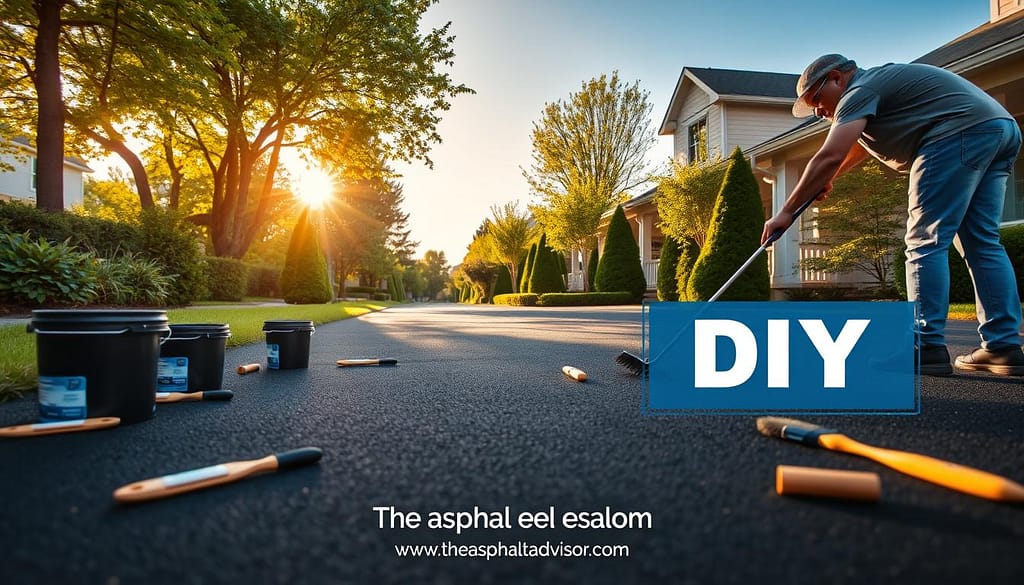
I remember the day I first noticed the cracks spreading across my driveway like a spider’s web. It was a wake-up call. My once-smooth asphalt surface was showing signs of wear and tear, and I knew I had to act fast. That’s when I discovered the magic of sealcoating – a game-changer in asphalt maintenance.
Sealcoating is like giving your asphalt a protective hug. It’s a thin, liquid layer that shields your pavement from harsh elements. Think of it as sunscreen for your driveway or parking lot. The sealcoat application process isn’t just about looks; it’s vital for preserving your investment.
The importance of sealcoating can’t be overstated. It’s the unsung hero in pavement preservation. By understanding its benefits and application, you’re taking the first step towards extending your asphalt’s life. Let’s dive into the essentials of this protective marvel.
Key Takeaways
- Sealcoating protects asphalt from UV rays, water damage, and chemical spills
- Regular sealcoating can double the lifespan of your asphalt surface
- Sealcoat should be applied every 3-5 years for optimal protection
- Professional application ensures even coverage and long-lasting results
- Sealcoating is a cost-effective maintenance solution compared to repairs
Understanding Sealcoat: Definition and Purpose
Sealcoat is key to keeping asphalt surfaces in good shape. I’ll tell you what sealcoat is and why it’s vital for your driveway or parking lot.
What is Sealcoat?
Sealcoat is a liquid that protects asphalt. It keeps out water, oils, and UV rays. There are many types, like tar-based, asphalt-based, and acrylic. Each one offers different levels of protection.
Why Is Sealcoating Important?
Sealcoating is very important. It makes asphalt last forever if you do it regularly. It stops water from getting into cracks, which is key in winter.
It also makes driveways and parking lots look great. They stay sleek and black, which everyone likes.
Regular sealcoating can make asphalt last much longer. Doing it every two to three years saves a lot of money. It’s cheaper than replacing the asphalt, costing just pennies per square foot.
Composition of Sealcoat Materials
Sealcoating materials are a mix of ingredients to protect and improve asphalt surfaces. I’ll explain the main parts and types of sealcoat. This will help you know what makes a good sealcoat for driveways and other areas.
Common Ingredients in Sealcoat
The main part of most sealcoating is asphalt emulsion. It’s water with tiny asphalt droplets. This base helps keep water out. To make it last longer and work better, makers add:
- Polymers: Make it stronger and last longer under heavy use and weather
- Fillers: Fill small cracks and holes in the asphalt
- Anti-stripping agents: Keep the sealcoat from peeling off
- Slip resistance additives: Make it safer by increasing traction
- UV protectants: Protect the sealcoat from sun damage
- Adhesion additives: Help it stick to the asphalt
Types of Sealcoat Products
When picking a sealcoat for driveways, knowing the types is key:
- Refined Coal Tar (RTS): Used widely for over 50 years
- Asphalt Emulsion Based (AE): Good for cracks and has special polymers
- Acrylic Sealers: Dry fast and are flexible
Each type has its own benefits. The right choice depends on your project and local rules. Knowing these details helps you pick the best sealcoating for your asphalt.
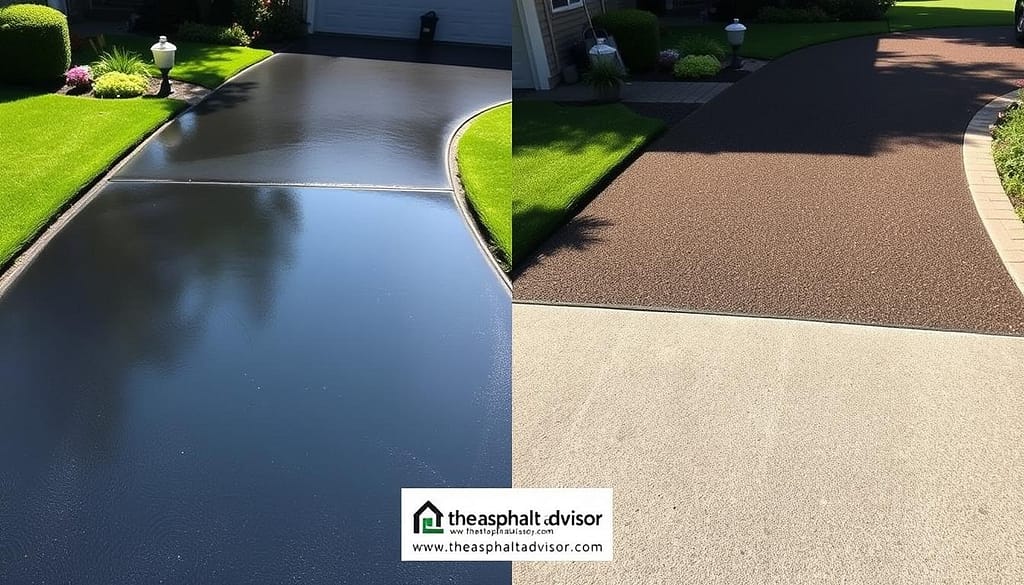
Benefits of Sealcoating Asphalt Surfaces
Sealcoating has many benefits for asphalt surfaces. It can turn old pavement into a smooth, attractive surface. Let’s look at the main advantages of sealcoating.
Protection from UV Damage
Sealcoating protects asphalt from harmful UV rays. It fills in surface voids, reducing exposure to oxygen and sunlight. This slows down oxidation, which can make asphalt brittle and crack.
The darker color of sealcoat also attracts more heat. This makes the asphalt more pliable and resistant to cracks.
Prevention of Water Damage
Water is a big threat to asphalt. Sealcoating creates a waterproof barrier that stops water from seeping in. This is key in preventing freeze-thaw damage, which can cause cracks and potholes.
By slowing down water penetration, sealcoating keeps the pavement’s structure strong.
Enhanced Visual Appeal
Sealcoating does more than protect. It makes faded asphalt look fresh and clean. This can increase property value and make a good first impression.
Regular sealcoating is also cost-effective. It’s much cheaper than repairing or replacing asphalt. Sealcoating extends the pavement’s life and saves money in the long run.
Sealcoating Process: Step-by-Step Guide
I’m excited to share my knowledge about the sealcoat application process. This guide will help you understand the steps involved and provide some valuable DIY sealcoating tips.
Preparing the Surface
The key to a successful sealcoat lies in proper preparation. First, I clean the surface thoroughly using a leaf blower and pressure washer to remove dirt and debris. For stubborn stains, I use a degreaser. It’s also important to repair any cracks larger than ¼-inch with a suitable filler before proceeding.

Applying the Sealcoat
When it comes to application, timing is everything. I prefer sealcoating during summer when temperatures stay above 50°F. I use a sprayer or squeegee to apply thin, even coats. For best results, I apply two coats, allowing six hours of drying time between each.
Curing Time and Techniques
After application, patience is key. I avoid walking or driving on the sealed surface for at least 24 hours. This allows the sealcoat to cure properly, ensuring its effectiveness and longevity. Remember, freshly laid asphalt doesn’t need sealing for 6-12 months as it needs time to cure naturally.
By following these steps and tips, you can achieve professional-looking results in your sealcoating project. If you’re unsure about any part of the process, don’t hesitate to consult a professional.
Choosing the Right Sealcoat for Your Needs
Choosing the right sealcoat for your asphalt driveway can be challenging. I’ll help you understand what to look for and compare different options. This will help you make a smart choice.
Factors to Consider
When choosing a sealcoat, think about durability, drying time, and how it affects the environment. Your local weather and driveway condition are also important. Some places have rules about certain sealcoats, so check local laws first.
Comparing Sealcoat Options
Let’s examine the main types of sealcoating materials:
| Sealcoat Type | Pros | Cons |
|---|---|---|
| Coal Tar Emulsion | Durable, resistant to oil spills | Contains carcinogens, banned in some areas |
| Asphalt Emulsion | Eco-friendly, protects from UV rays | Requires more frequent reapplication |
| Acrylic | Long-lasting, UV resistant | More expensive, less suitable for large projects |
| Oil-Based | Restores flexibility to old driveways | Strong odor, long drying time |
Asphalt emulsion sealcoat is a good choice for the environment. It protects against oxidation and UV rays. Oil-based sealcoats last 5-10 years but take a long time to dry. Acrylic sealcoats offer great UV protection and can last up to 7 years, perfect for sunny areas.
How Often Should You Sealcoat Your Asphalt?
Sealcoat maintenance is key to keeping your asphalt in top shape. The frequency of sealcoating depends on several factors. These include the climate, how much you use it, and the quality of the asphalt when it was first installed.
Signs It’s Time for Sealcoating
Knowing when your asphalt needs sealcoating is important. Here are some signs to look out for:
- Graying or fading of the surface color
- Small cracks appearing on the surface
- Rough or dry texture when touched
- Visible stones in the pavement

Recommended Sealcoating Schedule
Sealcoating is vital for your asphalt’s health. Here’s a general schedule to follow:
| Asphalt Age | Sealcoating Frequency |
|---|---|
| New installation | After 6-12 months |
| Established surfaces | Every 2-3 years |
| High-traffic areas | Annually |
Keep in mind, these are just guidelines. Your specific situation might require more or less sealcoating. For example, I sealcoat my driveway every year because of the harsh weather. This has helped my 31-year-old driveway last longer than my neighbors’.
DIY Sealcoating vs. Professional Services
When it comes to sealcoating, you have two options: tackle it yourself or hire professionals. I’ve explored both routes to help you make an informed decision.
Pros and Cons of DIY Sealcoating
DIY sealcoating can save you money upfront. It costs about $50 for airport-grade sealer, compared to $200-$300 for professionals. But, you’ll need to invest time and effort. A typical DIY job takes about 3 hours to complete.
| Aspect | DIY Sealcoating | Professional Services |
|---|---|---|
| Cost | $50 (materials only) | $200-$300 |
| Time | 3 hours | 30 minutes |
| Quality | Similar to professional | Guaranteed results |
| Warranty | No warranty | Work is warranted |
If you’re considering DIY, here are some sealcoating tips: clean your driveway thoroughly before application, choose the right sealer (acrylic-based is common but can be slippery), and follow proper application techniques for even coverage.
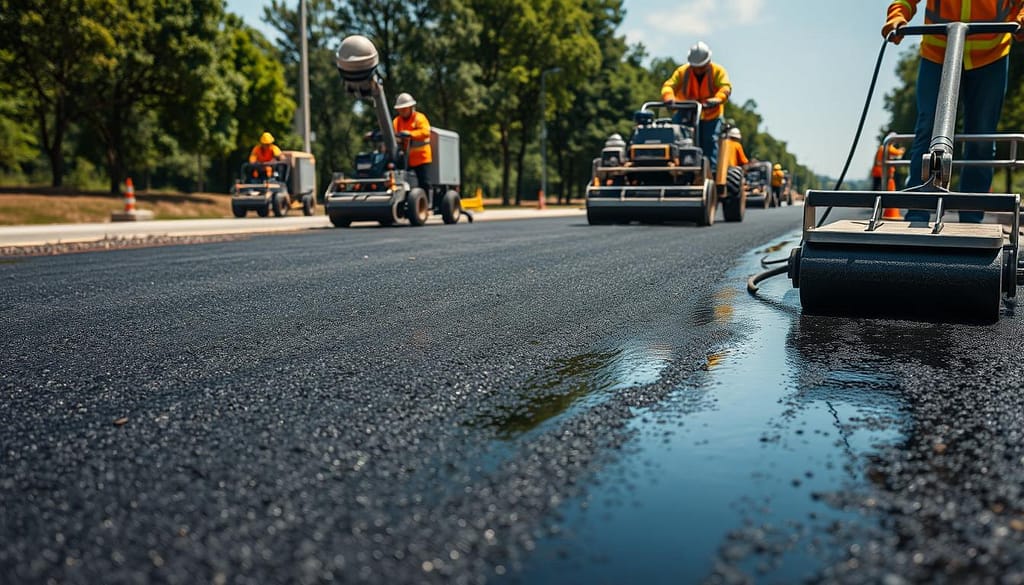
When to Hire a Professional
Professional sealcoating services near me offer expertise and efficiency. They can complete the job in about 30 minutes, saving you time and effort. The average cost for professional sealcoating is $175, which includes quality materials and skilled application.
Consider hiring professionals for large or complex surfaces. They bring specialized equipment and techniques, ensuring even application and durable results. Plus, you get the peace of mind of a warranty on the work done.
Whether you choose DIY or professional services, proper sealcoating will protect your asphalt and enhance its appearance. Weigh your budget, time, and desired results to make the best choice for your needs.
Costs Involved in Sealcoating
Understanding the costs of sealcoat maintenance is key. I’ll explain the average prices and what affects the total cost of sealcoating your asphalt.
Average Price Range for Sealcoating
Sealcoating prices vary based on several factors. Professionals charge between $0.08 to $0.30 per square foot. For a typical two-car driveway of 800 square feet, costs range from $400 to $1,200.
If you choose to do it yourself, expect to spend $0.15 to $0.25 per square foot on materials.

Factors Influencing Cost
Several elements affect the final sealcoating price:
- Size of the area: Larger surfaces cost less per square foot
- Surface condition: Damaged asphalt may need repairs before sealcoating
- Geographic location: Prices differ by region
- Professional vs. DIY: Professionals charge more but offer expertise
- Frequency: Regular sealcoating every 3-5 years can save money
When looking for “sealcoating companies near me,” remember. Professional services might seem expensive at first. But they often provide better results and save money in the long run. Quality sealcoating protects your asphalt and extends its life, making it a smart investment for property owners.
Common Myths About Sealcoating
I’ve heard many myths about sealcoating. Let’s set the record straight about what sealcoat is and its benefits. Sealcoating is not a permanent solution for all asphalt issues.
Misconceptions About Sealcoat Durability
Many believe sealcoating lasts forever. But, it needs to be reapplied every 3-5 years. In Atlanta, it usually lasts 2-3 years on parking lots.
Some think sealcoating stops all cracks. While it helps, it’s not a shield against severe damage or poor installation.
Debunking Sealcoating Myths
Another myth is that sealcoating is too pricey. It actually costs less than $0.20 per square foot. This is cheaper than repaving, which costs $3-$4 per square foot.
Sealcoating can double your pavement’s life if done regularly. Some worry it’ll disrupt their business. But, most businesses can reopen to foot traffic in 4-6 hours and vehicles in 12-24 hours after application.
Lastly, don’t think all sealcoats are the same. Different companies in Atlanta use different mixes. It’s important to find a reputable contractor who knows their stuff. Sealcoating is about protection, not just looks. It protects your asphalt from UV rays, water, and chemical spills for years.