I remember standing in my neighbor’s driveway five years ago, watching him pressure wash his beautiful black asphalt surface, proud of how good it looked. “Just installed it last year,” he told me. “Should last forever, right?” I had to bite my tongue because I knew what was coming. Fast forward to today, and that same driveway is a patchwork of cracks, faded gray sections, and crumbling edges—all because he never invested in asphalt driveway sealcoating. I’ve seen this scenario play out hundreds of times in my 15+ years in the industry, and it breaks my heart every time because it’s completely preventable. That smooth, jet-black surface you invested thousands of dollars in? It’s under constant attack from UV rays, water infiltration, petroleum products, and freeze-thaw cycles. Asphalt driveway sealcoating is like sunscreen for your pavement—it creates a protective barrier that can double or even triple the life of your investment. In this comprehensive guide, I’m going to share everything I’ve learned about protecting asphalt surfaces, from the science behind sealcoating to the exact steps you need to take to keep your driveway looking showroom-fresh for decades.
Key Takeaways: Essential Facts About Asphalt Driveway Sealcoating
- Optimal timing: Apply asphalt driveway sealcoating 6-12 months after new asphalt installation to allow proper curing, then reapply every 2-3 years
- Cost savings: Sealcoating costs $0.15-$0.25 per square foot versus $3-$7 per square foot for asphalt replacement—a 1,500 sq ft driveway costs $225-$375 to seal versus $4,500-$10,500 to replace
- Temperature requirements: Apply sealcoat only when temperatures are 50°F or above for 48 hours before and after application
- Lifespan extension: Proper asphalt driveway sealcoating can extend pavement life from 15-20 years to 25-30+ years
- Drying time: Wait 24-48 hours before walking on sealed surfaces and 48-72 hours before driving on them
- Material coverage: One 5-gallon bucket of sealer typically covers 250-350 square feet depending on porosity and application method
- UV protection: Sealcoating blocks 85-95% of UV radiation that causes oxidation and brittleness in asphalt
- Water resistance: Creates a waterproof barrier that prevents 98% of water penetration, the leading cause of asphalt deterioration
- ROI timeline: Every dollar spent on preventive sealcoating saves $6-$8 in future repair and replacement costs
- Application frequency: High-traffic commercial areas need sealcoating annually, while residential driveways require treatment every 2-3 years
Understanding Asphalt Driveway Sealcoating: Definition and Why It’s Important
I’ve been asked countless times: “What exactly is sealcoating, and why do I need it?” Let me break this down in the simplest terms possible. Asphalt driveway sealcoating is a protective liquid coating—typically made from refined coal tar or asphalt emulsion—that’s applied to the surface of your pavement. Think of your asphalt as a giant sponge made of rocks, sand, and a petroleum-based binder. When that binder gets exposed to oxygen, sunlight, water, and chemicals, it begins to break down through a process called oxidation.
In my experience, oxidation is the silent killer of asphalt surfaces. I’ve seen driveways age ten years in just two because they weren’t protected. The asphalt binder literally evaporates over time, leaving behind a brittle, gray surface where the aggregate stones have nothing holding them together. This is why older, unsealed asphalt looks faded and feels rough—you’re seeing the skeleton of the pavement without its protective flesh.
Asphalt driveway sealcoating works by creating a protective barrier that shields your pavement from these destructive elements. The sealer penetrates into the top layer of asphalt, filling surface voids and creating a flexible, waterproof membrane. This barrier blocks UV radiation, repels water, resists petroleum spills (like engine oil and gasoline), and provides a sacrificial layer that wears away instead of your actual pavement.
Here’s what really drives the importance home for me: asphalt is an investment that typically costs between $3-$7 per square foot to install. For a standard two-car driveway of about 600-800 square feet, you’re looking at $1,800-$5,600 just for the base installation. Without proper asphalt driveway maintenance, that investment starts deteriorating from day one. But with regular sealcoating, you’re essentially hitting the pause button on aging.
Pro Tip: New asphalt needs time to cure before sealcoating. I always tell homeowners to wait at least 6-12 months after installation. The volatile oils in fresh asphalt need to evaporate first, or you’ll trap them under the sealer and create adhesion problems. I’ve seen contractors apply sealer too early, and it literally peels off in sheets within a year.
The chemistry behind sealcoating protection is fascinating. Coal tar-based sealers contain refined coal tar pitch, clay, water, emulsifying agents, and additives. These create an incredibly durable coating that’s naturally resistant to petroleum products. Asphalt-based sealers use refined asphalt cement as the primary ingredient, making them more environmentally friendly in some regions but slightly less resistant to gas and oil spills.
I’ve witnessed firsthand what happens when homeowners skip sealcoating. Water is the number one enemy of asphalt—it seeps into tiny cracks, expands when it freezes, and literally tears the pavement apart from the inside. This freeze-thaw cycle creates what we call “alligator cracking,” where the surface looks like reptile skin. Once you reach this stage, sealcoating alone won’t fix it—you’re looking at pavement repair or even replacement.
Step-by-Step Asphalt Driveway Sealcoating Preparation Guide
I cannot stress this enough: preparation is 80% of a successful sealcoating job. I’ve seen DIYers rush through prep work and wonder why their sealer fails within months. The surface preparation determines everything—adhesion, longevity, appearance, and performance. Let me walk you through exactly how I prepare a driveway for sealcoating.
Step 1: Timing and Weather Assessment
First, check your calendar and weather forecast. I only apply asphalt driveway sealcoating when temperatures will remain above 50°F for at least 48 hours before and after application. The ideal window is 60-85°F with low humidity. I’ve made the mistake early in my career of sealing when cold weather was approaching—the sealer never properly cured and washed away with the first rain. Spring through early fall is your best window, with late spring and early summer being optimal.
Step 2: Thorough Cleaning
This is where most people cut corners. Your driveway needs to be absolutely spotless—I’m talking hospital-clean. I start by removing all vehicles, planters, toys, and debris. Then I use a gas-powered blower to remove loose dirt, leaves, and sand. For oil stains, I apply a commercial degreaser and let it sit for 15-20 minutes before scrubbing with a stiff brush.
Next comes pressure washing, which is non-negotiable. I use a 3,000-3,500 PSI pressure washer to remove embedded dirt, moss, mildew, and oxidized asphalt. I work in overlapping passes, maintaining a consistent distance of 12-18 inches from the surface. Pay special attention to oil-stained areas—petroleum residue will prevent sealer adhesion. After pressure washing, I let the surface dry completely for at least 24-48 hours depending on humidity.
Pro Tip: Use a degreasing solution specifically designed for asphalt, not household cleaners. I’ve found that TSP (trisodium phosphate) or commercial asphalt cleaners work best. Apply them before pressure washing for maximum effectiveness. If you skip this step on oil-stained areas, you’ll see the sealer peel off in those exact spots within months.
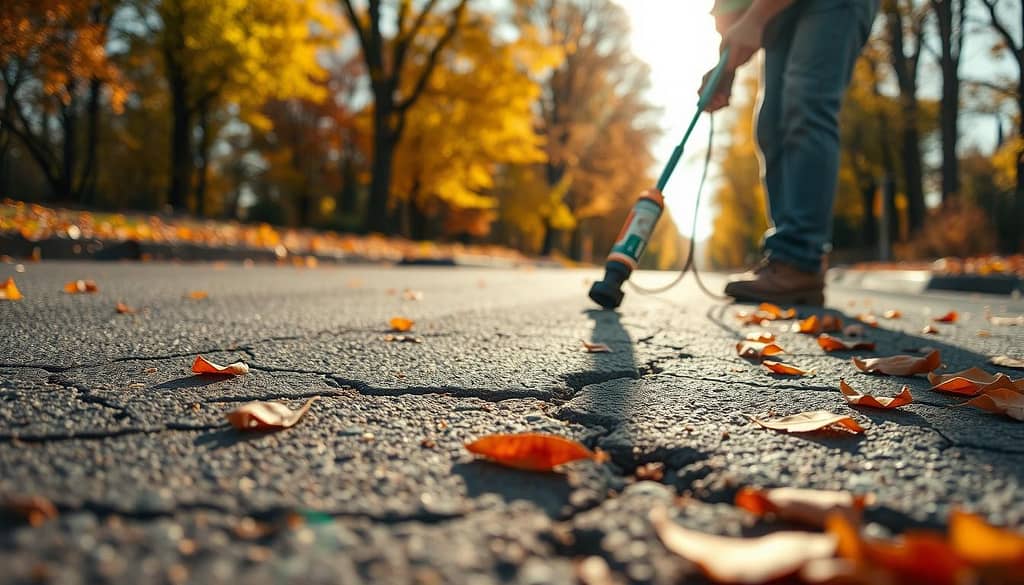
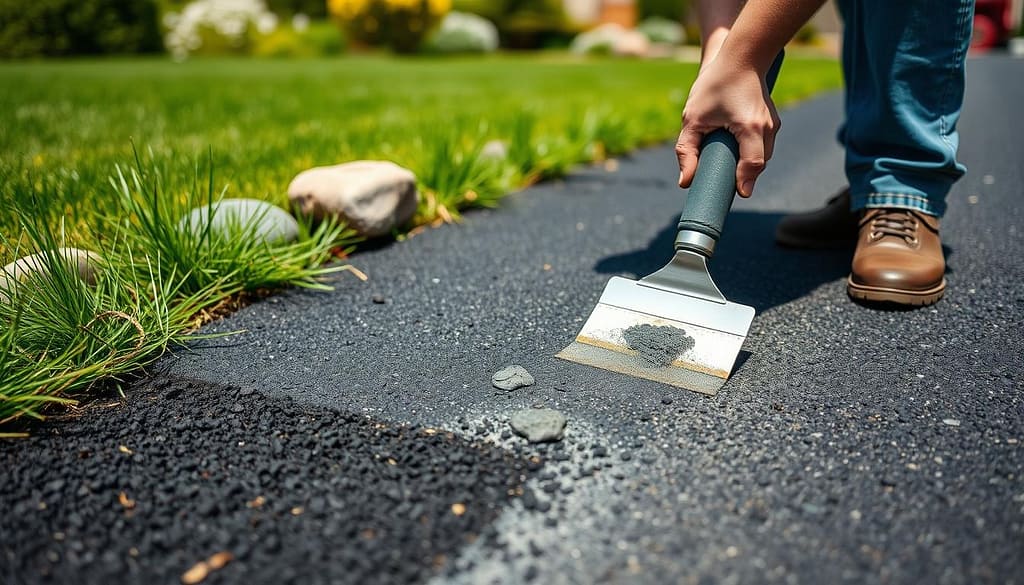
Step 3: Crack and Damage Repair
Walk your entire driveway and mark every crack, hole, and damaged area with spray paint or chalk. Cracks wider than 1/4 inch need to be filled before sealcoating. I use rubberized crack filler for smaller cracks (1/4″-1/2″) and hot pour rubberized asphalt for larger cracks (1/2″-1″). For details on proper crack repair techniques, I recommend studying different methods based on crack severity.
Potholes require more extensive work. I clean out all loose material, apply a tack coat of liquid asphalt, then fill with cold patch asphalt or hot asphalt mix. Compact thoroughly using a hand tamper or plate compactor. The filled area should be slightly crowned (raised) to account for settling. For comprehensive guidance, check out asphalt pothole patching methods.
Step 4: Edge Trimming and Vegetation Control
I use an edging tool or flat shovel to create clean, defined edges along your driveway borders. Grass and weeds growing into the asphalt edges should be removed and treated with herbicide. I typically cut back edges by 1-2 inches to create a clean line. This not only looks professional but also prevents vegetation from pushing under the sealer.
Step 5: Final Inspection and Touch-ups
Once everything is clean, repaired, and dry, I do a final walk-through. I check for any remaining oil spots, ensure all cracks are properly filled and level, and verify that the surface is completely dry. I run my hand across the pavement—if it feels cool or damp, it’s not ready. Moisture is the enemy of sealer adhesion.
For more detailed preparation steps and tips, I always recommend reviewing professional guidelines. The extra time spent on preparation pays dividends in the final result.
Asphalt Driveway Sealcoating vs. Resurfacing: Key Differences
I get asked this question at least once a week: “Should I sealcoat or resurface my driveway?” The answer depends entirely on the current condition of your pavement, and I’ve developed a simple assessment process over the years that helps homeowners make the right decision.
Asphalt driveway sealcoating is a preventive maintenance treatment that protects structurally sound pavement. It’s a thin coating (typically 1/16″ or less when dry) that seals the surface, prevents water penetration, and restores color. Sealcoating is appropriate when your asphalt has minor surface wear, slight fading, hairline cracks (less than 1/4″), and no significant structural damage.
Resurfacing or overlaying, on the other hand, involves applying a new 1.5″-2″ layer of asphalt over your existing pavement. This is necessary when you have extensive cracking (more than 25% of surface area), significant surface deterioration, rutting or depressions, or an aged surface that’s beyond the point where sealcoating would help.
Here’s how I assess which option you need: I walk the driveway and look at the overall condition. If I can see the individual stones in the aggregate clearly because the binder has worn away, if there are multiple areas with alligator cracking, or if the surface has depressions that hold water, sealcoating won’t fix those issues. You’re past preventive maintenance and into repair territory.
Think of it like this: sealcoating is like waxing your car—it protects the paint that’s already in good condition. Resurfacing is like getting a new paint job because the old paint is peeling and rusted through. You wouldn’t wax a rusty car and expect it to look new, right?
Cost Comparison:
| Factor | Asphalt Driveway Sealcoating | Asphalt Resurfacing |
|---|---|---|
| Cost per sq ft | $0.15-$0.25 | $2.00-$4.00 |
| Typical 1,500 sq ft driveway | $225-$375 | $3,000-$6,000 |
| Surface thickness added | 1/64″-1/16″ | 1.5″-2″ |
| Addresses structural issues | No | Yes |
| Frequency needed | Every 2-3 years | Every 10-15 years |
| Lifespan extension | 3-5 years | 8-15 years |
| Drying/curing time | 24-72 hours | 3-5 days |
I’ve learned that timing matters enormously in this decision. If your asphalt is 5-8 years old and showing early signs of wear, sealcoating is perfect. If it’s 15-20 years old with significant damage, you’re likely looking at resurfacing or full replacement. The sweet spot for starting a regular sealcoating program is within the first 1-2 years after installation (after the initial cure period).
For a deeper analysis of when to choose each option, I recommend reading about sealcoating versus resurfacing decisions. The key is being honest about your pavement’s condition rather than hoping a cheap fix will solve deep-rooted problems.
Pro Tip: If you’re on the fence, here’s my rule of thumb: If repairs (crack filling, patching, etc.) would cost more than 40% of what sealcoating costs, you should probably consider resurfacing instead. You’re throwing good money after bad at that point. I’ve seen homeowners spend $500 on repairs plus $400 on sealcoating when $3,500 for resurfacing would have been the smarter long-term investment.
Factors to Consider for Your Asphalt Driveway Sealcoating Project
Over the years, I’ve identified seven critical factors that determine whether your sealcoating project will be successful or a waste of money. Let me share what I evaluate before every job.
Age of the Asphalt
New asphalt needs time to cure—period. The petroleum oils in fresh asphalt must oxidize and evaporate naturally for 6-12 months. I’ve seen contractors seal brand-new driveways after just 30 days, and the sealer literally prevents proper curing, leading to a soft, tacky surface that never fully hardens. Wait the full year if possible. For older asphalt (15+ years), assess whether the pavement is too deteriorated for sealcoating to be effective.
Climate and Weather Patterns
Your local climate dramatically affects sealcoating frequency and timing. I work with clients across various regions, and homeowners in northern climates with harsh winters need to seal more frequently—often every 2 years—because freeze-thaw cycles are brutal on asphalt. In milder climates, every 3-4 years might be sufficient. UV exposure is another factor; driveways in sunny, southern climates experience more oxidation and may need more frequent treatment.
Traffic and Usage
A residential driveway with two cars sees vastly different wear than a commercial parking lot or a driveway with heavy equipment traffic. I adjust my recommendations based on usage. High-traffic areas need annual or biennial sealcoating. Low-traffic residential driveways can go 3 years between applications. Also consider turn radiuses—areas where vehicles turn tightly experience more shear stress and wear faster.
Drainage Conditions
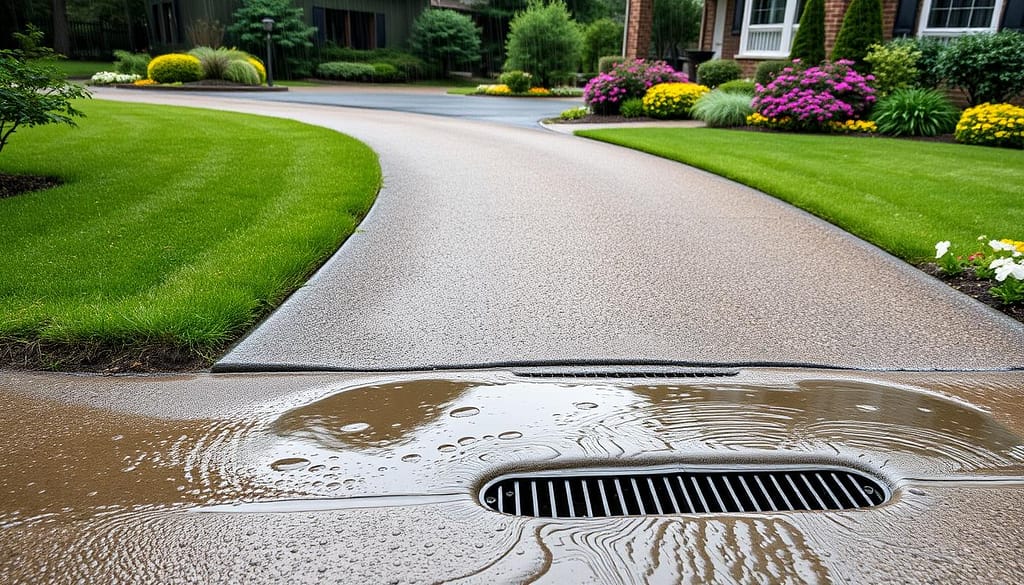
Water is the enemy, and I cannot emphasize this enough. If your driveway has standing water or poor drainage, sealcoating alone won’t save it. I always check for low spots, proper slope (minimum 1-2% grade), and effective water runoff. Preventing water damage should be addressed before sealcoating. Sometimes I recommend minor grading work or installing channel drains before sealing.
Existing Damage Assessment
Before committing to asphalt driveway sealcoating, honestly assess all damage. Make a list: How many linear feet of cracks do you have? How many potholes? Is there edge deterioration? Surface raveling? I estimate repair costs separately from sealcoating costs. If your repair bill approaches 50% of a resurfacing project, have a serious conversation about whether sealcoating is the right move.
Sealer Type Selection
You have two primary options: coal tar-based and asphalt-based sealers. Coal tar sealers are more durable and petroleum-resistant but are banned in some regions due to environmental concerns. Asphalt emulsion sealers are more eco-friendly and adequate for most residential applications but offer slightly less protection against gas and oil. I choose based on local regulations, expected exposure to petroleum products, and budget. Coal tar typically costs 10-20% more but lasts longer.
Pro Tip: Don’t skimp on quality to save $50. I’ve tested dozens of sealers, and the difference between contractor-grade and big-box store products is massive. Professional sealers typically contain 35-40% solids, while cheap versions might have 20-25%. That means more water and less actual protective material. Spend the extra money on a quality sealer—it’s still a fraction of the cost of premature asphalt replacement.
Property Aesthetics and Curb Appeal
Let’s be honest—a freshly sealed driveway looks incredible. That deep, rich black color transforms your property’s curb appeal instantly. If you’re planning to sell your home, asphalt driveway sealcoating offers one of the highest ROI improvements you can make. Buyers see a well-maintained driveway and assume the entire property has been cared for properly.
The Process of Professional Asphalt Driveway Sealcoating
I’ve sealed thousands of driveways, and I’ve refined my process to ensure consistent, high-quality results every time. Let me walk you through exactly how professional sealcoating should be done.
Material Preparation and Mixing
Professional sealcoating starts long before anything touches your driveway. I begin by selecting the right sealer for your specific application. Most professional-grade sealers come in 5-gallon pails or 55-gallon drums and require mixing before application.
I pour the sealer into a large mixing container and check the consistency. Most sealers can be used straight from the container, but I often add water (following manufacturer specifications) to achieve the right viscosity for application. Typically, I’ll thin sealer by 0-20% depending on application method. Too thick, and it won’t spread evenly; too thin, and you lose protective value.
Next, I add additives—sand is the most common. I add 3-5 pounds of fine silica sand per gallon of sealer. The sand provides several benefits: it adds texture for traction, fills surface voids more effectively, extends the sealer, and increases durability. For commercial applications, I might also add latex or polymer additives that enhance flexibility and wear resistance.
Application Method Selection
I have three primary application methods in my arsenal: squeegee, spray, and combination approach.
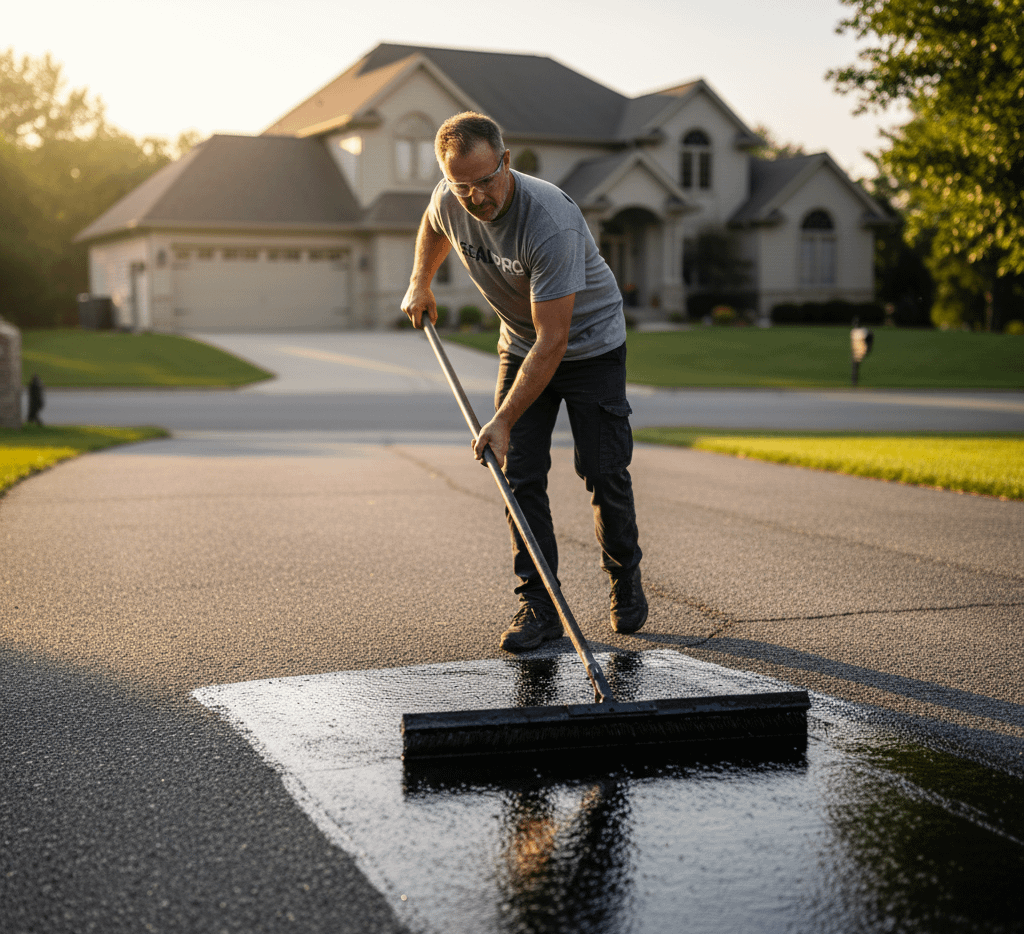
Squeegee Application: This is my preferred method for residential driveways. I use a 24″ or 36″ squeegee with a long handle and apply sealer in overlapping passes. This method forces sealer into surface pores and provides excellent coverage. It’s labor-intensive but offers superior results for smaller areas.
Spray Application: For larger areas, I use a spray system—either a pump sprayer or, for commercial jobs, a spray tank mounted on a truck. Spraying is faster and can cover large areas efficiently, but it requires more skill to achieve even coverage. I typically apply two thin coats rather than one heavy coat when spraying.
Combination Method: This is my go-to for most residential jobs. I spray the first coat to get sealer deep into surface pores, then squeegee the second coat to ensure even distribution and work the material into all areas.
Step-by-Step Application Process
Step 1: Final Surface Check Before opening a single bucket, I walk the driveway one last time. I check for any debris, ensure all repairs are properly cured, verify edges are clean, and confirm the surface is completely dry.
Step 2: Edge Work I always start with edges. Using a small brush or squeegee, I carefully seal along garage doors, walks, and borders. This prevents overspray or squeegee marks on adjacent surfaces and ensures complete coverage to the edges. I take my time here—sloppy edge work is immediately visible and looks unprofessional.
Step 3: First Coat Application Starting at the highest point (top of slope), I work backward toward the street, ensuring I don’t trap myself. For squeegee work, I pour a ribbon of sealer across the width of the driveway, then spread it with smooth, overlapping strokes. I maintain a consistent pressure and pace. The sealer should go on dark and wet but not so thick that it puddles.
Each pass overlaps the previous one by 2-3 inches. I work in sections about 10-15 feet at a time, constantly checking for uniform coverage. Common mistakes I watch for: leaving streaks, applying too thickly in some areas, missing spots, or creating puddles in low areas.
Step 4: Drying Time Between Coats Patience is crucial here. The first coat must be completely dry before applying the second—typically 4-8 hours depending on temperature and humidity. I test by touching the surface; it should feel dry and not transfer any sealer to my finger. Rushing this step causes the second coat to lift or pill up.
Step 5: Second Coat Application The second coat follows the same process as the first but often goes faster because the surface is already sealed and less porous. I apply the second coat perpendicular to the first when possible (if I went lengthwise on the first coat, I go crosswise on the second). This ensures complete coverage and fills any thin spots.
Pro Tip: Weather during and after application is critical. I never seal if rain is forecast within 24 hours. Even a light misting can ruin a fresh seal coat. If unexpected weather arrives, I cover the driveway with plastic sheeting, though this is a last resort. Plan your project for a stretch of clear, dry weather—late spring and early summer are ideal in most regions.
Cure Time and Traffic Restrictions
After the final coat, the waiting begins. This is where homeowner impatience causes the most problems. I provide clear instructions:
- 4-8 hours: Sealer is dry to touch but not cured
- 24 hours: Safe for foot traffic (walk cautiously)
- 48-72 hours: Safe for vehicle traffic (I recommend 72 hours in cooler weather)
- 7 days: Full cure achieved
I’ve seen people drive on their driveway after just 12 hours because “it looked dry.” Those tire marks are permanent, and no amount of additional sealcoating will fix them. The sealer needs time to cure fully—don’t rush it.
Quality Control Checks
Before leaving a job, I inspect every square foot. I look for any missed spots, uneven coverage, or areas where sealer might have been applied too heavily. I walk the entire perimeter checking edges. Any deficiencies get touched up immediately while I’m on site.
For those interested in tackling this themselves, I’ve detailed the DIY sealcoating process in another guide, though I always recommend hiring professionals for the best results.
Cost Analysis: What to Expect for Asphalt Driveway Sealcoating
Let’s talk money. I believe in complete transparency about costs because homeowners need accurate information to make informed decisions. Asphalt driveway sealcoating is one of the most cost-effective maintenance investments you can make, but prices vary significantly based on multiple factors.
Material Costs
Professional-grade sealers range from $20-$35 per 5-gallon bucket. A single bucket covers approximately 250-350 square feet depending on porosity, application method, and whether you’re applying one or two coats. For a typical two-car driveway (600 square feet, two coats), you’re looking at 4-6 buckets, or $80-$210 in sealer alone.
Additional materials include:
- Crack filler: $15-$30 per tube (enough for 40-60 linear feet)
- Sand additive: $8-$15 per 50-pound bag
- Cleaning solutions: $20-$40
- Mixing sticks, brushes, and disposables: $20-$40
Total DIY material cost for a 600 sq ft driveway: $150-$350 depending on condition and repair needs.
Professional Service Costs
Professional asphalt driveway sealcoating services typically charge $0.15-$0.25 per square foot for residential work. However, most contractors have minimum charges ($150-$300) because of equipment, travel, and setup costs. Here’s what I typically quote:
Residential Driveway Pricing:
- Small driveway (400-600 sq ft): $200-$350
- Medium driveway (600-1,000 sq ft): $300-$500
- Large driveway (1,000-1,500 sq ft): $450-$650
- Extra-large driveway (1,500+ sq ft): $0.30-$0.40 per sq ft
These prices typically include basic crack filling (up to 50 linear feet), cleaning, and two coats of professional-grade sealer. Extensive repairs cost extra.
Commercial Pricing: Commercial properties typically get better per-square-foot rates due to economies of scale, but the prices range from $0.10-$0.20 per square foot depending on size and complexity. A 10,000 sq ft parking lot might cost $1,500-$2,500.
Additional Cost Factors
Several factors can increase your total project cost:
- Extensive crack repair: If you have more than 100 linear feet of cracks requiring filling, add $100-$300
- Patching potholes: Each pothole repair costs $50-$150 depending on size
- Oil stain treatment: Heavy petroleum staining requires special primers and treatment, adding $75-$200
- Edge repair: Deteriorated edges needing rebuilding add $3-$5 per linear foot
- Rush scheduling: Need it done immediately? Expect to pay 15-25% more
- Difficult access: Steep driveways, narrow access, or special equipment needs increase costs
Pro Tip: Get three written estimates from reputable contractors. But don’t automatically choose the cheapest bid—I’ve seen too many homeowners burned by lowballers who use inferior products, skip proper prep work, or apply only one thin coat instead of two proper coats. A $150 sealcoat job that fails in 18 months isn’t a bargain; a $350 job that lasts 3-4 years is the better value.
Return on Investment
This is where asphalt driveway sealcoating really shines. Consider these numbers I’ve tracked over my career:
Without sealcoating:
- Average asphalt lifespan: 12-15 years
- Replacement cost (600 sq ft): $3,000-$5,000
- Annual cost of ownership: $200-$417
With regular sealcoating (every 3 years):
- Average asphalt lifespan: 25-30 years
- Initial replacement cost: $3,000-$5,000
- Sealcoating cost every 3 years: $300-$400
- Total sealcoating over 30 years: $3,000-$4,000
- Total 30-year cost: $6,000-$9,000
- Annual cost of ownership: $200-$300
But here’s the real kicker: without sealcoating, you’ll likely need to replace your driveway twice in 30 years, totaling $6,000-$10,000 just for replacement, plus dealing with the inconvenience and property disruption twice. With sealcoating, you replace it once and maintain it, often for less total cost and far less hassle.
For detailed information on overall asphalt costs, check out the comprehensive asphalt driveway cost guide or use the asphalt cost calculator for your specific project.
DIY vs Professional Cost Comparison
| Cost Factor | DIY Approach | Professional Service |
|---|---|---|
| Materials (600 sq ft) | $150-$350 | Included |
| Equipment rental/purchase | $100-$400 | Included |
| Time investment | 12-20 hours | 0 hours |
| Quality guarantee | None | 1-2 years typically |
| Total cost | $250-$750 | $300-$500 |
| Risk of errors | High | Low |
| Result quality | Variable | Consistent |
When you factor in equipment costs, time investment, and the learning curve, the cost difference between DIY and professional often narrows considerably—especially for first-timers.
Professional vs DIY: Making the Right Choice for Asphalt Driveway Sealcoating
This is probably the most common question I get: “Can I just seal it myself and save money?” The answer is: yes, you can, but whether you should depends on several factors. Let me give you the unvarnished truth from both sides.
When DIY Makes Sense
I fully support DIY sealcoating in certain situations. If you have a small, simple driveway (under 500 sq ft), relatively flat terrain, no complex repairs needed, time and physical ability to do the work, and patience to follow instructions carefully, DIY can save you $200-$400.
I’ve seen homeowners achieve excellent results with DIY sealcoating when they take their time, use quality materials, and follow proper procedures. The key is having realistic expectations and understanding that your first attempt won’t look as good as a professional’s 1,000th job.
DIY Challenges and Pitfalls
However, I need to be honest about the common mistakes I see with DIY jobs:
Application errors: Uneven coverage, streaking, puddles in low areas, missed spots around edges, and one coat instead of two are extremely common. These aren’t just cosmetic issues—thin or uneven coverage fails prematurely.
Poor surface preparation: This is the number one DIY failure point. Homeowners underestimate how critical cleaning and crack repair are. They skip pressure washing, don’t properly fill cracks, or seal over oil-stained areas. I’ve seen DIY jobs fail within six months because of inadequate prep work.
Timing mistakes: Sealing too soon after asphalt installation, working in wrong weather conditions, not allowing proper drying time between coats, or driving on the surface too early—these timing errors ruin otherwise decent jobs.
Material mistakes: Using big-box store sealer that’s been watered down or frozen and thawed, buying insufficient quantity and stretching it too thin, or using the wrong sealer type for your climate all lead to premature failure.
When to Hire a Professional
I strongly recommend hiring professionals when you have a large driveway (over 800 sq ft), extensive crack repairs needed, poor drainage issues that need addressing, limited time or physical limitations, or no experience with similar projects.
Professional contractors bring expertise, proper equipment, quality materials, and often warranties. We can complete in 4-6 hours what takes a homeowner 2-3 days. We have spray equipment that ensures even coverage. We know exactly how to handle problem areas. And most importantly, we guarantee our work.
Pro Tip: If you decide to hire a professional, do your homework. Ask these questions: How long have you been in business? Do you carry liability insurance? What brand and type of sealer do you use? How many coats will you apply? What’s included in the price? Do you warranty your work? Can I see recent project photos? Can you provide references? A reputable contractor will answer all these questions confidently and provide documentation.
Middle Ground Approach
Here’s a compromise I often suggest: hire professionals for the initial sealcoating to establish a properly protected baseline, then consider DIY maintenance sealcoating every 3-4 years after that. This gives you the benefit of professional expertise when your asphalt needs it most, but saves money on maintenance coats when the surface is already protected.
Alternatively, handle all the prep work yourself (cleaning, minor crack filling) and hire professionals just for the sealcoating application. This splits the cost while ensuring proper application.
Equipment Considerations
If you go DIY, you’ll need specific equipment:
- Pressure washer (3,000+ PSI): $50-$100 to rent for a day or $200-$500 to purchase
- Squeegee applicator with handle: $30-$60
- Mixing paddle and drill: $20-$40
- Edging brushes: $10-$20
- Stiff-bristle broom: $15-$25
- Safety equipment (gloves, goggles, old clothes): $20-$30
- Mixing bucket or container: $10-$20
Most of this equipment can be rented, but if you plan to sealcoat regularly, purchasing makes sense. Professional-grade spray equipment costs $1,500-$5,000, which is why most homeowners stick with squeegee application.
For those committed to the DIY route, I’ve put together detailed guidance on common sealcoating mistakes to avoid that can save you from costly errors.
Common Mistakes to Avoid in Asphalt Driveway Sealcoating
I’ve seen it all—and I mean all—when it comes to sealcoating disasters. Some mistakes are minor and cosmetic, but others can actually accelerate pavement deterioration instead of preventing it. Let me share the most critical errors I encounter and how to avoid them.
Mistake #1: Sealing New Asphalt Too Soon
This is probably the most common and damaging mistake I see. Homeowners get excited about their beautiful new black driveway and want to protect it immediately. But new asphalt contains volatile oils that need to evaporate through the surface. If you seal too soon, you trap these oils, preventing proper curing.
The result? A soft, tacky surface that never fully hardens, tire marks that never go away, and premature sealer failure. I’ve seen new driveways ruined by well-intentioned homeowners who sealed after just 30-60 days. Always wait a minimum of 6-12 months after installation.
Mistake #2: Ignoring Weather Conditions
I cannot tell you how many times I’ve driven past homes where someone is sealing their driveway with dark clouds overhead or temperatures in the 40s. Asphalt driveway sealcoating requires specific weather conditions:
- Temperature must be 50°F or above (60°F+ is better)
- No rain forecast for 24-48 hours
- Low to moderate humidity
- Minimal wind (prevents overspray and debris contamination)
Sealing in cold weather means the sealer won’t cure properly. Sealing before rain means your sealer washes away, creating a mess and wasting money. I once saw a neighbor seal on a Friday with rain forecasted for Saturday afternoon. He figured 18 hours would be enough. It wasn’t. The rain created streaks and washed sealer into his lawn and the street. He had to strip it and start over.
Mistake #3: Inadequate Surface Preparation
This is where 90% of DIY jobs fail. Surface preparation isn’t optional—it’s the foundation of success. Skipping or rushing these steps guarantees premature failure:
- Not pressure washing thoroughly leaves dirt and oxidized asphalt that prevent adhesion
- Ignoring oil stains means sealer won’t stick in those areas
- Failing to fill cracks allows water infiltration beneath the sealer
- Not allowing adequate drying time traps moisture under the sealer
I inspected a driveway where the homeowner had sealed over visible dirt, moss, and oil stains. Within three months, the sealer was peeling off in sheets. We had to strip everything and start fresh—costing triple what proper prep would have cost initially.
Pro Tip: The “peel test” helps identify if your surface is ready. After cleaning and drying, firmly press a piece of duct tape onto the asphalt and rip it off quickly. If any significant amount of asphalt particles or dust comes off with the tape, the surface isn’t clean enough. Keep cleaning until the tape comes off relatively clean.
Mistake #4: Using Inferior Sealcoat Products
Not all sealers are created equal. Big-box store sealers often contain 20-25% solids, while professional-grade products contain 35-40% solids. More solids means more actual protective material and less water. I’ve tested both extensively, and the difference in durability is stark.
Cheap sealer might cost $15 per bucket versus $30 for professional grade, but you’ll need to reapply it twice as often. It’s false economy. Additionally, some homeowners buy sealer that’s been sitting in a warehouse through freeze-thaw cycles, which breaks down the emulsion and ruins the product.
Mistake #5: Applying Only One Coat
I see this constantly: homeowners apply one coat, see the black color return, and think they’re done. But asphalt driveway sealcoating requires two coats for proper protection. The first coat fills surface pores and establishes a base. The second coat provides the actual protective layer.
One coat might make your driveway look better temporarily, but it won’t provide adequate UV protection, water resistance, or durability. You’ll be resealing in 12-18 months instead of 3-4 years. Apply two coats, period.
Mistake #6: Improper Application Technique
Even with good materials and prep, poor application ruins results:
- Applying too thick: Creates puddles, uneven drying, and premature cracking
- Applying too thin: Doesn’t provide adequate protection
- Inconsistent coverage: Leaves visible streaks and weak spots
- Poor edge work: Creates unsightly borders and incomplete protection
- Working yourself into a corner: Literally trapping yourself with no exit path
I’ve seen homeowners apply sealer so thick in low spots that it never fully cured—remaining tacky for weeks. Others apply it so thin you can barely see the difference in color, providing virtually no protection.
Mistake #7: Not Addressing Underlying Issues
Asphalt driveway sealcoating is a protective treatment, not a repair solution. If your pavement has structural problems—settling, heaving, base failure, extensive cracking (over 25% of surface area), or significant deterioration—sealcoating won’t fix them. It’s like putting a fresh coat of paint on a house with a crumbling foundation.
Address the root causes first. Fix drainage problems, repair significant cracks and potholes, and ensure structural integrity. Then seal to protect your investment. For guidance on different repair needs, check out top tips for asphalt driveway repair.
Mistake #8: Ignoring Traffic Restrictions
Patience is not optional after sealcoating. I’ve witnessed countless homeowners who sealed Friday afternoon, saw the surface looked dry Saturday evening, and drove on it Sunday morning. The result? Permanent tire marks, disturbed sealer, and compromised protection.
Follow these minimum wait times religiously:
- 24 hours before walking
- 48-72 hours before driving (longer in cool weather)
- 7 days before any heavy equipment or aggressive use
I tell homeowners to add an extra day to be safe. Better to park on the street for an extra 24 hours than to ruin a $400 sealcoating job.
Pro Tip: Block off your driveway with cones, caution tape, or sawhorses. Post clear signs indicating when vehicle traffic will be allowed. Tell family members, guests, and delivery drivers. I’ve seen pizza delivery drivers ignore wet sealer warnings and drive right across a freshly sealed surface. Don’t assume people will notice—make it obvious and impossible to miss.
Mistake #9: Sealing Over Damaged Asphalt
Sealcoating cannot fix failed asphalt. If you have extensive alligator cracking, potholes, sunken areas, or edge deterioration, sealcoating will make it look better temporarily but won’t address the underlying problems. In fact, sealing severely damaged asphalt can trap water beneath the surface, accelerating deterioration.
Be honest about your pavement’s condition. If it’s beyond the point where sealcoating helps, you’re throwing money away. Consider resurfacing options or full replacement instead.
Mistake #10: DIY Without Proper Knowledge
I respect homeowners who want to tackle projects themselves, but asphalt driveway sealcoating isn’t as simple as it looks. Without understanding proper mixing ratios, application techniques, weather requirements, and surface preparation, you’re likely to make expensive mistakes.
If you’re determined to DIY, invest time in learning first. Watch professional videos, read comprehensive guides, talk to contractors, and understand the chemistry and process. Better yet, watch a professional do one application, then handle future maintenance coats yourself with that knowledge.
Maintenance Tips and Best Practices for Asphalt Driveway Sealcoating
Sealcoating is just one component of a comprehensive asphalt maintenance program. I’ve developed a maintenance protocol over the years that maximizes pavement life and minimizes total ownership costs. Let me share the best practices I recommend to every client.
Establish a Regular Sealcoating Schedule
Consistency is key. I recommend establishing a sealcoating schedule based on these factors:
Climate-Based Frequency:
- Harsh climates (significant freeze-thaw cycles, extreme temperatures): Every 2 years
- Moderate climates (mild winters, moderate weather): Every 2-3 years
- Mild climates (minimal temperature extremes, little freeze-thaw): Every 3-4 years
Usage-Based Frequency:
- High traffic (frequent use, heavy vehicles, commercial): Every 1-2 years
- Medium traffic (daily family use, standard vehicles): Every 2-3 years
- Low traffic (occasional use, light vehicles): Every 3-4 years
I maintain a simple calendar reminder system. Once I seal a driveway, I schedule the next maintenance reminder for 2-3 years out. This prevents the “out of sight, out of mind” problem where homeowners forget about maintenance until damage is already severe.
Seasonal Maintenance Checklist
Spring (April-May):
- Inspect for winter damage—cracks, potholes, edge deterioration
- Clean surface thoroughly, removing sand, debris, and organic matter
- Fill cracks that developed over winter—fall crack repair is important, but spring touch-up is necessary too
- Apply sealcoat if 2+ years since last application and temperatures are consistently above 50°F
Summer (June-August):
- Monitor for any oil or gas spills and clean immediately
- Keep driveway free of heavy debris
- Watch for new crack formation in expansion areas
- This is prime sealcoating season—take advantage of optimal weather
Fall (September-October):
- Final sealcoating opportunity before cold weather
- Fill all cracks before winter to prevent freeze-thaw damage
- Clean leaves and organic debris promptly (they stain and retain moisture)
- Ensure proper drainage is in place before winter precipitation
Winter (November-March):
- Minimize use of rock salt (use sand or calcium chloride instead)
- Avoid sharp turning movements when frozen
- Promptly remove snow with plastic rather than metal shovels
- Monitor for pooling water and ice formation
Daily and Weekly Practices
The small things matter. I encourage homeowners to adopt these habits:
- Sweep regularly: Remove dirt, sand, and debris weekly. These act like sandpaper under tires, accelerating wear.
- Clean spills immediately: Oil, gas, antifreeze, and other petroleum products break down asphalt. Clean them immediately with absorbent materials and degreaser.
- Avoid sharp turns: When stationary or moving slowly, turning sharply creates shear stress that damages sealer and asphalt.
- Distribute weight: Don’t park in the exact same spot every day. Vary your parking position to distribute weight and wear evenly.
- Control vegetation: Keep grass, weeds, and plants from encroaching on edges. Roots create cracks and retain moisture.
Pro Tip: Create a “hotspot map” of your driveway. Note areas where you always turn, always park, or where water tends to collect. These high-stress zones need extra attention during inspections and may need more frequent crack filling or spot treatment. I’ve found that homeowners who monitor these hotspots catch problems early and save significant money on repairs.
Crack Monitoring and Filling
Don’t wait until your scheduled sealcoating to address cracks. I recommend inspecting your driveway quarterly and filling any cracks over 1/4″ immediately. Small cracks grow exponentially once water infiltrates, especially through freeze-thaw cycles.
Keep crack filler on hand—it’s inexpensive ($15-$25 per tube) and takes minutes to apply. A crack that costs $2 to fill today might cause $200 in damage if left untreated for a year. For comprehensive information on why cracks form, review what causes asphalt cracking.
Drainage Management
Water is asphalt’s worst enemy. Even with perfect asphalt driveway sealcoating, poor drainage will eventually destroy your pavement. I check drainage every spring and fall:
- Ensure proper slope (minimum 1-2% grade)
- Clear any blockages in drainage channels
- Verify water flows away from garage and foundation
- Fill low spots that collect standing water
- Consider adding drainage solutions if problems persist
Standing water doesn’t just damage asphalt—it breeds mosquitoes, creates ice hazards in winter, and looks unsightly. Address drainage issues as a priority.
Edge Protection
Driveway edges are vulnerable because they lack lateral support. I recommend these edge protection practices:
- Install edge restraints or borders (pavers, concrete, steel edging)
- Avoid driving over edges
- Fill edge cracks immediately
- Keep vegetation trimmed back
- Consider building up edges with additional asphalt if needed
I’ve seen driveways with perfect centers but crumbling edges. Edges need extra attention because they’re exposed on three sides instead of just the top.
Winter-Specific Care
Winter presents unique challenges for asphalt driveway sealcoating and maintenance:
- Deicing chemicals: Rock salt (sodium chloride) accelerates asphalt deterioration. Use sand, calcium chloride, or magnesium chloride instead. If you must use salt, apply sparingly and rinse it away when temperatures rise.
- Snow removal: Use plastic rather than metal shovels to avoid gouging the surface. Set snowblower skid plates high enough to avoid scraping. Never use sharp implements to chip ice.
- Plowing caution: If you hire snow removal services, instruct them to keep plow blades slightly raised to avoid scraping the surface.
Professional Inspections
Even if you’re diligent about maintenance, I recommend professional inspections every 3-5 years. A trained eye can spot developing problems before they become serious. Professional inspections typically cost $75-$150 and can save thousands in premature repairs or replacement.
We look for issues invisible to untrained eyes: subsurface drainage problems, base failure indicators, unusual wear patterns suggesting structural issues, and early signs of deterioration that can be addressed inexpensively now rather than expensively later.
Record Keeping
I encourage homeowners to maintain simple records:
- Dates of sealcoating applications
- Photos showing condition over time
- Dates and locations of crack repairs
- Notes about problem areas
- Weather events that caused damage
This documentation helps identify patterns, justify your maintenance to future buyers, establish a track record for insurance claims, and remind you when next maintenance is due.
Pro Tip: Take photos of your driveway from the same angles twice yearly—spring and fall. Store them in a dedicated folder on your phone or computer. Over time, you’ll have a visual timeline showing how your maintenance program is working. I’ve helped homeowners use these photos to identify subtle changes that indicate developing problems. Plus, if you sell your home, showing a documented maintenance history adds value and gives buyers confidence.
Cost-Saving Strategies for Asphalt Driveway Sealcoating
After 15+ years in this business, I’ve learned numerous ways to maximize value and minimize costs without sacrificing quality. Let me share strategies that have saved my clients thousands of dollars over the years.
Timing Your Project Strategically
Contractors typically have seasonal pricing variations. In my experience:
- Peak season (May-September): Highest demand, highest prices, longest wait times
- Shoulder season (April, October): Moderate pricing, shorter wait times, good weather still possible
- Off-season (November-March): Lowest prices, but weather restricts work in most climates
If you’re flexible, schedule your sealcoating for late April or early May, or September to early October. You’ll often save 10-20% compared to peak summer pricing, and contractors are more likely to give you their full attention.
Negotiate with Multiple Contractors
Get at least three written estimates. Don’t just compare bottom-line prices—compare what’s included:
- How many coats?
- What brand of sealer?
- Is crack filling included? How much?
- Is cleaning included?
- What warranty is offered?
Use these estimates to negotiate. If one contractor offers better pricing but another offers better terms or materials, ask if they’ll match. Many contractors would rather negotiate than lose a job, especially during slower periods.
Bundle Services
If you need multiple services—sealcoating, crack repair, patching—bundling often saves money. Contractors can mobilize once and complete all work together, reducing their costs and allowing them to offer you better pricing.
Additionally, if you have neighbors interested in sealcoating, approach contractors about doing multiple driveways in the same timeframe. I’ve offered 15-20% discounts when I can complete three or four driveways in the same neighborhood on the same day because my mobilization costs and travel time are spread across multiple jobs.
DIY Prep Work, Professional Application
As I mentioned earlier, consider handling all preparation work yourself—cleaning, basic crack filling, vegetation removal—then hiring professionals just for sealcoating application. This can save 20-30% of total costs while ensuring proper application where it matters most.
Just communicate clearly with your contractor about what you’ve done and what they’ll be responsible for. Get it in writing to avoid misunderstandings.
Invest in Preventive Maintenance
This might seem counterintuitive in a “cost-saving” section, but regular maintenance is the ultimate cost saver. Consider:
Reactive approach:
- Years 0-10: $0 spent on maintenance
- Year 12: $500 in crack repairs
- Year 15: $5,000 for resurfacing or replacement
- Total 15-year cost: $5,500
Proactive approach:
- Year 1: Wait period (new asphalt curing)
- Year 2: $350 for first sealcoat
- Year 5: $350 for second sealcoat
- Year 8: $400 for third sealcoat (includes crack filling)
- Year 11: $400 for fourth sealcoat
- Year 14: $400 for fifth sealcoat
- Total 15-year cost: $1,900
- Condition at year 15: Excellent (continues another 10-15 years)
The proactive approach costs $3,600 less over 15 years and leaves you with pavement in excellent condition that will last another 10-15 years. The reactive approach leaves you with newly replaced pavement that will need its own maintenance cycle.
Choose Quality Materials Once
Cheap sealer requires reapplication twice as often. Professional-grade sealer might cost 50% more per application but lasts twice as long. Over a 20-year period, using quality materials actually costs less.
I calculated this for a client recently:
- Cheap sealer: $200 per application, every 18 months, 13 applications over 20 years = $2,600
- Professional sealer: $350 per application, every 3 years, 6 applications over 20 years = $2,100
The professional sealer saved $500 and required seven fewer applications (less hassle, less driveway downtime, less work).
Use Technology and Resources
Take advantage of free resources:
- Use online calculators like the asphalt driveway cost calculator to estimate your project costs
- Research contractors online—read reviews, check complaints, verify licensing
- Watch YouTube videos to understand the process before hiring (you’ll spot low-quality work more easily)
- Join local homeowner forums to get contractor recommendations
Knowledge is money. The more you understand about asphalt driveway sealcoating, the better equipped you are to make cost-effective decisions and avoid expensive mistakes.
Frequently Asked Questions About Asphalt Driveway Sealcoating
Over the years, I’ve answered thousands of questions from homeowners. Let me address the most common ones I hear repeatedly.
Is it good to seal coat an asphalt driveway?
Absolutely, yes—it’s one of the best investments you can make in your property. I’ve compared sealed versus unsealed driveways over decades, and the difference is dramatic. Asphalt driveway sealcoating provides multiple critical benefits: it blocks 85-95% of UV radiation that causes oxidation and brittleness, creates a waterproof barrier preventing 98% of water infiltration (the leading cause of asphalt failure), resists damage from petroleum products like gas and oil, significantly slows the aging process and extends pavement life by 50-100%, and enhances curb appeal with that rich, black appearance.
The numbers don’t lie. Sealed driveways last 25-30 years on average, while unsealed driveways typically fail after 12-15 years. When you consider that asphalt replacement costs $3-$7 per square foot compared to sealcoating costs of $0.15-$0.25 per square foot, the return on investment is undeniable. I’ve seen unsealed driveways require full replacement at age 15, costing $5,000-$8,000, while sealed driveways at age 15 look nearly new and have years of life remaining—all for a total sealcoating investment of $1,500-$2,000 over those 15 years.
How often should an asphalt driveway be seal coated?
The ideal frequency depends on several factors, but my general recommendation for most residential driveways is every 2-3 years. However, let me break down the specific scenarios:
Climate considerations:
- Harsh climates with significant freeze-thaw cycles: Every 2 years
- Moderate climates: Every 2-3 years
- Mild climates with minimal temperature extremes: Every 3-4 years
Usage factors:
- High-traffic commercial or heavily-used driveways: Every 1-2 years
- Standard residential use: Every 2-3 years
- Low-traffic or occasional-use driveways: Every 3-4 years
Here’s my rule of thumb: when your asphalt starts looking gray or faded instead of black, or when water no longer beads on the surface but soaks in, it’s time to reseal. Don’t wait until you see significant cracking or deterioration—by then, sealcoating becomes less effective.
One critical timing note: never sealcoat brand-new asphalt! Wait 6-12 months after installation to allow proper curing. I’ve seen too many homeowners damage new asphalt by sealing too early.
What is the best sealer for an asphalt driveway?
There’s no single “best” sealer for every situation, but I can guide you through the options. The two main types are coal tar-based and asphalt emulsion-based sealers, each with distinct advantages.
Coal tar-based sealers:
- Pros: Superior durability, excellent resistance to petroleum products (gas, oil), longer-lasting protection (typically 3-4 years), deep black color that lasts, better performance in high-traffic areas
- Cons: More expensive (typically 10-20% more), banned in some regions due to environmental concerns, stronger odor during application, may track slightly more when fresh
Asphalt emulsion sealers:
- Pros: More environmentally friendly, lower cost, adequate protection for most residential applications, faster drying in some formulations, widely available
- Cons: Less durable (typically 2-3 years), more susceptible to petroleum damage, may fade faster, generally requires more frequent reapplication
For residential driveways with normal use, I typically recommend professional-grade asphalt emulsion sealers. They provide excellent protection at reasonable cost and are environmentally friendlier. For commercial applications or driveways with significant vehicle traffic, coal tar sealers offer better long-term value despite higher initial cost—provided they’re legal in your area.
Specific brands I’ve had success with include:
- Professional grade: Latex-ite Optimum, SealMaster, Tarconite, Gem Seal
- Premium residential: Liquid Road, Henry Company, Black Jack
Avoid the cheapest options from big-box stores. Look for sealers with 35-40% solids content and proper additives. If purchasing DIY, always add sand (3-5 pounds per gallon) for improved durability and traction.
Can I seal my asphalt driveway myself?
Yes, you absolutely can—many homeowners successfully seal their own driveways and save $200-$400 in labor costs. However, success requires proper preparation, quality materials, correct technique, appropriate weather conditions, and patience to follow all steps properly.
I support DIY sealcoating for small to medium-sized driveways (under 1,000 square feet) in good condition with minimal repairs needed. It’s a physically demanding but manageable weekend project for someone with basic home improvement skills.
Here’s what DIY requires:
- Time investment: 12-20 hours including prep, application, and cleanup
- Physical ability: Significant kneeling, bending, and repetitive motion
- Equipment: Pressure washer, squeegee applicator, brushes, mixing tools (most can be rented)
- Materials cost: $200-$400 for a typical driveway
- Learning curve: Your first attempt won’t look as good as a professional’s, but can still provide adequate protection
When to hire professionals instead:
- Large driveways (over 1,000 square feet)
- Extensive damage requiring significant repairs
- Poor drainage issues that need expert assessment
- Limited time or physical limitations
- Desire for professional appearance and warranty
If you choose DIY, invest time in learning proper technique. Watch professional videos, read comprehensive guides like my DIY sealcoating guide, and understand that surface preparation is 80% of success. Don’t rush—proper prep work and application technique make all the difference between a sealcoat that lasts 3-4 years versus one that fails in 12-18 months.
My honest recommendation? Watch a professional do your first sealcoating, then consider handling future maintenance coats yourself using what you learned. This gives you a properly established baseline and hands-on education.
How long does sealcoating last?
Professional-quality asphalt driveway sealcoating typically lasts 2-4 years depending on numerous factors. In my experience, here’s the realistic breakdown:
Optimal conditions (3-4 year lifespan):
- Professional-grade sealer properly applied
- Two full coats with adequate coverage
- Minimal traffic and gentle use
- Moderate climate without extreme weather
- Regular maintenance (cleaning, prompt spill cleanup)
Average conditions (2-3 year lifespan):
- Quality sealer with proper application
- Standard residential use and traffic
- Normal climate with seasonal variations
- Basic maintenance practices
Poor conditions (1-2 year lifespan):
- Low-quality or improperly applied sealer
- Single coat or thin coverage
- Heavy traffic or harsh use
- Extreme climate or poor drainage
- No maintenance between sealcoating
The variables that most impact longevity are sealer quality (professional-grade versus big-box store products), application technique (two proper coats versus one thin coat), climate and weather exposure, traffic level and usage patterns, and maintenance between applications.
I’ve seen professionally applied sealcoating last 4+ years on low-traffic driveways in mild climates with good maintenance. Conversely, I’ve seen DIY applications using cheap materials fail in under a year due to poor prep work, inadequate application, or harsh conditions.
Here’s how to maximize lifespan: use professional-grade sealer with 35-40% solids content, apply two full coats according to manufacturer specifications, seal during optimal weather conditions (60-85°F, low humidity, no rain), properly prepare the surface (cleaning, repairs, drying), add sand for durability (3-5 pounds per gallon), and maintain between applications (regular cleaning, prompt crack filling, proper drainage).
Does sealcoating fill cracks?
No, this is a common misconception. Sealcoating is a thin protective coating (typically 1/16″ or less when dry) designed to seal the surface and prevent water infiltration—it doesn’t fill cracks. Think of sealcoating like paint on your car: it protects the surface but doesn’t fill dents or scratches.
Cracks must be properly filled BEFORE sealcoating using dedicated crack filler products. Here’s my process:
- Clean cracks: Remove all debris, vegetation, and loose material
- Fill with appropriate product: Use rubberized crack filler for cracks 1/4″-1/2″ wide, hot pour rubberized asphalt for cracks 1/2″-1″ wide, and consider professional repair for cracks over 1″ or extensive cracking
- Allow curing: Let crack filler cure completely (typically 24-48 hours)
- Then sealcoat: Apply sealcoat over the entire surface, including filled cracks
The sealcoat will cover filled cracks and create a uniform appearance, but the crack filler does the actual structural repair. Attempting to use sealcoat as crack filler results in inadequate repair—water will still infiltrate, freeze-thaw damage will continue, and cracks will worsen rapidly.
I recommend addressing all cracks over 1/4″ before sealcoating. For guidance on crack types and repair strategies, review information about asphalt cracking causes.
What temperature is too cold for sealcoating?
Asphalt driveway sealcoating requires minimum temperatures of 50°F, with 60°F being much better for optimal curing. But here’s what many people don’t realize: it’s not just about the air temperature at application time—you need sustained temperatures above 50°F for 48 hours before AND after application.
Why temperature matters: Sealcoat is a water-based emulsion that cures through evaporation and chemical bonding. Cold temperatures slow this process dramatically or prevent it entirely. Below 50°F, the sealer may not properly bond, can remain soft indefinitely, might freeze before curing (ruining it completely), or could take weeks to cure instead of days.
My temperature guidelines:
- Ideal conditions: 60-85°F air temperature, surface temperature 55-90°F
- Acceptable conditions: 50-60°F air temperature (but expect longer cure times)
- Marginal conditions: 45-50°F (don’t do it—high risk of failure)
- Unacceptable conditions: Below 45°F (guaranteed failure)
Check your forecast for the entire week surrounding your project. If overnight lows will drop below 50°F or daytime highs won’t reach 60°F, postpone. I’ve seen homeowners seal in late October because they had a warm weekend, only to have temperatures plunge the following week. The sealer never properly cured and washed away with winter precipitation.
Pro Tip: Surface temperature matters as much as air temperature. A surface that’s been in shade all morning might still be below 50°F even if air temperature is 55°F. I use an infrared thermometer to check surface temperature before starting any sealcoating project—it’s a $20 tool that prevents expensive mistakes. Ensure the surface has been in direct sunlight for at least 2-3 hours and reads above 55°F before applying sealer.**
Conclusion: Protecting Your Asphalt Investment Through Proper Sealcoating
After 15+ years of working with thousands of driveways, I’ve reached one unwavering conclusion: asphalt driveway sealcoating is the single most cost-effective maintenance investment you can make in your pavement. The decision isn’t whether to sealcoat—it’s when to start and how to do it properly.
Let me summarize the key decision points. First, timing is critical—wait 6-12 months after new asphalt installation, then establish a regular 2-3 year sealcoating schedule based on your climate and usage. Second, preparation determines success—proper cleaning, thorough crack repair, and adequate drying time are non-negotiable. Third, quality matters more than price—using professional-grade materials and proper application technique provides exponentially better value than cheap shortcuts. Fourth, weather conditions must be right—temperatures above 50°F (ideally 60-85°F) for 48 hours before and after application. And fifth, consider professional services for your initial sealcoating to establish proper protection, then decide whether DIY maintenance makes sense for your situation.
The math is compelling: spending $300-$400 every 2-3 years on sealcoating can extend your asphalt’s life from 15 years to 30+ years, saving you $5,000-$10,000 in premature replacement costs. That’s a 10:1 or better return on investment—you simply won’t find a better deal anywhere in home maintenance.
Beyond the financial benefits, there’s something deeply satisfying about maintaining your property properly. I still get excited when I drive by driveways I sealed 3-4 years ago and see them looking nearly perfect—that deep black color, smooth surface, and obvious care. These homeowners understood that asphalt driveway sealcoating isn’t an expense; it’s an investment in their property value, curb appeal, and peace of mind.
Whether you choose to hire professionals or tackle the project yourself, the important thing is that you take action. Don’t be like my neighbor from the opening story—don’t let your beautiful asphalt investment deteriorate simply because you postponed maintenance. Start your sealcoating program this year, maintain it consistently, and your driveway will serve you faithfully for decades.
I’ve shared everything I know about protecting asphalt surfaces in this guide, but every driveway is unique. If you’re unsure about your specific situation—whether your pavement is too damaged for sealcoating, whether you need repairs first, or which products are best for your climate—I strongly encourage you to consult with a reputable local contractor for a professional assessment. A 30-minute consultation could save you thousands in costly mistakes.
Your asphalt is under attack every single day from UV radiation, water, chemicals, and traffic. Asphalt driveway sealcoating is your defense—use it wisely, use it regularly, and you’ll enjoy a beautiful, durable driveway that adds value to your property for decades to come. The question isn’t whether to protect your investment—it’s how soon you’ll start.
For additional resources on maintaining and protecting your asphalt investment, explore the comprehensive guides available at The Asphalt Advisor, where you’ll find detailed information on everything from basic repair techniques to comparing asphalt versus concrete options for your next project. Remember: an ounce of prevention truly is worth a pound of cure, and nowhere is that more true than with asphalt maintenance.