Patching an Asphalt Pothole: My Quick and Easy DIY Method
I was standing in a homeowner’s driveway last spring when she pointed to a network of cracks spreading across her asphalt like spiderwebs and asked me the question I hear almost daily: “Can this be fixed, or do I need to replace everything?” Her face showed genuine concern—not just about the appearance, but about the investment she’d made in her property. I knelt down, ran my hand along one of the deeper cracks, and smiled. “I’ve got good news,” I told her. “With the right pavement repair approach, we can extend this driveway’s life by another 10-15 years.” That conversation is exactly why I’m writing this guide. Over my 15 years specializing in asphalt maintenance, I’ve learned that most homeowners don’t realize how manageable pavement repair can be when you understand the process, timing, and options available. Whether you’re dealing with minor cracks or more significant damage, proper pavement repair isn’t just about aesthetics—it’s about protecting one of your property’s most substantial investments.
Key Takeaways: What You Need to Know About Pavement Repair
- Pavement repair costs range from $2-$5 per square foot for patching, $3-$7 for resurfacing, and $8-$15 for full replacement
- Crack filling should be performed when cracks reach 1/4 inch wide to prevent water infiltration and base deterioration
- The ideal temperature for pavement repair is between 50°F and 85°F, with repairs lasting 5-15 years depending on method
- Addressing pavement damage within the first 2-3 years can prevent repair costs from escalating by 400-500%
- Professional pavement repair typically takes 1-3 days for residential driveways, with 24-48 hours cure time before vehicle traffic
- Annual inspections can catch 80% of pavement issues before they require major intervention
- Proper base preparation accounts for 70% of pavement repair longevity—never skip this step
- Sealcoating after pavement repair extends the fix by 3-5 years and should be done 90 days post-repair
- Winter freeze-thaw cycles cause the most pavement damage, making fall repairs critical in northern climates
- DIY pavement repair saves 40-60% on labor but requires proper equipment and realistic assessment of damage severity
Understanding Pavement Repair: Definition and Why It’s Important
I’ve worked on over 2,000 driveways throughout my career, and I can tell you that pavement repair is far more nuanced than most property owners realize. At its core, pavement repair encompasses any restoration work performed on asphalt or concrete surfaces to address deterioration, damage, or structural compromise. This includes everything from filling small cracks to complete section replacement.
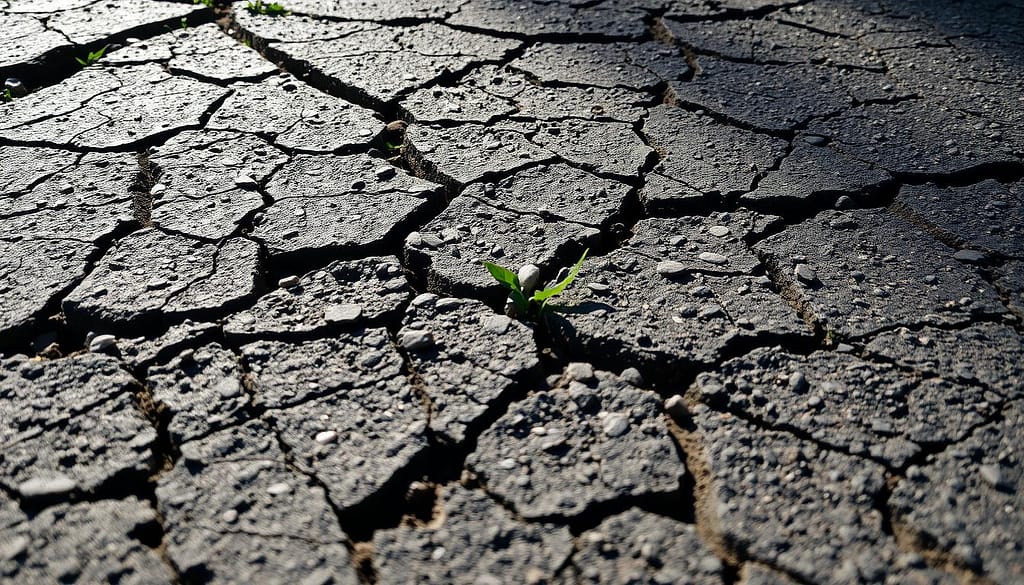
In my experience, the biggest misconception homeowners have is thinking pavement repair is purely cosmetic. Nothing could be further from the truth. When I examine damaged pavement, I’m looking at a surface that’s actively deteriorating. Every crack, pothole, or depression is a doorway for water to penetrate the base layers beneath your pavement. Once water infiltrates, the damage accelerates exponentially—especially during freeze-thaw cycles where trapped moisture expands and contracts.
Think of pavement repair like going to the dentist for a cavity. If you catch it early with a simple filling, you’re looking at minimal time and expense. Ignore it, and you’re facing a root canal or extraction. The same principle applies to your driveway or parking lot. I’ve seen $300 crack filling jobs turn into $8,000 replacement projects simply because the homeowner waited too long.
The structural importance of timely pavement repair cannot be overstated. Your pavement system consists of three critical layers: the surface course (what you drive on), the binder course (the structural middle layer), and the base (compacted aggregate foundation). When surface damage goes unaddressed, water reaches the base, causing it to shift, settle, and eventually fail. At that point, you’re not just repairing pavement—you’re rebuilding the entire structure.
Understanding what causes asphalt cracking is crucial because prevention is always cheaper than cure. UV radiation, petroleum products, heavy loads, and water infiltration all contribute to pavement degradation. The good news? With proper pavement repair techniques and regular maintenance, you can address these issues before they become catastrophic.
Pro Tip: Schedule your annual pavement inspection in early spring, right after the last frost. This timing allows you to identify any winter damage before warm weather accelerates deterioration. I mark my calendar for mid-April every year—it’s become second nature.
Step-by-Step Pavement Repair Assessment Guide

Before I even touch a piece of equipment, I spend 20-30 minutes thoroughly assessing the pavement condition. This evaluation phase is critical because it determines everything from the repair method to the budget. Let me walk you through my exact assessment process.
First, I conduct a visual walk-through of the entire surface. I’m looking for six key distress patterns: alligator cracking (interconnected cracks forming a pattern like reptile skin), longitudinal cracking (running parallel to the direction of traffic), transverse cracking (perpendicular cracks), depression areas, edge deterioration, and potholes. Each pattern tells me something specific about what’s failing beneath the surface.
Next, I perform what I call the “screwdriver test.” I carry a long screwdriver and probe suspect areas, especially around cracks and edges. If the screwdriver penetrates more than an inch with minimal resistance, I know the base has been compromised. This single test has saved my clients thousands by identifying areas that need full-depth repair rather than surface treatment.
I also evaluate drainage patterns. Standing water is pavement’s worst enemy, so I look for puddles, staining patterns that indicate water flow, and areas where the crown (the slight peak in the middle of the pavement) has flattened. Poor drainage often means I’ll need to address grading issues alongside the pavement repair work itself.
Measuring crack widths is another critical step. I use a crack width gauge (you can buy one for about $15), though a standard ruler works fine. Cracks under 1/4 inch typically qualify for crack filling. Between 1/4 and 1/2 inch, I consider routing and sealing. Anything wider than 1/2 inch usually requires more aggressive pavement repair methods like patching or milling and resurfacing.
For property managers or commercial applications, I document everything with photos and create a sketch map showing distress locations. This becomes invaluable for tracking deterioration over time and justifying budget requests. Even for residential work, I recommend homeowners take annual photos from the same positions—it’s amazing what comparison reveals.
Pro Tip: Perform your assessment on a dry day at least 48 hours after rain. Wet pavement hides problems, and you’ll miss critical indicators like fine cracking or surface texture loss. I’ve learned this the hard way when a “simple” job turned into a complex repair because I missed water-hidden damage.
The final assessment component involves determining the pavement’s age and history. I ask homeowners about previous repairs, sealcoating schedules, and unusual events (like heavy equipment crossing the driveway). An asphalt overlay from five years ago behaves differently than original pavement from fifteen years ago, and my repair approach adjusts accordingly.
Pavement Repair vs. Replacement: Key Differences
This is the conversation I have with nearly every client, and I understand why—the decision between repair and replacement carries significant financial and practical implications. Let me break down exactly how I evaluate this critical choice.
Pavement repair focuses on addressing specific problem areas while preserving the remaining serviceable pavement. It’s targeted intervention. Replacement, by contrast, means removing and rebuilding the entire pavement system—surface, binder, and often the base layer. The cost difference is substantial: repairs typically run $2-$7 per square foot, while replacement averages $8-$15 per square foot.
In my experience, pavement repair makes sense when damage affects less than 30% of the total surface area and the remaining pavement shows good structural integrity. I use what I call the “70/30 rule”—if 70% or more of your pavement is in good condition, repair is almost always the smarter investment. However, this assumes the base layer remains intact.
I recently worked with a homeowner who had severe alligator cracking covering about 25% of his driveway. The rest looked decent—some minor surface cracks but structurally sound. We removed the damaged sections, recompacted the base, and installed new asphalt patches. Total cost: $1,800. Full replacement would have been $6,500. Three years later, those repairs still look perfect.
Conversely, replacement becomes necessary when you’re dealing with widespread structural failure. If I probe multiple areas and find soft, compromised base material, or if alligator cracking covers more than 30-40% of the surface, continuing to repair is like putting bandages on a sinking ship. You’ll spend money repeatedly without addressing the underlying problem.
Age is another crucial factor. Asphalt pavement has a realistic lifespan of 15-20 years with proper maintenance, extending to 25-30 years in ideal conditions. If your pavement is approaching or exceeding 20 years and showing significant distress, replacement often makes more economic sense than extensive pavement repair. You’re essentially trying to extend something that’s reached the end of its service life.
I also consider the pavement’s remaining service life expectancy. If repairs can extend functionality by 5-10 years, that’s usually worthwhile. But if you’re looking at needing replacement in 2-3 years anyway, investing heavily in repairs becomes questionable. This is where honest professional guidance matters—I’ve talked clients out of expensive repairs when I knew replacement was imminent.
Pro Tip: Get multiple opinions if you’re borderline between repair and replacement. I’ve seen contractors push for full replacement when strategic repairs would suffice, and I’ve also seen desperate homeowners spend thousands on repairs when replacement was inevitable. A reputable contractor will explain the math and let you make an informed decision.
For those considering resurfacing as a middle option, check out my comprehensive guide on asphalt overlay, which offers an excellent compromise when the base is sound but the surface is extensively deteriorated.
Factors to Consider for Your Pavement Repair Project
Over the years, I’ve identified eight critical factors that determine pavement repair success or failure. Understanding these before starting your project can mean the difference between a repair that lasts 15 years and one that fails within 18 months.
Climate and Seasonal Timing
I cannot stress this enough: temperature matters tremendously for pavement repair. Asphalt needs ambient temperatures above 50°F for proper adhesion and compaction. I’ve seen well-meaning DIYers attempt repairs in 40°F weather, only to have the patch fail before winter ends. My personal rule is to schedule pavement repair when daytime temperatures will remain above 50°F for at least 72 hours post-repair.
Spring and fall are typically ideal, though summer works if you avoid extreme heat above 95°F. In northern climates, I’m usually booking pavement repair projects from late April through October. Southern regions have more flexibility, but mid-summer heat can make working with asphalt challenging—it becomes too fluid and hard to compact properly.
Traffic Load and Usage Patterns
A residential driveway carrying two sedans daily has vastly different requirements than a commercial parking lot supporting delivery trucks. I adjust my pavement repair specifications accordingly. For high-traffic areas, I increase asphalt thickness, use higher-grade binders, and pay extra attention to edge support.
I recently repaired a section of driveway where the homeowner regularly parked his work truck—a fully loaded F-350. Standard 2-inch patch thickness wouldn’t cut it. We went with 3.5 inches and extended the repair area by 6 inches in all directions beyond the visible damage. That extra material and labor cost $200 more but will prevent edge failure for years.
Drainage Considerations
Poor drainage destroys more pavement repair work than any other single factor. Before patching anything, I evaluate whether water is causing or contributing to the damage. Standing water, improper slope, or concentrated flow patterns must be addressed, or your repair will fail regardless of material quality.
I’ve learned to incorporate drainage solutions into pavement repair projects. This might mean adding small drainage channels, adjusting grades, or installing edge drains. For homeowners dealing with persistent water issues, my guide to preventing driveway water damage provides detailed solutions that complement repair work.
Base Condition and Preparation
I’ll say this plainly: you cannot successfully repair pavement on a failed base. Period. If the underlying aggregate is soft, shifting, or contaminated with soil, any surface repair is temporary at best. This is why my assessment includes probing and, when necessary, removing small sections to visually inspect the base.
Proper base preparation for pavement repair involves removing all loose material, ensuring proper compaction (95% modified Proctor density minimum), and confirming adequate thickness (usually 4-6 inches for residential applications). Skipping these steps to save time or money guarantees premature failure.
Material Selection and Quality
Not all asphalt is created equal. For pavement repair, I typically use hot-mix asphalt rather than cold-patch products for any repair larger than a dinner plate. Cold-patch has its place for temporary winter fixes, but it’s not a permanent solution. The material quality directly impacts longevity—using premium materials adds perhaps 15-20% to project cost but can double the repair lifespan.
Pro Tip: Ask your contractor specifically about the binder grade they’re using. For pavement repair, I prefer PG 64-22 in moderate climates or PG 58-28 in northern regions. These performance-graded asphalts handle temperature extremes better than standard grades. If a contractor can’t answer this question, consider that a red flag.
Edge Support and Transition Management
Pavement repair edges are failure points waiting to happen without proper support. I always cut back to solid pavement, creating clean vertical edges rather than feathering. Then I ensure the new material ties into existing pavement at the same thickness, providing full structural support across the joint.
For repairs adjacent to soil or grass, I often recommend installing edge restraint—either concrete curbing or compacted aggregate shoulders. This prevents the repair edge from breaking down under lateral pressure from traffic turning or parking.
Budget and Long-Term Value
I help clients think beyond immediate costs to long-term value. A $1,500 pavement repair that lasts 12-15 years represents better value than three $600 temporary fixes over the same period. I present options at different price points, explaining the longevity and performance expectations for each.
For those planning their budget, my asphalt driveway cost guide provides comprehensive pricing information that helps set realistic expectations for both repair and replacement scenarios.
The Process of Professional Pavement Repair

Let me walk you through exactly how I approach a pavement repair project from start to finish. This process has been refined over thousands of jobs, and following these steps consistently delivers repairs that last.
Initial Site Preparation and Safety Setup
Every pavement repair project begins with proper site preparation. I establish a work zone using cones or caution tape, ensuring we have clear access and keeping people and pets at a safe distance. For driveways, I coordinate with homeowners about vehicle access—they’ll need alternative parking for 24-48 hours minimum.
I also verify underground utilities before any cutting or excavation. Even shallow repairs can encounter irrigation lines, electrical conduits, or communication cables. One quick call to your local utility location service (811 in the US) prevents expensive mistakes and potential injuries.
Marking and Cutting Repair Boundaries
I mark the repair area using chalk or marking paint, typically extending 6-12 inches beyond the visible damage. This ensures we’re cutting back to structurally sound pavement. Then I use a pavement saw with a diamond blade to cut clean, straight edges. These vertical cuts are crucial—they create a defined repair boundary and prevent the existing pavement from cracking further.
The cutting depth matches the planned repair thickness, usually 2-3 inches for residential applications. I make sure to use water cooling during cutting to minimize dust and prevent blade overheating. This step takes time but is absolutely worth it for the quality of the final repair.
Removing Damaged Material and Excavation
Using a jackhammer or pavement breaker, I remove all damaged asphalt within the cut boundaries. This is physically demanding work, and it’s important to remove every piece—any remaining loose material compromises the repair. I excavate down to solid base, checking the aggregate condition as I go.
If the base shows any sign of deterioration (soft spots, contamination with soil, inadequate compaction), I excavate deeper and plan for base repair. This might add to the project scope, but it’s non-negotiable for a lasting repair. I’ve never regretted digging deeper when needed, but I’ve certainly regretted not doing so.
Pro Tip: During excavation, save some of the removed asphalt for thickness verification. I measure several pieces to confirm the existing pavement depth, which helps ensure my repair matches properly. This simple step prevents thickness mismatches that create bumps or depressions.
Base Inspection, Repair, and Compaction
This is where pavement repair becomes as much art as science. I thoroughly inspect the exposed base material, looking for proper aggregate type (crushed stone is ideal), adequate thickness, and signs of contamination. If I find issues, I remove compromised material and replace it with clean, crushed aggregate base course.
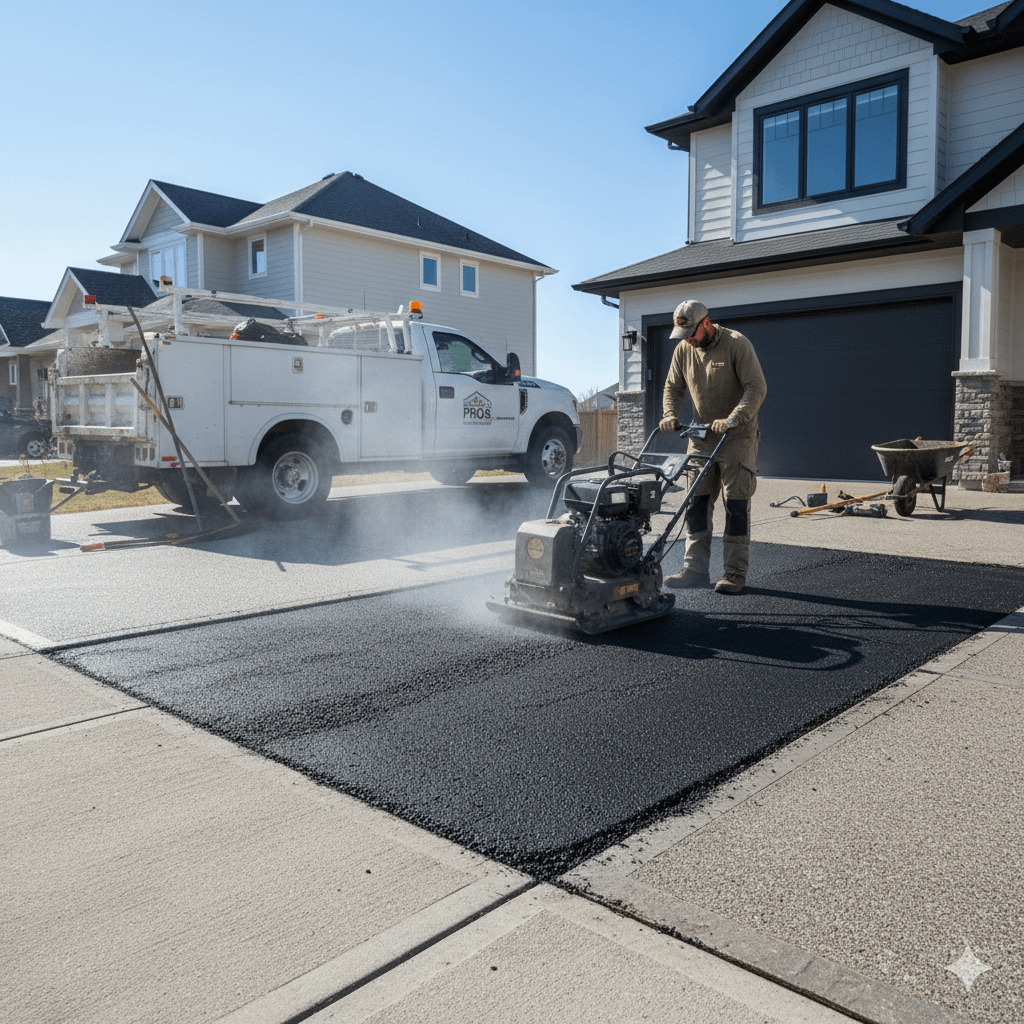
Compaction is absolutely critical. I use a plate compactor for most residential repairs, making multiple passes until the base is rock-solid. I’m looking for zero movement when I walk on it. For larger repairs or commercial work, I bring in a vibratory roller. The base should be level and about 2-4 inches below the surrounding pavement surface, depending on repair thickness.
If drainage contributed to the original failure, I address it now—adding aggregate, adjusting slopes, or installing drainage features. This is your opportunity to fix underlying problems, not just symptoms.
Tack Coat Application
Before placing new asphalt, I apply tack coat (an asphalt emulsion adhesive) to all vertical edges and the base surface. This ensures the new material bonds properly to existing pavement. I use a spray wand or brush to apply a thin, uniform coat, then allow it to “break” (turn from brown to black) before placing asphalt—usually 15-30 minutes depending on temperature.
Many DIYers skip this step, which is a mistake. Tack coat is inexpensive and dramatically improves bond strength. Without it, the repair can delaminate from the existing pavement, creating a weak point that fails prematurely.
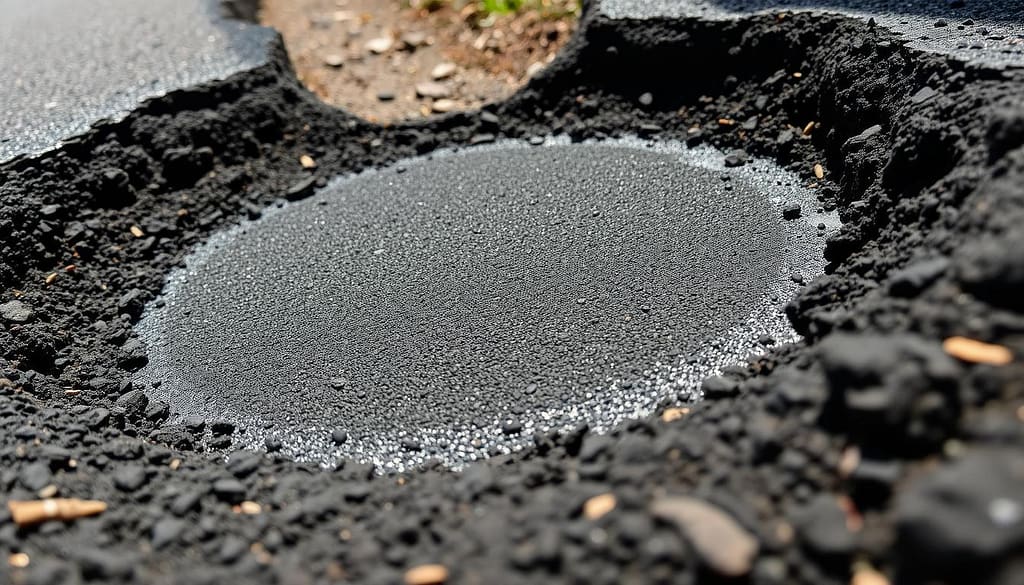
Hot-Mix Asphalt Placement
I only use hot-mix asphalt for permanent pavement repair. The material arrives from the plant at 275-325°F, so timing is important. I place it quickly, raking to distribute material evenly across the repair area. The asphalt should slightly overfill the repair—it will compact down to the final elevation.
For larger repairs, I place asphalt in lifts (layers), compacting each before adding the next. Maximum lift thickness is typically 3 inches. For a 4-inch repair, I’d place and compact 2 inches, then add and compact another 2 inches. This ensures thorough compaction throughout the repair depth.
Compaction and Finishing
Proper compaction makes or breaks pavement repair. I start around the edges using a hand tamper, then use a plate compactor or vibratory roller for the main area. I make multiple passes, checking the surface elevation against surrounding pavement. The goal is a smooth transition with no lip or depression.
I continue compacting until the surface shows no movement and reaches proper density. Under-compaction leads to premature rutting and failure. Over-compaction in hot weather can push asphalt around, creating waves. It’s a balance that comes with experience.
For the final finish, I sometimes use a steel roller or even a vibratory plate covered with water for the smoothest possible surface. The repair should be level with surrounding pavement—you shouldn’t feel a bump driving over it.
Pro Tip: If you’re doing DIY pavement repair and don’t have access to a plate compactor, you can compact small patches (under 10 square feet) using your vehicle. Cover the repair with 3/4-inch plywood to distribute weight, then slowly drive back and forth several times. It’s not ideal, but it works in a pinch.
Curing and Traffic Management
Newly placed asphalt can support weight almost immediately, but it takes time to fully cure and achieve maximum strength. I recommend keeping vehicle traffic off repairs for at least 24 hours, preferably 48 hours. Foot traffic is fine after 4-6 hours once the surface cools.
In hot weather (above 85°F), I extend the waiting period because asphalt remains workable longer. In cooler weather (50-65°F), it firms up faster. I always provide specific recommendations based on temperature and forecast conditions.
For commercial applications or high-traffic areas, I sometimes use additives that accelerate curing, allowing traffic return in as little as 2-4 hours. These add cost but minimize disruption—worth considering for busy locations.
Final Inspection and Sealcoating Plans
After the repair cures, I conduct a final inspection, checking surface smoothness, edge transitions, and overall appearance. Any minor imperfections can be addressed with a light surface coat or additional compaction while the asphalt remains somewhat workable (within the first week).
I advise homeowners to wait 90 days before sealcoating over new pavement repair. This allows the asphalt to fully cure and any petroleum oils to evaporate. Sealcoating too soon can trap these oils and prevent proper curing. When the time comes, applying sealcoat protects both the repair and the surrounding pavement, extending overall service life by years.
For more detailed repair techniques specific to different damage types, my asphalt driveway repair guide provides additional insights that complement this process overview.
Cost Analysis: What to Expect for Pavement Repair
Let’s talk numbers, because pavement repair costs are all over the map, and I want you to understand what drives pricing so you can budget accurately and evaluate quotes fairly.
The most basic pavement repair—crack filling—typically runs $1-$3 per linear foot for cracks 1/4 to 1/2 inch wide. So if you have 100 feet of cracks, expect $100-$300. I know that sounds simple, but many contractors have minimum charges ($200-$350) because mobilization costs are real regardless of project size.
Patching costs vary significantly by method and size. Small potholes (under 2 square feet) often cost $100-$250 each including materials and labor. Medium patches (10-25 square feet) run $3-$6 per square foot. Larger section replacement (100+ square feet) drops to $2-$4 per square foot because economies of scale kick in. I just completed a 300-square-foot section replacement for $2.85 per square foot, whereas a 15-square-foot patch on the same property cost $5.20 per square foot.
Here’s a breakdown of typical pavement repair costs I see in my market:
| Repair Type | Cost Range | Longevity | Best For |
|---|---|---|---|
| Crack Filling | $1-$3 per linear foot | 2-5 years | Cracks under 1/2 inch |
| Pothole Patching | $100-$250 per hole | 3-7 years | Isolated damage |
| Section Replacement | $3-$7 per sq ft | 10-15 years | Localized failure areas |
| Milling & Resurfacing | $4-$8 per sq ft | 12-18 years | Widespread surface damage |
| Full Depth Reclamation | $6-$10 per sq ft | 15-20 years | Severe structural issues |
Several factors push costs higher. If base repair is needed, add $2-$4 per square foot for excavation, new aggregate, and compaction. Difficult access—like backyards without gate access for equipment—can increase labor costs by 25-40%. Rush timing or premium materials add 15-30% to standard pricing.
Geographic location matters tremendously. I work in a mid-sized market where costs are moderate. In major metro areas, expect 30-50% higher pricing. Rural areas might be 10-20% lower, though availability of contractors can be limited.
Let me share a real project example: Last month, I quoted a residential driveway with three distinct issues. First, a 40-square-foot section near the garage had alligator cracking with base failure. Second, there were about 75 linear feet of cracks scattered throughout. Third, two depressions were holding water. Here’s how I priced it:
- Section replacement (40 sq ft with base repair): $320
- Crack filling (75 linear feet): $180
- Depression repairs (grinding and filling): $250
- Mobilization and misc materials: $150
- Total: $900
The homeowner initially thought this seemed high, but I explained that addressing everything now prevents those cracks from becoming failed sections requiring $2,000+ in additional work within three years. He understood the preventive value and approved the work.
Pro Tip: Ask contractors for itemized quotes breaking down materials, labor, and each repair type. This transparency helps you compare quotes accurately and understand where your money goes. Beware of contractors who only provide a single lump-sum number—it makes comparison shopping nearly impossible.
For large-scale pavement repair involving milling and resurfacing, costs increase substantially but so does the coverage area and longevity. A typical 1,000-square-foot residential driveway overlay runs $4,000-$6,000, which seems expensive until you consider it’s refreshing the entire surface and typically includes some base repair where needed.
Don’t forget ancillary costs. If your pavement repair requires temporary traffic control for commercial properties, add $200-$500. Disposal fees for removed asphalt run $20-$40 per ton. Sealcoating after repair (which I strongly recommend) adds $0.15-$0.30 per square foot.
Seasonal pricing variations exist too. I’m busiest in late spring and early fall, so my quotes during peak season might be 10-15% higher than winter booking for spring work. Scheduling flexibility can save money—if you’re not in a rush, book during slower periods for better rates.
For comprehensive budgeting that covers not just repair but overall driveway investment, check my detailed asphalt driveway cost guide, which provides context for understanding where pavement repair fits in the total ownership picture.
Professional vs DIY Pavement Repair: Making the Right Choice

This is probably the most common question I field: “Can I do this myself?” My answer is always the same—it depends on the scope, your skill level, and your expectations for quality and longevity. Let me break down both approaches honestly.
When DIY Pavement Repair Makes Sense
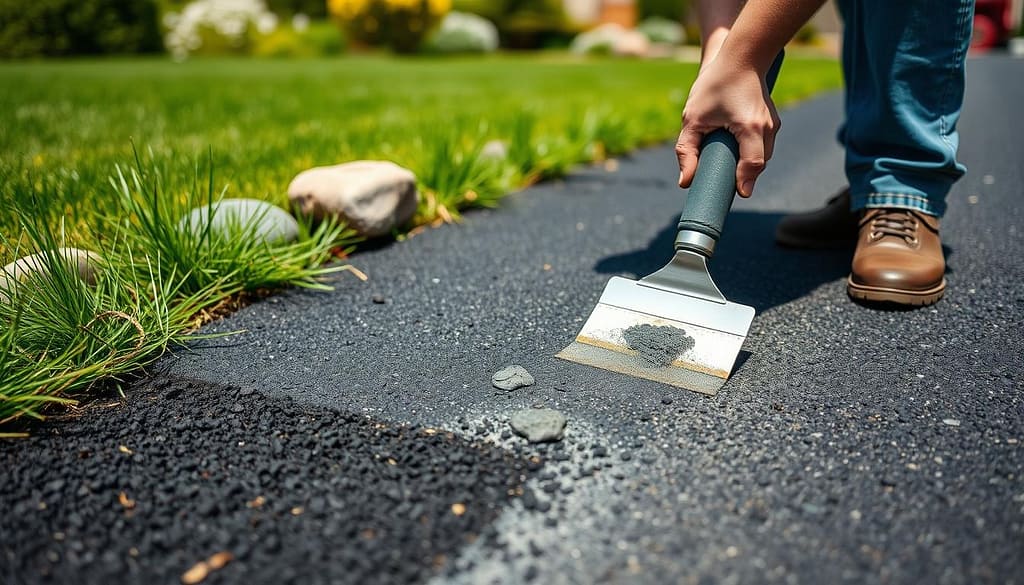
I support DIY work for smaller, straightforward repairs. Crack filling is absolutely doable for most homeowners. You’ll need a crack filler product ($25-$50), a pour pot or caulking gun ($15-$30), and some time. The technique is straightforward: clean the crack thoroughly, apply filler, and smooth with a squeegee. I’ve created guides on asphalt pothole patching that walk through the DIY approach step by step.
Small pothole repairs (under 1 square foot) are also reasonable DIY projects using cold-patch asphalt. You won’t get the same longevity as hot-mix, but for low-traffic residential areas, cold-patch can last 2-4 years if properly compacted. I’ve seen homeowners successfully tackle these repairs and feel genuinely proud of their work.
The cost savings for DIY pavement repair are real—typically 40-60% compared to hiring a pro, assuming you have or can borrow necessary tools. For crack filling that a contractor would charge $250, you might spend $100-$120 doing it yourself. That’s meaningful savings if you have the time and inclination.
When Professional Pavement Repair Is Worth It
Anything involving cutting pavement, base work, or hot-mix asphalt placement really benefits from professional expertise and equipment. The specialized tools alone—pavement saw ($800-$2,000 to buy or $100-$150/day to rent), plate compactor ($100/day rental), and the knowledge to properly use them—quickly erode DIY cost advantages.
I’ve seen too many well-intentioned DIY pavement repairs fail within a year because of improper compaction, incorrect asphalt placement temperature, or missed base issues. One homeowner spent $400 on materials for a 50-square-foot patch, only to have it fail after one winter. I ended up removing his work and doing it correctly for $650—so he ultimately spent $1,050 plus his time and frustration when the original professional quote was $700.
Professionals also carry insurance. If I accidentally damage your water line during excavation, my insurance covers repairs. If you damage it, you’re paying out of pocket. For projects involving equipment that could cause property damage, this protection has real value.
The Equipment Factor
Let me be blunt about equipment requirements for quality pavement repair. You absolutely need:
- Pavement saw with diamond blade (for anything beyond crack filling)
- Jackhammer or breaker (for removing damaged asphalt)
- Plate compactor (for base and asphalt compaction)
- Hot-mix asphalt (which requires pickup within 1-2 hours of production)
- Proper safety equipment (hearing protection, safety glasses, steel-toed boots)
Renting this equipment for a day costs $250-$400. If your project spans multiple days (likely for anything substantial), rental costs multiply. Plus, there’s a learning curve for each tool. I’ve been using pavement saws for 15 years and still approach them with respect—they’re powerful, potentially dangerous tools.
Pro Tip: If you’re determined to DIY, consider a hybrid approach. Hire a professional for the cutting, excavation, and base work—the critical structural components—then handle the finishing and future maintenance yourself. This splits the cost difference while ensuring the foundation of your pavement repair is sound.
Quality and Longevity Expectations
Professional pavement repairs I complete typically last 10-15 years with proper maintenance. DIY repairs using cold-patch and without professional equipment usually last 2-4 years. That’s not a criticism of DIY efforts—it’s simply the reality of material and technique differences. Hot-mix asphalt properly compacted outperforms cold-patch significantly.
If you’re planning to sell your home within 2-3 years, DIY pavement repair might make perfect sense. If you’re planning to live there long-term, professional work offers better value over time despite higher upfront cost.
Skills Assessment
Be honest about your abilities. Can you operate heavy equipment safely? Do you understand soil compaction and drainage principles? Are you comfortable working with 300°F materials? If you’re answering “no” or “I’m not sure,” professional pavement repair is probably the better choice.
I’ve worked with plenty of handy homeowners who have the skills and successfully complete DIY pavement repair. I’ve also seen people underestimate the complexity and end up frustrated or injured. There’s no shame in recognizing when a project exceeds your current skill level—it’s actually wise risk management.
For those interested in learning more about professional equipment and techniques, my guide on choosing sealcoat application equipment provides insights into the professional approach that might inform your DIY vs. professional decision.
Common Mistakes to Avoid in Pavement Repair
I’ve witnessed—and occasionally made—every pavement repair mistake imaginable. Let me save you from the most common and costly errors I see repeatedly.
Mistake #1: Addressing Symptoms Rather Than Root Causes
The number one mistake is fixing surface damage without understanding what caused it. I see this constantly: homeowners patch a pothole that formed because of water infiltration, but they don’t address the drainage issue. Six months later, another pothole appears right next to the repair. You’ve spent money twice on the same problem.
Before any pavement repair, I investigate the underlying cause. Is water pooling there? Is the base compromised? Has a utility trench settled? Addressing the root cause alongside surface damage prevents repeated failures and wasted money.
Mistake #2: Using Cold-Patch as a Permanent Solution
Cold-patch asphalt has its place—temporary winter repairs or emergency fixes. But I cringe when I see homeowners using it for permanent pavement repair. Cold-patch simply doesn’t bond or compact like hot-mix asphalt. It will work its way loose, creating edges that catch snowplow blades and deteriorate rapidly.
If you must use cold-patch temporarily, commit to replacing it with proper hot-mix asphalt when weather permits. I’ve seen DIY cold-patch repairs become permanent by default, then fail within 18-24 months, requiring complete redo work.
Mistake #3: Feathering or Tapering Repair Edges
Some contractors try to blend pavement repairs by feathering the edges—gradually thinning the new asphalt to match the existing surface. This creates weak, unsupported edges that break down immediately under traffic. I always cut vertical edges and maintain full-thickness asphalt to the boundary. Yes, you might feel a slight edge transition, but the repair will last years longer than a feathered edge.
Mistake #4: Ignoring Temperature Requirements
I cannot count how many failed pavement repairs I’ve seen because someone tried to work in cold weather. Asphalt needs heat to properly bond and compact. Attempting repairs when ambient temperatures are below 50°F—or when surfaces are wet or frozen—guarantees failure.
Similarly, working in extreme heat (above 95°F) causes problems. The asphalt becomes too fluid, making proper compaction difficult and causing material to stick to everything. I schedule pavement repair during moderate temperature windows and refuse to compromise on this requirement, even if it means rescheduling a project.
Mistake #5: Skipping Proper Compaction
Under-compacted asphalt is like a sponge—it will absorb water, rut under traffic, and deteriorate rapidly. I’ve seen countless DIY pavement repairs fail because homeowners didn’t have access to a plate compactor and tried to compact by hand or with inadequate equipment.
There’s no shortcut here. Proper compaction requires the right equipment and multiple passes. If you’re not willing to rent a compactor or hire someone with proper equipment, you’re setting yourself up for failure. This is one area where cutting corners absolutely guarantees poor results.
Mistake #6: Neglecting Edge Support
Pavement repair edges are vulnerable to breakage, especially along driveways where vehicles turn or park. I always ensure repair edges are either tied into existing solid pavement or supported by properly compacted aggregate shoulders. Repairs that extend to unsupported edges along grass or loose soil will crack and crumble within months.
For repairs adjacent to lawns, I extend the excavation 4-6 inches beyond the pavement edge, fill with compacted stone, and create a solid shoulder. This costs an extra $50-$100 but prevents edge failure that would compromise the entire repair.
Mistake #7: Delaying Repairs Until Damage Spreads
The economics of pavement repair strongly favor early intervention. A $150 crack filling job this year prevents a $1,200 pothole repair next year. I’ve watched homeowners delay addressing visible damage, thinking they’re saving money, only to face exponentially higher costs later.
According to Federal Highway Administration research, pavement deterioration follows an exponential curve. The first 75% of a pavement’s life shows minimal surface distress, but the final 25% sees rapid acceleration in damage. Once you enter that final phase, costs escalate dramatically. Early pavement repair keeps you in the slow-deterioration phase.
Pro Tip: Create a simple “pavement journal” with dated photos taken from the same spots each spring and fall. This visual timeline helps you spot accelerating deterioration and make informed decisions about when repairs are truly necessary versus when they can wait another season.
Mistake #8: Mixing Incompatible Repair Materials
Not all pavement repair products work well together. I’ve seen homeowners apply crack sealant over previous repairs, only to have the new material not adhere because the old repair used an incompatible product. Rubberized crack fillers, for example, don’t bond to certain petroleum-based products.
Before applying any pavement repair material over previous work, I verify compatibility. When in doubt, I remove the old material and start fresh. It’s extra work upfront but prevents the frustration of watching new repairs fail because they couldn’t bond to underlying materials.
Mistake #9: Over-Relying on Sealcoating as a Repair Solution
Sealcoating is an excellent protective maintenance treatment, but it’s not structural pavement repair. I frequently encounter homeowners who think applying sealcoat will fix underlying problems. It won’t.
Sealcoat fills very fine surface cracks (hairline only) and provides UV and chemical protection, but it does nothing for structural damage. Applying sealcoat over damaged pavement without proper repairs is cosmetic at best—like painting over rotted wood. Address structural issues first, then use sealcoating as a protective layer.
Mistake #10: Failing to Plan for Drainage
Water causes 90% of pavement failures I encounter. Yet drainage is the most commonly overlooked aspect of pavement repair planning. I always evaluate whether water contributed to the damage I’m repairing and address it as part of the project.
This might mean adjusting grades, adding drainage channels, installing edge drains, or even extending the repair area to eliminate depressions where water collects. My comprehensive guide on preventing driveway water damage covers drainage solutions that should be integrated into any pavement repair project where water is a factor.
Maintenance Tips and Best Practices After Pavement Repair
Successful pavement repair doesn’t end when the compactor stops. The maintenance you perform afterward determines whether your repair lasts 5 years or 15. Let me share the specific practices I recommend to every client.
Immediate Post-Repair Care (First 90 Days)
The curing period is critical. For the first 24-48 hours, keep all traffic off the repair. After that, you can resume normal use, but I recommend avoiding heavy vehicles or equipment for at least a week. The asphalt continues to cure and harden for 90 days, gaining strength throughout this period.
Avoid sharp turns or standing starts on new pavement repair during the first month. The surface remains slightly more pliable than fully cured asphalt, and aggressive driving maneuvers can cause surface marks or minor deformation. Power steering turns while stationary are particularly problematic—they can leave marks that become permanent.
I also advise against parking in the exact same spot every day during the first month. Vary your parking position to distribute weight across the repair area rather than concentrating it in one spot. This allows more even curing and prevents premature rutting in high-load areas.
Sealcoating Strategy
Wait a minimum of 90 days after pavement repair before applying sealcoat. I prefer waiting 6 months if possible, allowing the asphalt to fully cure and any petroleum oils to evaporate. Sealcoating too early can trap these oils and actually prevent proper curing.
Once you do sealcoat, maintain a regular schedule—every 2-3 years for residential driveways in moderate climates, every 1-2 years in harsh climates with severe winters. The benefits of proper sealcoating include UV protection, water resistance, and improved appearance, all of which extend your pavement repair investment.
Regular Inspection Schedule
I recommend thorough pavement inspections twice annually—spring and fall. Spring inspection catches winter damage before warm weather accelerates deterioration. Fall inspection identifies issues to address before winter arrives.
During inspections, look for:
- New cracks forming (especially near repair edges)
- Surface raveling or aggregate loss
- Depression areas holding water
- Edge deterioration
- Signs of petroleum damage (oil drips, fuel spills)
Document findings with photos and notes. This creates a maintenance history that helps you spot patterns and make informed decisions about when additional pavement repair becomes necessary.
Proactive Crack Management
Don’t wait for cracks to become potholes. As soon as you notice cracks reaching 1/4 inch width, schedule crack filling. This simple, inexpensive maintenance prevents water infiltration that would otherwise compromise both your repair and surrounding pavement.
I seal cracks annually as part of my regular maintenance routine. It takes maybe 2-3 hours for an average driveway and costs under $100 in materials if doing it yourself. This small investment prevents thousands in future pavement repair costs by stopping damage progression early.
Cleaning and Chemical Protection
Keep your pavement clean. I recommend periodic sweeping or power washing to remove debris, dirt, and organic materials that can stain or deteriorate asphalt. Pay special attention to areas under trees where leaves accumulate—decomposing organic matter creates acidic conditions that attack asphalt binders.
Address petroleum spills immediately. Gasoline, motor oil, transmission fluid, and other petroleum products dissolve asphalt binders. When spills occur, absorb the liquid with kitty litter or sand, then clean the area with detergent and water. For significant spills, apply a coat of sealant to the affected area after cleaning to provide a protective barrier.
Pro Tip: Keep a “driveway emergency kit” in your garage: a bag of cold-patch for temporary repairs, crack filler, kitty litter for oil spills, and a stiff broom. When minor issues appear, you can address them immediately rather than letting them worsen while you shop for supplies.
Seasonal Maintenance
Each season demands specific attention:
Spring: Inspect for winter damage, fill any new cracks, clean debris from winter months, check drainage systems.
Summer: This is the ideal time for major pavement repair work. Address any issues identified during spring inspection. Apply sealcoat if needed (ensuring temperatures are moderate, not extreme).
Fall: Final inspection before winter, ensure drainage is functioning properly, address any damage before freeze-thaw cycles begin. According to asphalt industry experts, fall repairs prevent winter damage from escalating exponentially.
Winter: Avoid using metal shovels or sharp ice choppers that can damage the surface. Use plastic shovels for snow removal. Apply ice melt products sparingly—some chemicals can damage asphalt. Calcium chloride is safer than rock salt. Clear snow promptly to prevent freeze-thaw cycles from affecting your pavement repair.
Traffic Management
Be mindful of how you use your pavement. Avoid parking heavy vehicles in the same spot repeatedly—this causes rutting and premature wear. If you regularly park work trucks, trailers, or RVs, consider rotating parking locations or reinforcing high-load areas with additional asphalt thickness.
Turn wheels while moving, not while stationary. Power steering turns on stationary vehicles concentrate enormous pressure on small surface areas, causing scuffing and premature wear. This is especially important on fresh pavement repair that’s still curing.
Edge Maintenance
Pavement edges are vulnerable points requiring extra attention. Keep edges cleanly defined by trimming grass and preventing soil buildup. Accumulated soil against pavement edges traps moisture, leading to edge deterioration and base erosion.
I recommend installing edge restraints—either concrete curbing or compacted stone shoulders—to provide structural support. This is especially important adjacent to pavement repair areas where edges are already vulnerable due to the transition between old and new material.
Long-Term Planning
Even with perfect maintenance, asphalt eventually reaches end of life. Start planning for major rehabilitation or replacement when your pavement reaches 15-18 years old or when maintenance costs begin escalating significantly. At that point, you’re often better investing in an asphalt overlay or complete replacement rather than continuing to patch a deteriorating surface.
Keep records of all maintenance and pavement repair work. This documentation helps you make informed decisions, can increase property value by demonstrating responsible ownership, and provides valuable information for future owners.
Professional Maintenance Partnerships
Consider establishing a relationship with a local pavement maintenance contractor for annual inspections and minor repairs. Many contractors offer maintenance packages that include annual inspection, crack sealing, and priority scheduling for repairs. This proactive approach catches problems early and typically costs less than reactive emergency repairs.
For commercial property managers dealing with larger pavement areas, implementing a comprehensive pavement management program that includes regular inspections, systematic repairs, and scheduled resurfacing provides the best long-term value. Professional equipment like parking lot striping machines ensures your property maintains professional appearance alongside structural integrity.
Frequently Asked Questions About Pavement Repair
How long does pavement repair last?
In my experience, properly executed pavement repair lasts 10-15 years for full-depth patches using hot-mix asphalt with adequate base preparation. Crack filling typically lasts 2-5 years before requiring reapplication. Cold-patch repairs last 2-4 years at best. Longevity depends heavily on traffic load, climate conditions, and maintenance quality. I’ve seen repairs exceed 20 years in protected residential areas with excellent maintenance, while high-traffic commercial repairs might need attention after 7-10 years.
What’s the best time of year for pavement repair?
Late spring through early fall provides optimal conditions for pavement repair. Specifically, I target periods when daytime temperatures consistently remain between 50°F and 85°F, with no rain in the forecast for 48 hours. In northern climates, this typically means May through September. Southern regions have longer windows. Fall repairs (September-October) are particularly strategic because they address damage before winter freeze-thaw cycles cause deterioration to accelerate.
Can I repair asphalt pavement in cold weather?
Standard hot-mix asphalt pavement repair should not be attempted when ambient temperatures drop below 50°F. The asphalt won’t compact properly and won’t bond to existing pavement. For winter emergencies, use cold-patch as a temporary solution, understanding it will need replacement with proper hot-mix repair once temperatures warm. Some specialty hot-mix products with additives can be placed in slightly cooler weather (down to 40°F), but these cost more and require experienced application.
How much does professional pavement repair cost compared to DIY?
Professional pavement repair typically costs 40-60% more than DIY materials alone, but this doesn’t account for tool rental, your time, or quality differences. For example, professional crack filling might cost $250 where DIY runs $100-120. However, professional work using hot-mix asphalt for patches lasts 10-15 years versus 2-4 years for DIY cold-patch repairs. Over time, professional work often provides better value despite higher upfront cost. The equation changes for simple crack filling, where DIY makes strong economic sense.
Should I repair or replace my damaged pavement?
I use the 70/30 rule: if 70% or more of your pavement remains in good structural condition, repair makes economic sense. When damage exceeds 30-40% of the surface, or if the base is compromised over large areas, replacement typically provides better long-term value. Also consider pavement age—if your asphalt is already 18-20 years old and showing significant distress, investing in extensive repairs makes less sense than replacement. Request professional evaluation if you’re uncertain; most contractors provide free assessments.
How soon can I drive on newly repaired pavement?
Wait minimum 24 hours before driving on pavement repair, preferably 48 hours. The asphalt needs time to cool and begin curing. In hot weather (above 85°F), extend this to 48-72 hours as the material remains workable longer. For foot traffic, wait 4-6 hours until the surface cools to touch. Avoid sharp turns, power steering movements while stationary, and heavy vehicle parking for the first week to prevent surface marking while the asphalt continues curing.
Will pavement repair match my existing driveway color?
Fresh asphalt appears very dark black while existing pavement has faded to gray. This color difference is temporary—new pavement repair will weather and fade over 6-18 months, eventually blending reasonably well with surrounding asphalt. Perfect color matching is impossible, but the difference becomes less noticeable over time. Sealcoating the entire surface 6-12 months after repair creates more uniform appearance by darkening everything to similar shade.
What causes pavement to need repair?
The primary culprit is water infiltration combined with freeze-thaw cycles. Water enters through cracks, freezes and expands in winter, causing progressive damage. Understanding what causes asphalt cracking helps with prevention. Other major factors include UV radiation degrading asphalt binders, petroleum spills dissolving binders, heavy vehicle loads exceeding design capacity, poor drainage causing base deterioration, and inadequate initial construction. Most pavement repair needs result from combination of these factors rather than single cause.
Conclusion: Protecting Your Investment Through Timely Pavement Repair
Standing in driveways across hundreds of properties over the past 15 years, I’ve learned that pavement repair represents far more than just fixing cracks and holes—it’s about protecting one of your property’s most significant investments. The difference between a driveway or parking lot that lasts 15 years versus 25 years comes down to recognizing problems early and addressing them strategically.
The key insights I hope you take from this guide are straightforward: catch damage early when pavement repair is simple and affordable, never compromise on base preparation, and maintain a regular inspection and maintenance schedule. These three principles have guided my work since I started in this industry, and they’ve saved my clients hundreds of thousands of dollars in premature replacement costs.
Whether you choose DIY or professional pavement repair depends on your project scope, skill level, and quality expectations. For simple crack filling, DIY absolutely makes sense. For structural repairs involving base work and hot-mix asphalt, professional expertise typically provides better long-term value despite higher upfront costs. Be honest with yourself about your capabilities and the project demands.
Remember that pavement repair is not a one-time event but part of an ongoing maintenance cycle. Annual inspections, proactive crack sealing, regular cleaning, and periodic sealcoating work together to extend pavement life exponentially. The homeowner who spends $200 annually on preventive maintenance will avoid the property owner who faces $8,000 replacement costs because they neglected minor issues.
I encourage you to walk your driveway or parking lot today with fresh eyes. Look for those warning signs—cracks widening, edges crumbling, depressions holding water. Each represents an opportunity for cost-effective intervention before problems escalate. And if you’re uncertain about what you’re seeing or what action to take, consult with a qualified pavement repair professional. Most of us provide free assessments because we’d rather help you make informed decisions than see you waste money on wrong approaches.
The pavement repair industry has evolved significantly during my career, with better materials, improved techniques, and greater understanding of pavement science. Take advantage of this knowledge. Your driveway can easily provide 20-30 years of service with proper care—but only if you commit to maintaining it.
Your pavement is speaking to you every day, showing you exactly what it needs through cracks, discoloration, and surface changes. Learn to read these signs, respond promptly, and you’ll protect your investment for decades to come. That’s what professional pavement repair is really about—not just fixing today’s problems, but preventing tomorrow’s headaches.
For more detailed guides on asphalt maintenance and repair, explore our comprehensive resources on sealcoating applications, cost planning, and specialized repair techniques. Have questions about your specific pavement repair needs? Understanding your options empowers better decisions for your property’s long-term health.