Last month, I received a comment from Vicki that stopped me in my tracks. She explained her situation: “The asphalt has been stained with paint, bondo and fiberglass as well as caulk and welding debris. I cannot remove these from the surface with the standard tools. Can I use a power tool with a wire brush or will it damage the asphalt and require patching and tamping?”
Her question about how to remove stains from asphalt resonated with me immediately because it’s a problem I see all the time. When you work on projects in your driveway or parking area, the asphalt becomes collateral damage. Paint drips, bondo overspray, caulk smears, and welding debris don’t just wipe away with a garden hose or standard cleaning tools. And Vicki’s concern about using a wire brush? That’s the million-dollar question that could either save her sealcoating project or create expensive new problems.
This comment inspired me to write the most comprehensive guide on how to remove stains from asphalt surfaces. Whether you’re dealing with paint, body filler, fiberglass, caulk, or welding debris like Vicki, you’ll discover the proven methods to remove stains from asphalt before sealcoating—and learn exactly when power tools are safe to use and when they’ll do more harm than good.
What You’ll Learn About Removing Stains from Asphalt:
- Safe methods for removing paint, bondo, fiberglass, caulk, and welding debris from asphalt
- When power tools and wire brushes can be used (and when they’ll cause damage)
- Chemical solutions that work without harming your pavement
- How to know when patching is a better option than aggressive cleaning
Contents
- Why Surface Preparation Matters for Sealcoating Success
- Understanding Common Stubborn Contaminants on Asphalt
- The Wire Brush Question: Can You Use Power Tools on Asphalt?
- How to Remove Stains from Asphalt: Step-by-Step Methods for Each Type
- Chemical Solutions to Remove Stains from Asphalt Safely
- When to Patch Instead of Clean
- Recommended Tools and Products for Asphalt Stain Removal
- Final Preparation Before Sealcoating
Disclaimer: All external links, including Amazon links, are provided for informational purposes only. None of the products mentioned are sponsored, and no affiliate links are used. I do not receive any compensation from these links.
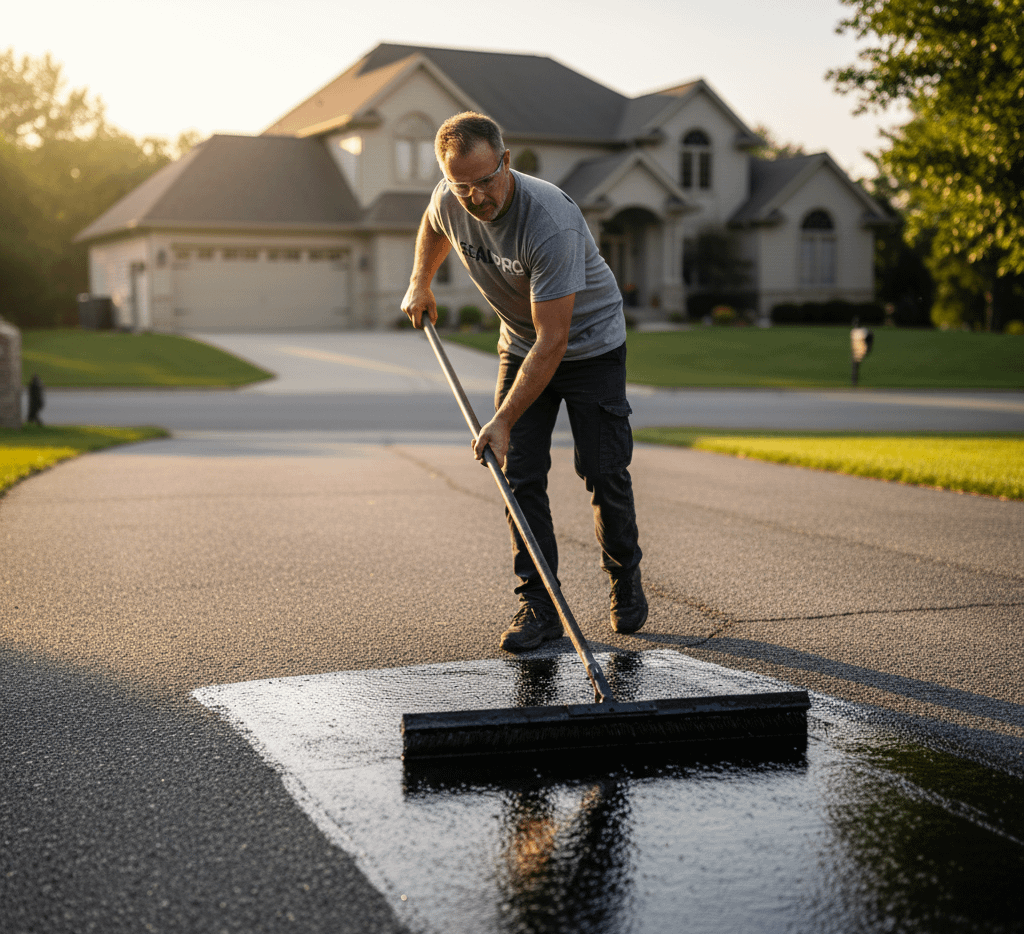
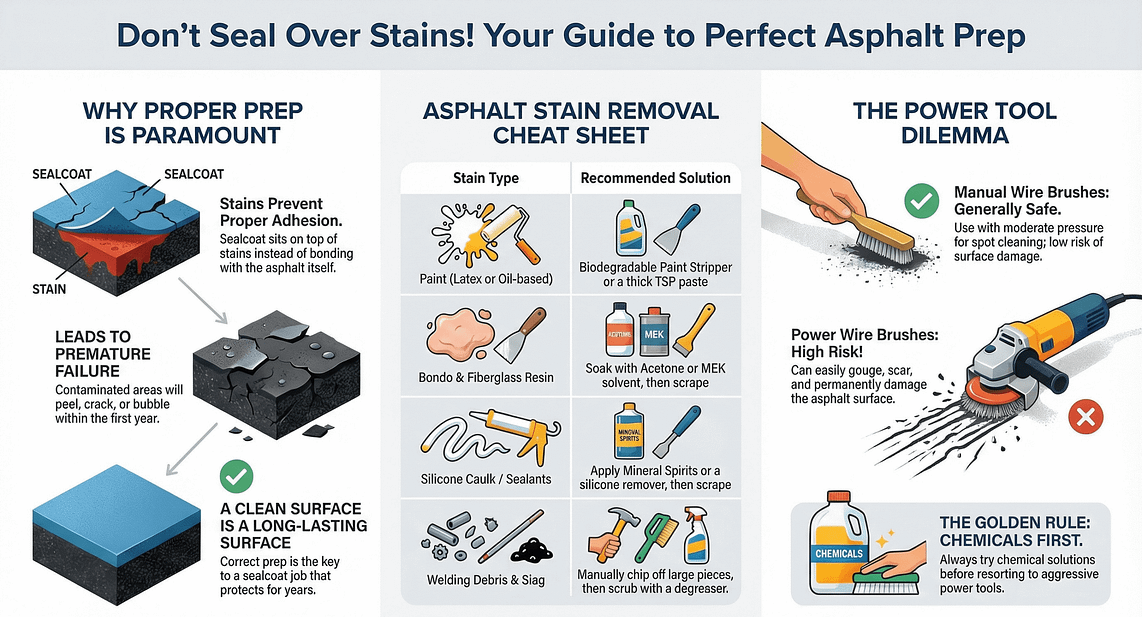
Why Surface Preparation Matters for Sealcoating Success
Before we dive into specific stain removal techniques, let’s talk about why this matters so much. I learned this lesson the hard way when I tried to sealcoat over improperly cleaned asphalt. Within months, the sealcoat started peeling in patches where contaminants had prevented proper adhesion.
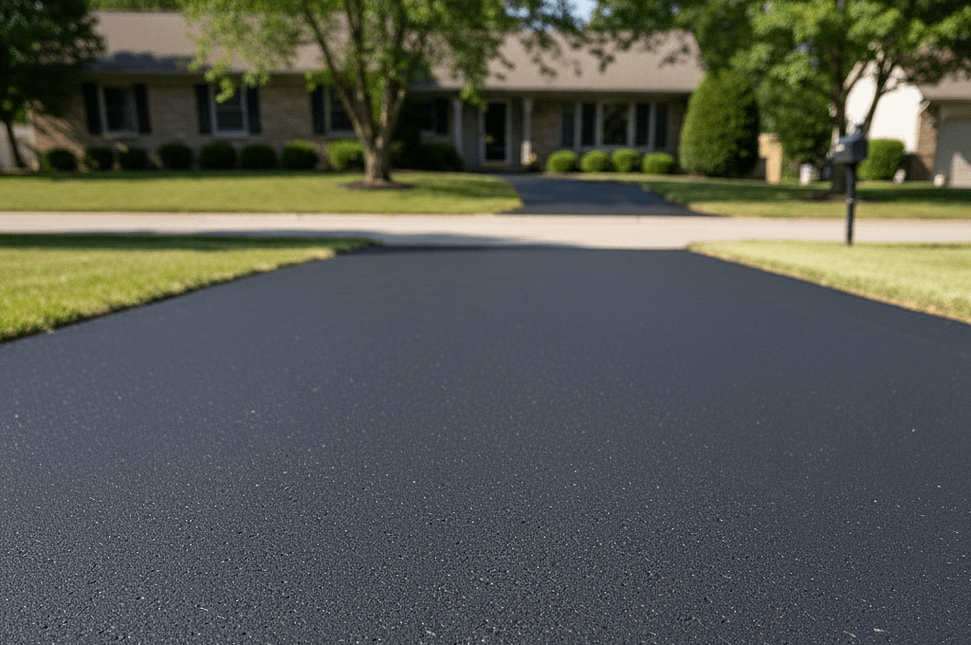
Sealcoating is like sunscreen for your driveway. It protects against UV rays, water damage, oil spills, and general wear and tear. But just like sunscreen won’t stick to oily skin, sealcoat won’t adhere to contaminated asphalt. The surface needs to be absolutely clean for the protective layer to bond effectively.

Here’s what happens when you sealcoat over stubborn contaminants:
- Poor adhesion: The sealcoat sits on top of the stain rather than bonding with the asphalt
- Premature failure: Areas with contaminants will peel, crack, or bubble within the first year
- Uneven appearance: Stains can bleed through the sealcoat, creating discolored patches
- Wasted money: You’ll end up redoing the work much sooner than the typical 2-3 year sealcoating cycle
A well-maintained asphalt surface can last up to 30 years with proper care. But that longevity depends on thorough surface preparation before every sealcoating application.
Understanding Common Stubborn Contaminants on Asphalt
Not all stains are created equal. Each type of contaminant requires a different approach for safe and effective removal. Let’s break down what you’re dealing with:

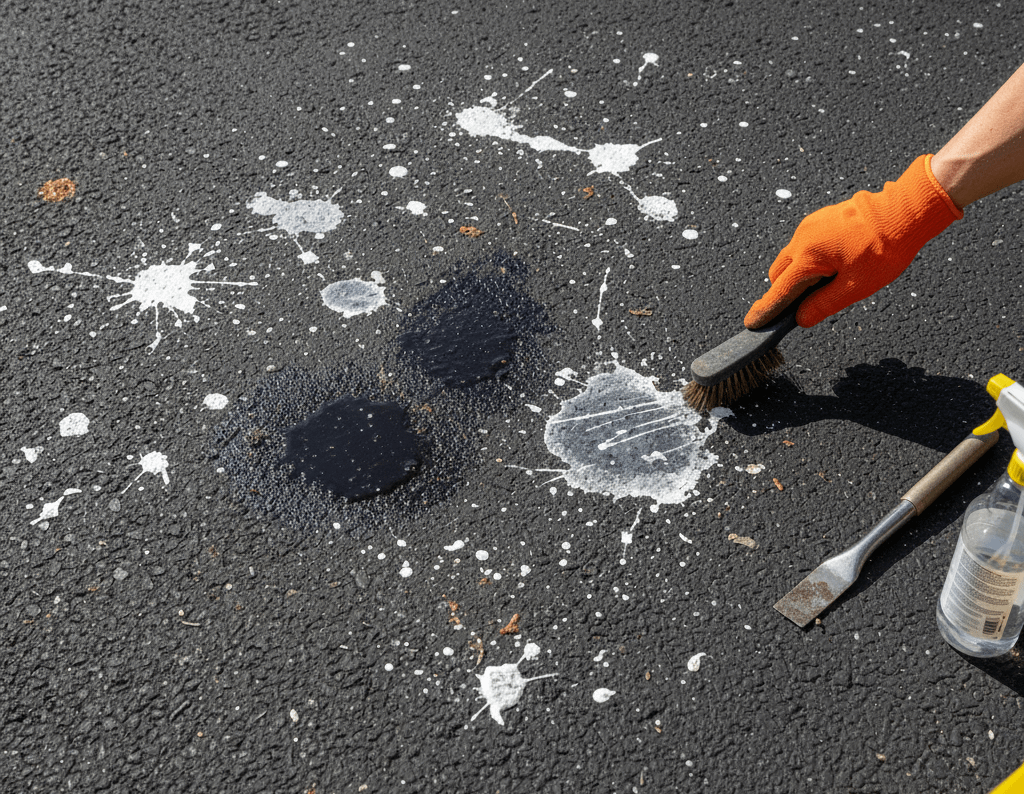
Paint Stains
Paint is one of the most common stubborn stains on asphalt. Whether it’s from a home painting project, spray paint overspray, or road marking paint, these stains penetrate into the porous asphalt surface.
Why paint is problematic?
- Creates a barrier that prevents sealcoat adhesion
- Can contain chemicals that degrade asphalt over time
- Difficult to remove once fully cured
Bondo and Body Filler
Bondo is a polyester-based body filler commonly used in auto repair. When it gets on asphalt (usually from car restoration projects), it creates one of the toughest stains to remove.
Challenges with bondo:
- Forms an extremely strong bond with porous surfaces
- Resistant to most standard cleaning methods
- Contains resins that require specific solvents
Fiberglass Residue
Fiberglass repair work often leaves resin and glass fibers embedded in asphalt. This combination creates a hard, textured contamination that’s both visible and problematic for sealcoating.
Fiberglass issues:
- Resin bonds aggressively to asphalt
- Glass fibers can protrude through the sealcoat
- Requires careful removal to avoid spreading contamination
Caulk and Sealants
Silicone caulk, polyurethane sealants, and similar products can drip or smear onto asphalt during various projects.
Caulk complications:
- Silicone especially resists most cleaning agents
- Can remain tacky or soft, preventing sealcoat curing
- Different caulk types require different removal approaches
Welding Debris
Metal slag, spatter, and welding residue create both chemical and physical contamination on asphalt.
Welding debris challenges:
- Hot metal can melt into the asphalt surface
- Chemical contamination from welding flux and slag
- Often requires mechanical removal
The Wire Brush Question: Can You Use Power Tools on Asphalt?
This is the million-dollar question, and it’s why I’m writing this article. The short answer is: maybe, but with extreme caution.
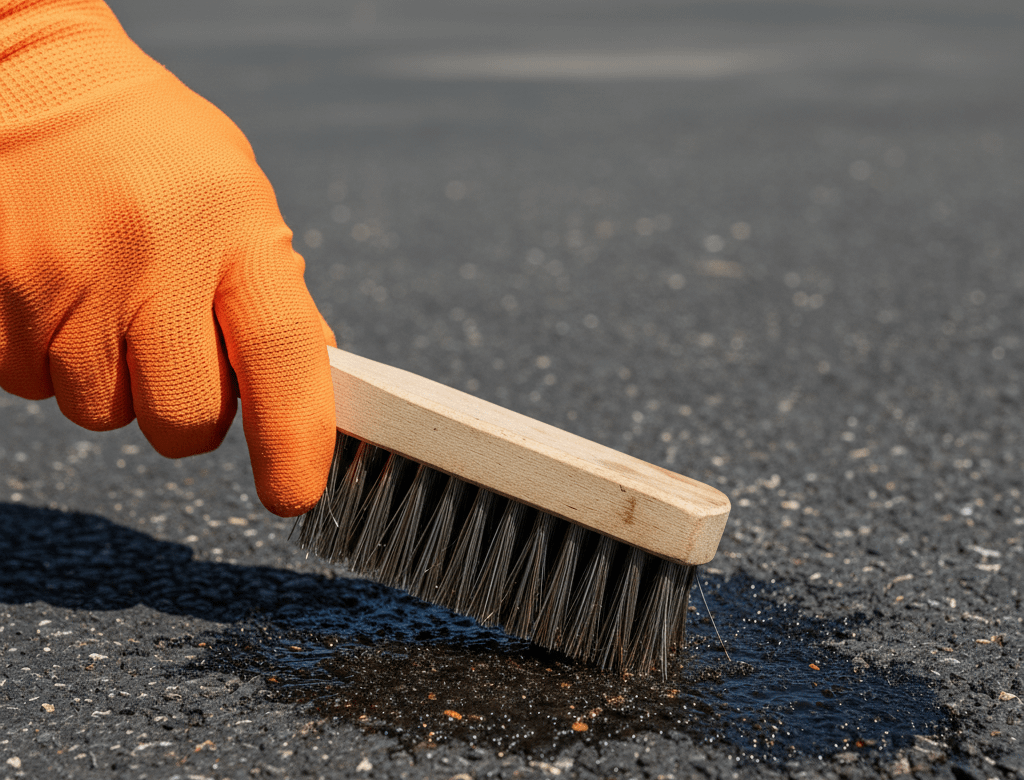
Manual Wire Brushes: Generally Safe
Hand-held wire brushes are commonly used by professionals for spot cleaning oil stains and preparing small areas before sealcoating. When used with reasonable pressure and technique, they’re unlikely to damage your asphalt.
Best practices for manual wire brushing:
- Use brass or bronze brushes instead of steel when possible (less aggressive)
- Brush in the direction of any existing texture
- Apply moderate pressure, letting the bristles do the work
- Focus on small areas rather than broad sweeping motions
Power Tools with Wire Brushes: High Risk
Here’s where things get tricky. Power tools with wire wheel attachments can absolutely damage your asphalt if you’re not careful. I’ve seen driveways with visible scarring and texture damage from overzealous power tool use.
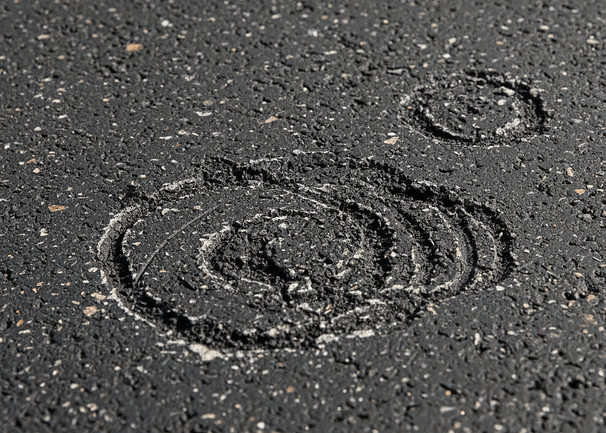
The risks:
- Gouging: Wire wheels spinning at high RPM can dig grooves into softer asphalt
- Scarring: Creates visible marks that show through sealcoat
- Texture damage: Disrupts the surface texture, leading to uneven sealcoat appearance
- Heat generation: Friction can soften asphalt, making damage worse
If you must use power tools, follow these guidelines:
- Choose the right brush type:
- Crimped wire brushes (more flexible) over knotted wire (aggressive)
- Brass or bronze bristles instead of steel
- Lower bristle density for less aggressive action
- Control your technique:
- Keep the tool moving constantly
- Use minimal pressure
- Never let the brush dwell in one spot
- Work in cooler weather when asphalt is harder
- Test first:
- Always test on an inconspicuous area
- Observe results after 24 hours
- If you see visible damage, stop immediately
- Consider alternatives:
- Chemical methods often work just as well
- Manual scraping is safer for small areas
- Professional equipment designed for asphalt
The honest truth: In most cases, using a power wire brush is a last resort before deciding to patch the area. The risk of creating new problems often outweighs the benefit of removing the stain.
Step-by-Step Guide: How to Remove Stains from Asphalt by Type
Now let’s get practical. Here are proven methods to remove stains from asphalt for each type of stubborn contaminant.
How to Remove Paint Stains from Asphalt
When you need to remove stains from asphalt caused by paint, the approach depends on the paint type and how long it’s been there.
Method 1: Chemical Paint Stripper (Best for fresh paint)
- Choose the right stripper: Look for biodegradable, asphalt-safe paint strippers. Avoid products with methylene chloride, which can damage asphalt.
- Application process:
- Apply stripper generously to the paint stain
- Let it sit for the recommended time (usually 15-30 minutes)
- Scrub with a stiff-bristled brush
- Rinse thoroughly with water
- Repeat if necessary
- Safety considerations: Wear gloves, eye protection, and work in a well-ventilated area.
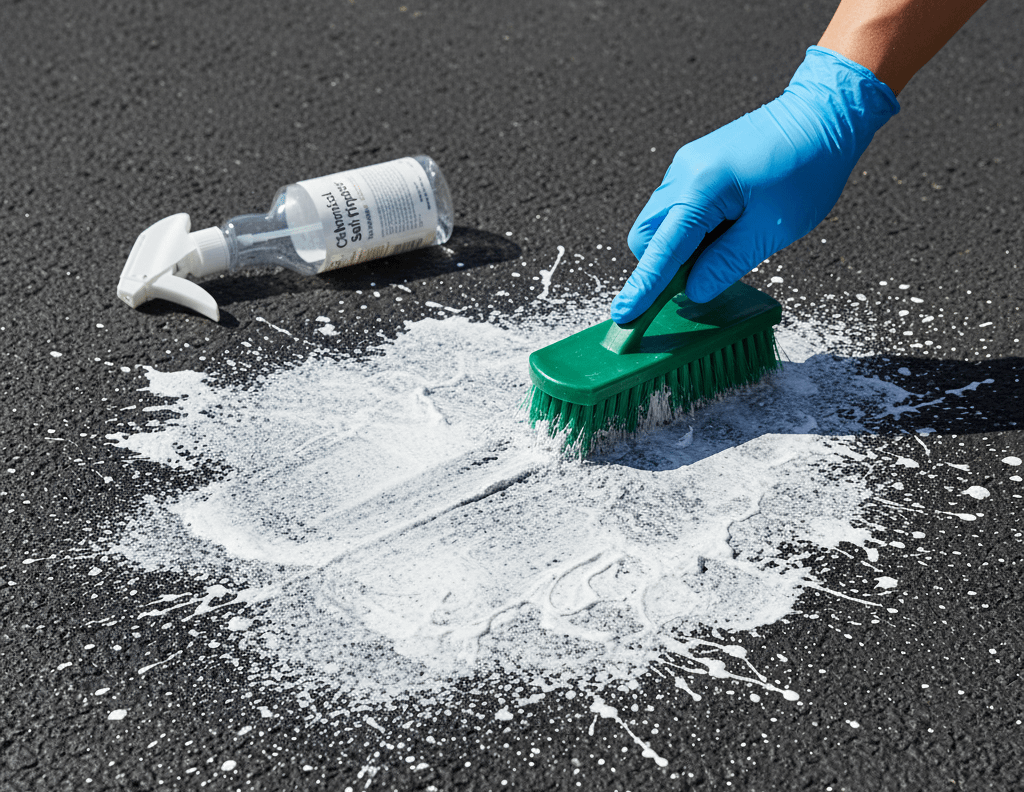
Method 2: Pressure Washing with Detergent (For water-based paint)
- Mix a strong degreaser or TSP (trisodium phosphate) solution
- Apply to the stained area and let it soak for 10-15 minutes
- Use a pressure washer at 3,000-3,300 PSI with a 25-degree nozzle
- Hold the nozzle 12-18 inches from the surface
- Work in overlapping passes
Method 3: Manual Scraping (For thick, dried paint)
- Use a metal paint scraper held at a low angle
- Apply firm pressure to lift paint edges
- Work slowly to avoid gouging the asphalt
- Follow up with chemical treatment for remaining residue
Pro tip: For old, stubborn paint, create a paste using TSP powder and a small amount of water. Apply this thick paste to the paint, cover with plastic wrap, and let it work overnight before scrubbing.
How to Remove Bondo and Body Filler Stains from Asphalt
Bondo is one of the toughest contaminants when you need to remove stains from asphalt because of its strong polyester resin base. Here’s how to tackle it:
Method 1: Chemical Dissolution
- Use acetone or MEK (methyl ethyl ketone):
- These solvents break down polyester resins
- Apply generously to saturate the bondo
- Let it soak for 30-60 minutes
- Cover with plastic wrap to prevent evaporation
- Mechanical removal:
- After soaking, use a putty knife or scraper
- Work at low angles to lift softened material
- Reapply solvent as needed
- Final cleaning:
- Scrub with a wire brush (manually)
- Rinse thoroughly with water
- Allow complete drying before sealcoating
Method 2: Heat and Scrape (Use with extreme caution)
- Use a heat gun on low setting
- Warm the bondo just enough to soften (don’t overheat the asphalt)
- Scrape while warm
- This method requires experience to avoid damaging asphalt
Warning: If the bondo is extensive or deeply embedded, patching the affected area may be more practical than removal.
How to Remove Fiberglass Stains from Asphalt
Fiberglass resin shares properties with bondo but adds the complication of glass fibers when you need to remove stains from asphalt.
Step-by-step process:
- Initial fiber removal:
- Wear gloves to protect against glass fiber irritation
- Use duct tape or a lint roller to pull out loose fibers
- Vacuum the area thoroughly
- Resin dissolution:
- Apply acetone or fiberglass resin remover
- Let it penetrate for 45-60 minutes
- Scrub with a stiff brush
- Rinse and repeat as necessary
- Stubborn spots:
- May require very careful sanding with coarse sandpaper
- Work gently to avoid excessive asphalt damage
- Clean thoroughly after sanding
How to Remove Caulk and Sealant Stains from Asphalt
Different caulk types require different approaches when you remove stains from asphalt.
For Silicone Caulk:
- Apply a commercial silicone remover or mineral spirits
- Let it soak for the recommended time
- Use a plastic scraper to lift the softened caulk
- For stubborn residue, use a razor blade at a shallow angle
- Final cleaning with degreaser
For Polyurethane or Latex Caulk:
- These are easier to remove than silicone
- Use warm, soapy water with a degreaser
- Scrub with a stiff brush
- For dried caulk, use a heat gun to soften, then scrape
- Chemical strippers also work well
How to Remove Welding Debris Stains from Asphalt
Welding slag and spatter require a combination approach to remove stains from asphalt effectively.
Process:
- Mechanical removal:
- Use a chipping hammer or screwdriver to chip off large slag pieces
- A wire brush (manual) works well for spatter
- Be gentle to avoid gouging the asphalt
- Chemical cleaning:
- Apply a degreaser to remove oil-based contamination
- Use a rust remover for any metal staining
- Scrub thoroughly
- Final preparation:
- Pressure wash the area
- Allow complete drying
- Inspect for any embedded metal that might rust through sealcoat
Chemical Solutions to Remove Stains from Asphalt Safely
Let’s talk about the chemical arsenal that can help you remove stains from asphalt without resorting to aggressive mechanical methods that could damage your driveway.
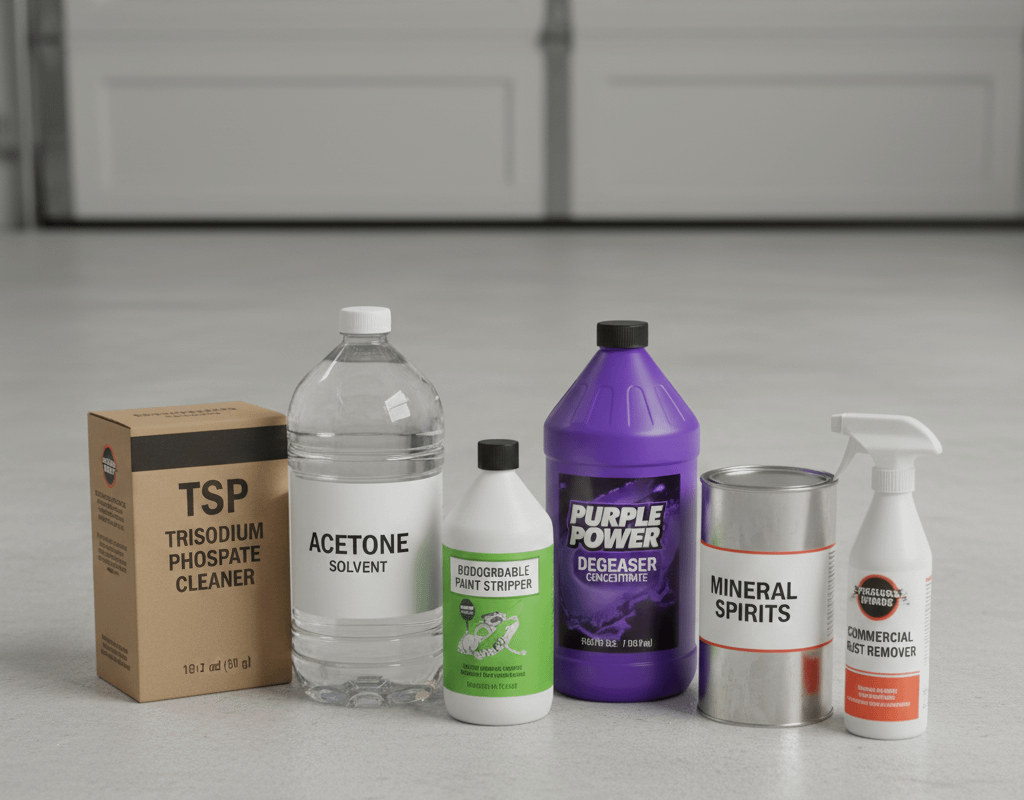
Recommended Products and Solutions
TSP (Trisodium Phosphate)
- Best for: General degreasing, paint preparation, oil stains
- Mixing ratio: 1/2 cup per gallon of hot water (or make a thick paste for tough stains)
- Application: Scrub, let sit 15-30 minutes, rinse thoroughly
- Safety: Wear gloves and eye protection; it can be harsh on skin
Acetone
- Best for: Bondo, fiberglass resin, some paints
- Application: Pour directly on stain, let soak, scrape when softened
- Safety: Highly flammable, use outdoors with good ventilation
- Tip: Cover with plastic wrap to prevent rapid evaporation
Biodegradable Paint Strippers
- Best for: Various paint types without damaging asphalt
- Brands to consider: Citristrip, Peel Away, or similar eco-friendly options
- Application: Follow manufacturer’s instructions carefully
- Advantage: Less harsh than traditional strippers, safer for asphalt
Degreasers (Commercial Grade)
- Best for: Oil-based contaminants, general preparation
- Application: Dilute according to instructions, apply, scrub, rinse
- Tip: Purple Power or Simple Green are affordable and effective
Mineral Spirits
- Best for: Silicone caulk, oil-based paints, grease
- Application: Apply with a cloth, let penetrate, scrub
- Safety: Use in well-ventilated areas
Application Best Practices
Temperature matters: Apply chemical cleaners when temperatures are between 50-85°F. Too cold and they won’t work effectively; too hot and they evaporate too quickly.
Dwell time is critical: Don’t rush the process. Most chemical cleaners need adequate contact time to break down contaminants. Follow product instructions, but when in doubt, let it work longer rather than shorter.
Multiple applications: It’s better to do 3-4 lighter chemical treatments than one aggressive mechanical removal that damages the asphalt.
Neutralization: Some chemical cleaners need to be neutralized after use. Always rinse thoroughly with water and, if recommended, follow with a neutralizing rinse.
Testing: Always test any chemical on a small, inconspicuous area first. Wait 24 hours to ensure it doesn’t damage or discolor the asphalt.
When to Patch Instead of Clean
Sometimes, the best solution isn’t cleaning at all. It’s knowing when to cut your losses and patch the damaged area instead.
Signs You Should Patch Rather Than Clean
Consider patching if:
- The contamination is extensive: If stains cover more than 25-30% of a localized area, patching may be more efficient
- Repeated cleaning attempts have failed: If you’ve tried multiple methods without success, you’re risking more damage
- The asphalt surface is already damaged: If there’s gouging, pitting, or the surface is deteriorating around the stain, patching addresses both issues
- The contaminant has penetrated deeply: Some materials soak into asphalt beyond surface level, especially if the asphalt is older or already compromised
- Time and cost analysis: Sometimes patching a small area is faster and more cost-effective than extensive stain removal efforts
Basic Patching Process
If you decide patching is the best route:
- Cut out the damaged section:
- Use a circular saw with a diamond blade or asphalt cutter
- Create a clean, square, or rectangular cutout
- Cut at least 1-2 inches beyond the contaminated area
- Remove all damaged material
- Prepare the base:
- Compact the exposed base
- Add compacted gravel if needed for proper depth
- Ensure the base is solid and level
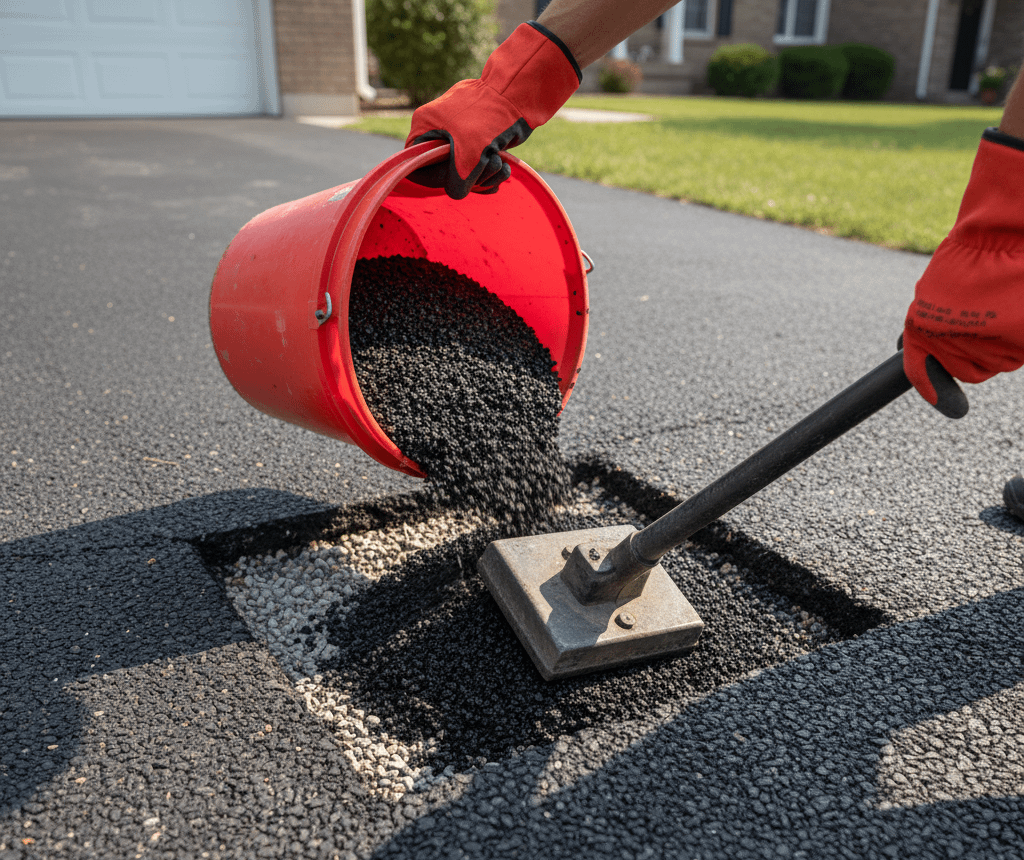
- Apply an asphalt patch:
- Use cold patch for small repairs or hot asphalt for larger areas
- Overfill slightly to account for compaction
- Compact thoroughly with a hand tamper or plate compactor
- The patch should be slightly higher than the surrounding asphalt initially
- Allow proper curing:
- Cold patch needs 24-48 hours before driving on it
- Hot asphalt can usually be used within hours, but check product specifications
- Wait at least 6-12 months before sealcoating over new patches
Professional Help
For extensive contamination or if you’re not comfortable with patching, bringing in a professional is money well spent. They have:
- Industrial-grade cleaning equipment
- Experience knowing which methods work best
- Proper patching equipment and materials
- The ability to assess whether the underlying structure is compromised
Recommended Tools and Products for Stain Removal
Let me share my toolkit for tackling stubborn asphalt stains. These are the products and tools that have proven their worth through numerous projects.
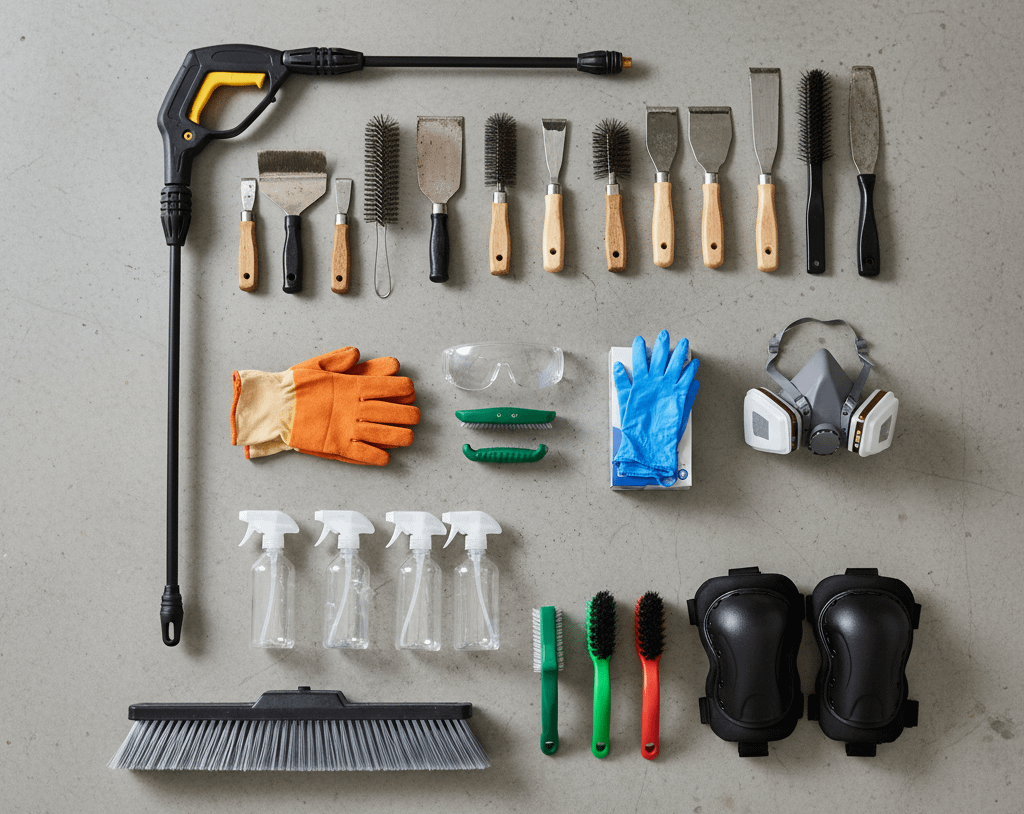
Essential Cleaning Tools
Manual Tools:
- Stiff-bristled push broom: For initial debris removal
- Wire brushes (various sizes): Both brass and steel options
- Metal scrapers and putty knives: Multiple widths from 1-4 inches
- Scrub brushes with handles: Makes the work less back-breaking
- Razor blade scraper: For precise removal of thin residues
Power Equipment:
- Pressure washer (3,000-3,300 PSI): Essential for final cleaning
- Heat gun: For softening caulk and some resins (use cautiously)
- Power wire brush (use with caution): Only as a last resort before patching
Safety Equipment:
- Chemical-resistant gloves: Nitrile or neoprene
- Safety glasses or goggles: Protect from splashes and debris
- Respirator mask: For working with strong chemicals
- Knee pads: You’ll thank me later
- Long sleeves and pants: Protect skin from chemicals and sun
Recommended Chemical Products
For Paint Removal:
- Citristrip or similar biodegradable strippers
- TSP (Trisodium Phosphate) powder
- Heavy-duty degreaser
For Resin-Based Contaminants:
- Acetone (buy in gallon quantities)
- MEK (Methyl Ethyl Ketone)
- Commercial fiberglass resin remover
For General Cleaning:
- Purple Power or Simple Green concentrate
- Dish soap with degreasing properties
- White vinegar (for neutralizing alkaline cleaners)
For Specific Applications:
- Silicone caulk remover
- Mineral spirits
- Rust remover for welding stains
Investment Priority
If you’re on a budget, prioritize in this order:
- Safety equipment (non-negotiable)
- Pressure washer (if you don’t have one, consider renting)
- TSP and acetone (covers most situations)
- Manual wire brushes and scrapers
- Specialized chemicals as needed for specific stains
Final Preparation Before Sealcoating
You’ve removed all those stubborn stains. Great work! But don’t rush to start sealcoating just yet. Final preparation is crucial for lasting results.
The Final Inspection Checklist
Walk your entire asphalt surface and check for:
✓ All contaminants removed: No paint, Bondo, fiberglass, caulk, or debris remaining
✓ Chemical residue cleaned: All cleaning chemicals thoroughly rinsed away
✓ Surface is completely dry: Wait 24-48 hours after final cleaning, longer if weather is humid
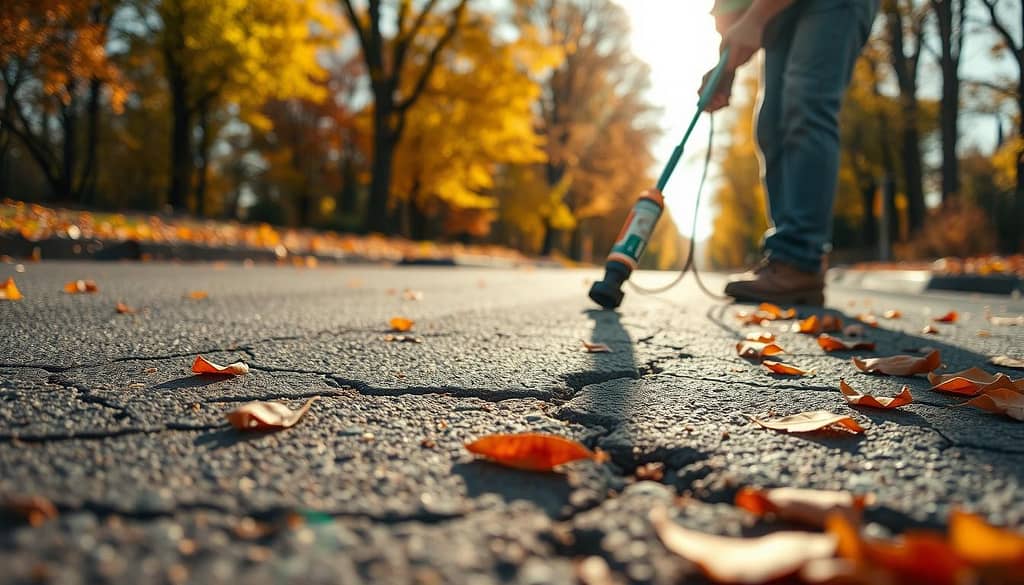
✓ Cracks properly filled: Use crack filler for any cracks wider than 1/4 inch
✓ Potholes patched: All depressions and holes repaired with proper compaction
✓ Oil stains treated: Any remaining oil spots treated with oil spot primer
✓ Vegetation removed: All grass and weeds cleared from edges and cracks
✓ Weather forecast checked: Ensure 48 hours of dry weather with temps above 50°F
The 48-Hour Wait
This is critical: After your final cleaning, wait at least 48 hours before sealcoating. Here’s why:
- Moisture evaporation: Water trapped in the porous asphalt must fully evaporate
- Chemical dissipation: Any cleaning product residues need time to off-gas
- Surface stabilization: The asphalt surface needs to return to its normal state
- Proper assessment: You can evaluate if any cleaning methods caused damage
In humid conditions or after extensive water washing, wait even longer. Test by laying a piece of plastic sheeting on the asphalt overnight. If there’s condensation underneath in the morning, the surface isn’t ready.
Final Surface Preparation
Right before sealcoating:
- Final sweep: Remove any dust or debris that accumulated during the waiting period
- Edge trimming: Use an edger or string trimmer for grass along borders
- Blowing: A leaf blower does an excellent job of removing fine dust
- Tape off: Protect concrete, garage doors, and other areas you don’t want sealed
- Stage your materials: Have all sealcoating supplies ready and mixed according to instructions
Conclusion: Successfully Remove Stains from Asphalt for Lasting Results
Standing in my driveway that day, reading Vicki’s comment about paint spills and welding debris, I realized how many homeowners face this exact challenge. Learning how to remove stains from asphalt properly makes the difference between a sealcoating job that lasts years and one that fails within months.
The key lessons about how to remove stains from asphalt:
Patience pays off: When you remove stains from asphalt, they require time and the right approach, not brute force
Chemicals before power tools: Always try gentler methods first when you remove stains from asphalt to avoid creating new damage
Know when to patch: Sometimes replacing a section is smarter than extensive efforts to remove stains from asphalt
Proper preparation matters: The work you do to remove stains from asphalt before sealcoating determines how long it lasts
Safety first: Protect yourself when working with chemicals and power equipment to remove stains from asphalt
Remember, sealcoating is an investment in the longevity of your asphalt. By properly learning how to remove stains from asphalt—including paint, bondo, fiberglass, caulk, and welding debris—you’re ensuring that investment pays off with years of protection.
The effort you put into learning how to remove stains from asphalt and properly preparing the surface today will save you money, time, and frustration down the road. Your asphalt will thank you with a beautiful, durable finish that protects your investment for years to come.
Do you have questions about how to remove stains from asphalt caused by a specific contaminant? Drop a comment below, and I’ll help you tackle it based on my experience. And if you’ve discovered methods that work well to remove stains from asphalt, please share them with the community!
Ready to sealcoat? Check out our complete guide on sealcoating preparation tips for the next steps in your project.
Related Articles: