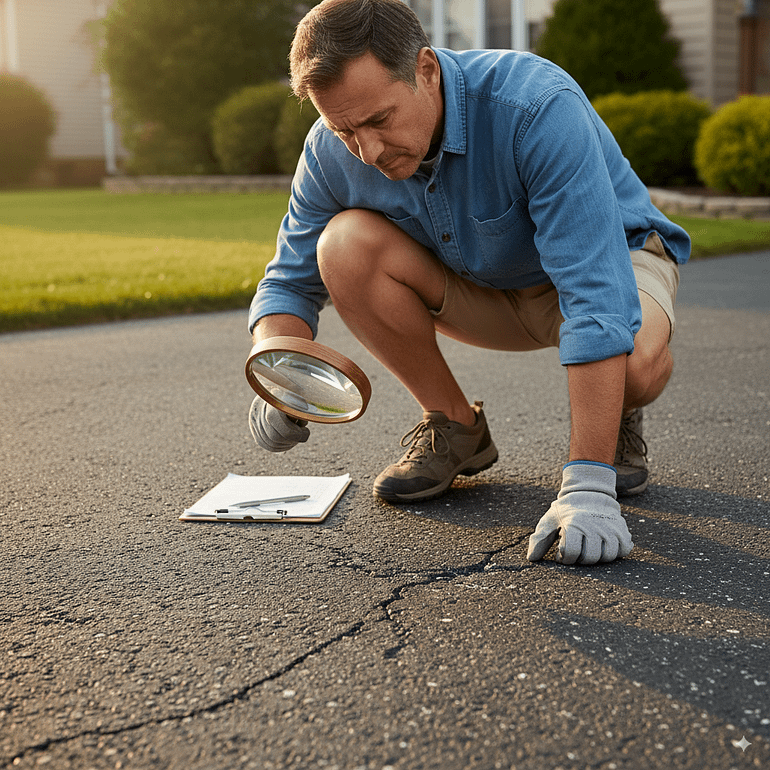
I was standing in my neighbor’s driveway last spring, examining the spider web of cracks that had formed over the harsh winter months. “Do I need to tear this whole thing out?” she asked, pointing at what was once a smooth black surface. I’ve heard this question countless times in my 15+ years as an asphalt maintenance specialist, and I could see the worry in her eyes – the same look I see from homeowners who think they’re facing a complete driveway replacement costing $8,000 to $15,000.
“Actually,” I told her, kneeling down to examine the foundation, “an asphalt overlay might be exactly what you need.” Her existing base was solid, the cracks were surface-level, and there was no significant settling or drainage issues. Three weeks later, she had what looked like a brand-new driveway for less than half the cost of replacement. That’s the power of understanding when and how to use an asphalt overlay – a solution that can extend your driveway’s life by 12-15 years while saving you thousands of dollars.
In this comprehensive guide, I’ll share everything I’ve learned about asphalt overlays, from determining if your driveway is a good candidate to understanding the installation process and long-term maintenance requirements. Whether you’re dealing with surface cracking, minor settling, or simply want to refresh an aging driveway, this article will help you make an informed decision about one of the most cost-effective pavement solutions available.
Key Takeaways: Essential Facts About Asphalt Overlay
- Cost savings: Asphalt overlay typically costs 40-60% less than complete replacement, ranging from $3-6 per square foot versus $7-12 for full reconstruction
- Thickness requirements: Standard residential overlays are 1.5-2 inches thick, while commercial applications may require 2-3 inches
- Lifespan extension: A properly installed overlay can add 12-15 years to your existing pavement when applied over a structurally sound base
- Ideal conditions: Best results occur when existing asphalt has less than 25% surface cracking and no major structural failures
- Temperature requirements: Installation requires ambient temperatures above 50°F and dry conditions for optimal compaction and adhesion
- Preparation timeline: Most residential projects require 1-2 days of preparation followed by 1 day of overlay application
- Drainage consideration: Overlay adds 1.5-2 inches of height, potentially affecting drainage patterns and requiring adjustments to adjacent structures
- Traffic restrictions: New overlay requires 24-48 hours of curing time before vehicle traffic, with full strength achieved in 30 days
- Maintenance frequency: Seal coating should be applied 12-18 months after overlay installation, then every 3-4 years thereafter
- Seasonal timing: Spring through early fall provides optimal installation conditions, with late spring being ideal for maximum curing time
Understanding Asphalt Overlay: Definition and Why It’s Important

I’ve been explaining asphalt overlays to homeowners for over a decade, and I like to think of it as giving your driveway a new lease on life. An asphalt overlay is essentially a new layer of hot mix asphalt applied directly over your existing pavement surface. Think of it like adding a fresh coat of paint to a wall – except instead of paint, we’re adding 1.5 to 2 inches of new asphalt that bonds with your existing surface to create a renewed, durable driving surface.
The importance of understanding overlays becomes clear when you consider the alternative. Complete driveway replacement involves excavating the existing asphalt, potentially rebuilding the base layer, and installing entirely new pavement. This process can take 3-5 days and costs significantly more than an overlay. In my experience, roughly 70% of driveways that homeowners think need complete replacement are actually excellent candidates for overlay.
What makes an overlay so effective is the structural principle behind it. Your existing driveway has already done the hard work of settling and establishing a stable foundation. When that foundation is sound, adding a fresh wearing surface on top gives you all the benefits of new asphalt – smooth surface, proper drainage, and renewed weather resistance – without the expense and disruption of starting from scratch.
I’ve seen overlays transform driveways that looked beyond repair. The key is understanding that we’re not just covering up problems; we’re adding structural thickness and creating a new protective barrier that can last 12-15 years with proper maintenance. This is particularly valuable in regions with harsh winters, where the new surface provides enhanced resistance to freeze-thaw cycles and chemical deicing damage.
Pro Tip: Before considering any pavement work, I always recommend having a professional assess your existing base. A structurally sound foundation is crucial for overlay success, and this evaluation can save you thousands by determining if you’re a good candidate for this cost-effective solution.
Step-by-Step Asphalt Overlay Guide
Having overseen hundreds of overlay projects, I can tell you that success lies in the preparation and attention to detail during each phase. The process might look straightforward, but there are critical steps that separate a professional-quality job from a premature failure.
The first step I always take is conducting a thorough site evaluation. I walk the entire surface, looking for signs of base failure, measuring crack density, and checking for proper drainage. I use a simple rule: if more than 25% of the surface shows cracking or if I can push a screwdriver more than an inch into any crack, we need to address structural issues before considering an overlay.
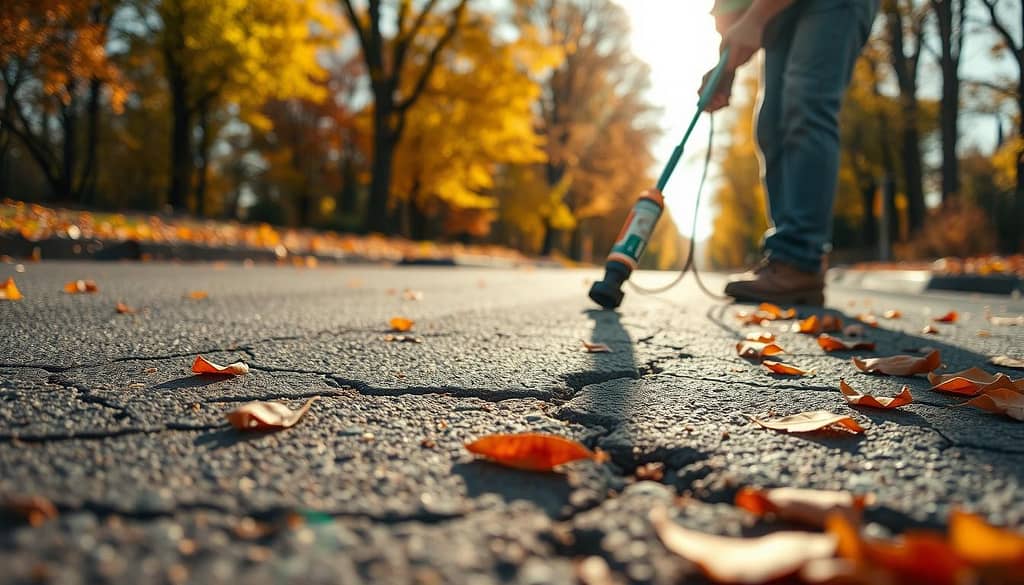
Once I determine the site is suitable, preparation begins with crack filling and patching. Any cracks wider than ¼ inch get filled with hot rubberized crack filler. Larger damaged areas – what we call “alligatored” sections – get cut out and patched with new asphalt. This step is crucial because cracks in the existing surface will eventually telegraph through the new overlay if not properly addressed.
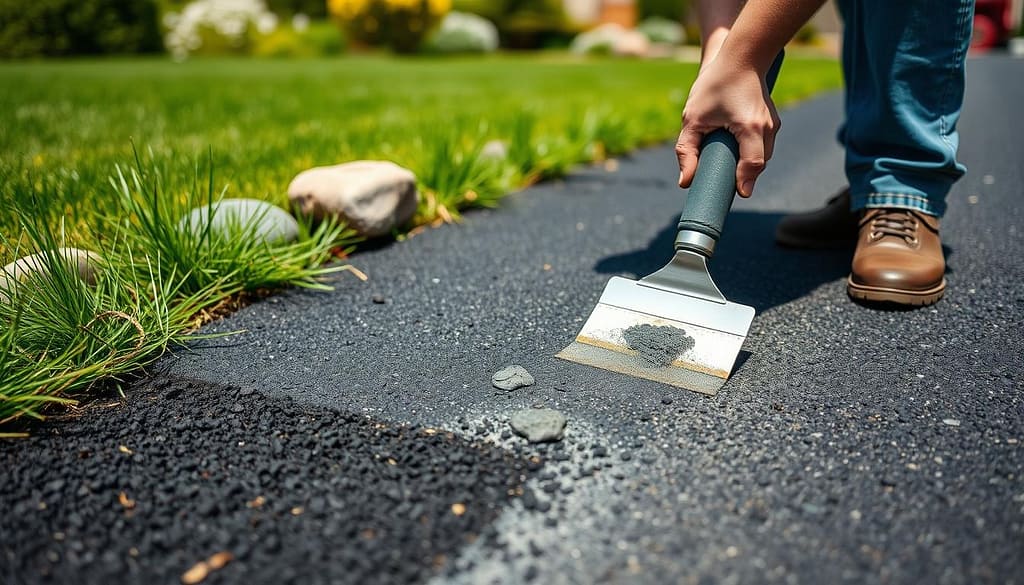
The next phase involves cleaning and surface preparation. I use a power broom or compressed air to remove all loose debris, vegetation, and standing water. Oil stains get treated with a degreasing agent because asphalt won’t properly bond to petroleum-contaminated surfaces. Edge preparation is equally important – I create clean, straight lines where the new overlay will meet existing concrete or adjacent surfaces.
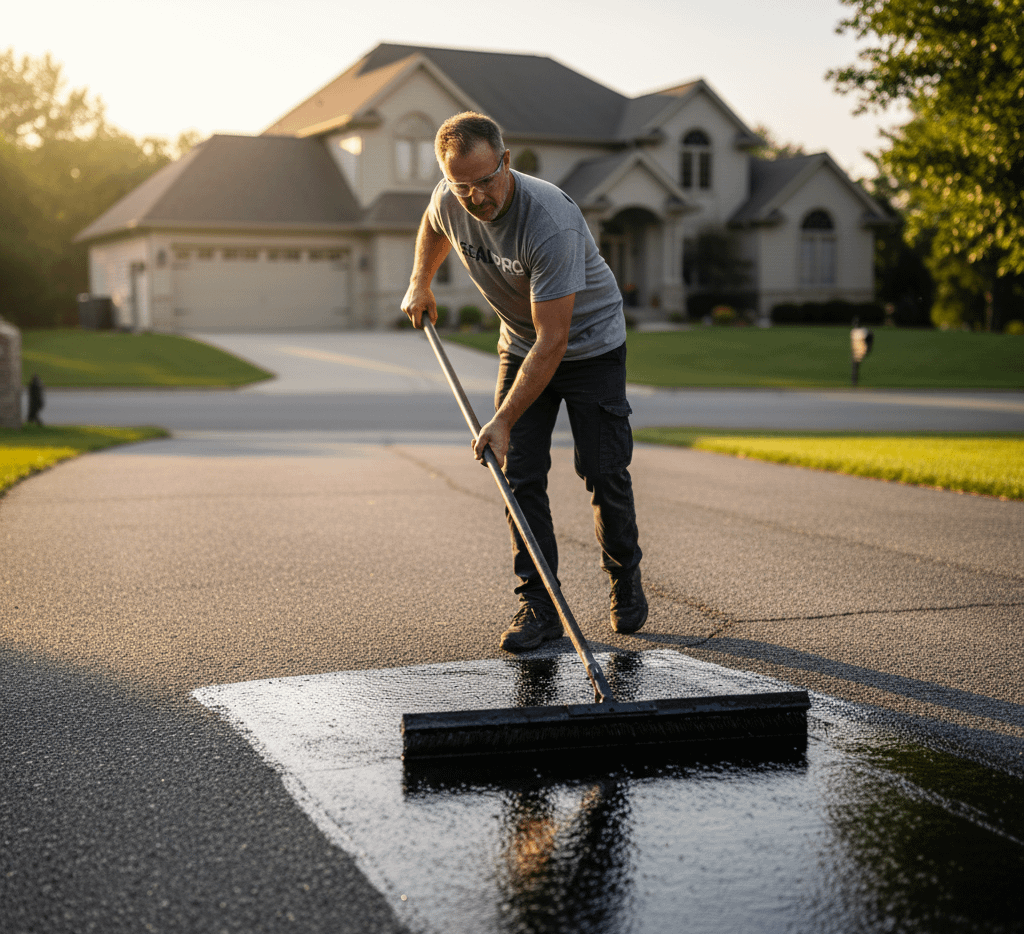
On installation day, timing becomes critical. The asphalt plant needs to deliver hot mix at 275-300°F, and ambient temperatures must be above 50°F for proper compaction. I coordinate delivery so material arrives just as we’re ready to pave – hot asphalt waits for no one, and temperature loss affects the quality of compaction.
The actual paving process requires precision in thickness control. I use screed extensions and string lines to ensure consistent 1.5-2 inch thickness across the entire surface. Proper compaction follows immediately, starting with breakdown rolling at maximum temperature, then intermediate rolling for density, and finally finish rolling for surface smoothness.
Pro Tip: I never allow foot traffic on new overlay for at least 6 hours, and vehicle traffic should wait 24-48 hours depending on temperature and thickness. Rushing this timeline can cause permanent indentations and premature surface failure.
Asphalt Overlay vs Complete Replacement: Key Differences
In my years of consulting with homeowners, I’ve found that understanding the fundamental differences between overlay and replacement helps people make confident decisions about their pavement investment. The choice isn’t just about cost – it’s about matching the right solution to your specific situation.
Cost represents the most obvious difference, and it’s substantial. Complete replacement typically runs $7-12 per square foot, while overlay costs $3-6 per square foot. For an average 1,200 square foot driveway, that’s the difference between $8,400-14,400 for replacement versus $3,600-7,200 for overlay. However, I always emphasize that overlay is only cost-effective when applied over a structurally sound base.
The installation timeline differs dramatically between the two approaches. Replacement requires excavation, base preparation, and installation, typically taking 3-5 days depending on weather and site conditions. Overlay can often be completed in 1-2 days since we’re working with an existing foundation. This shorter timeline means less disruption to your daily routine and faster return to normal driveway use.
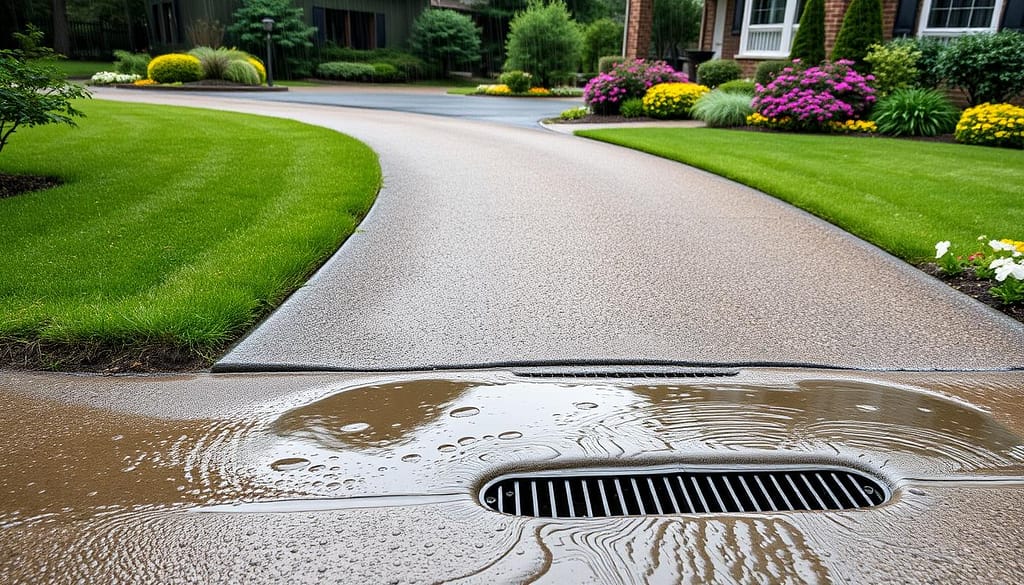
Structural considerations present perhaps the most important distinction. Replacement allows us to address underlying drainage issues, modify the driveway grade, and rebuild compromised base materials. Overlay works with your existing elevation and drainage patterns, which can be limiting if you have water pooling issues or need significant grade changes.
Height increase is a practical difference many homeowners overlook. Overlay adds 1.5-2 inches to your existing surface elevation, which can affect drainage flow toward your garage, create steps at sidewalk intersections, or impact sprinkler head clearances. Replacement allows us to maintain existing elevations while still providing fresh pavement.
Longevity expectations also vary between the two approaches. A properly installed replacement over a well-constructed base should last 20-25 years with regular maintenance. Overlay typically provides 12-15 years of service life, though this depends heavily on the condition of the underlying pavement and quality of installation.
I’ve learned that the decision often comes down to the homeowner’s long-term plans. If you’re planning to stay in your home for the next 20+ years and want maximum longevity, replacement might justify the additional investment. If you need a cost-effective solution that provides excellent medium-term performance, overlay is often the smart choice.
Pro Tip: I recommend replacement when existing pavement shows extensive alligatoring, base settlement, or drainage problems. Overlay works best when your main issues are surface cracking, minor rutting, or cosmetic concerns over structurally sound pavement.
Factors to Consider for Your Overlay Project
Deciding whether your driveway is a good candidate for asphalt overlay requires evaluating several interconnected factors that I’ve learned to assess systematically over my career. The wrong choice can lead to premature failure and the need for complete replacement within just a few years.
Existing pavement condition stands as the primary determining factor. I look for what we call “structural integrity” – the ability of your current pavement and base to support the additional load of new asphalt plus continued traffic. Surface cracking is acceptable and expected, but I become concerned when I see pattern cracking that indicates base failure, significant rutting deeper than 1 inch, or areas where the pavement moves or flexes under foot pressure.
Drainage patterns require careful evaluation because overlay changes your surface elevation. I examine how water currently flows across your driveway and away from your home’s foundation. Adding 1.5-2 inches of height can redirect water flow, potentially causing pooling against your garage or foundation walls. Sometimes we need to adjust adjacent concrete surfaces or install new drainage solutions as part of the overlay project.
The age and construction history of your existing pavement provides valuable insight into overlay suitability. Driveways less than 10 years old with minimal cracking are usually excellent candidates. Pavement 15-20 years old requires more detailed evaluation, while surfaces over 20 years old often have underlying issues that make replacement more practical in the long run.
Climate considerations significantly impact overlay success. In regions with severe freeze-thaw cycles, existing cracks can expand and contract, potentially telegraphing through the new surface within 2-3 years. I’ve seen overlays in northern climates last 15+ years when properly prepared, but surface preparation becomes even more critical in harsh weather environments.
Budget and timing factors influence the decision beyond simple cost comparison. While overlay costs less upfront, you’ll likely need another pavement solution in 12-15 years. Complete replacement costs more initially but may be more economical over a 20-year timeline. I help homeowners calculate total cost of ownership based on their expected length of residence.
Traffic patterns and usage intensity affect overlay performance. A driveway serving two vehicles with normal residential use has different requirements than one accommodating delivery trucks, RVs, or commercial vehicles. Heavy traffic loads can accelerate failure if the underlying base isn’t adequate for the combined load of existing and new asphalt.
Adjacent infrastructure presents practical challenges that can increase project complexity. Sidewalks, decorative borders, sprinkler systems, and landscape edging may require modification to accommodate the height increase. These adjustments add cost and complexity but are essential for proper function and appearance.
Pro Tip: I always recommend core sampling for driveways over 15 years old or when structural integrity is questionable. A simple core sample reveals the thickness and condition of existing layers, helping determine if your base can support an overlay or if replacement is the wiser investment.
The Process of Professional Asphalt Overlay

Understanding the detailed installation process helps homeowners recognize quality workmanship and make informed decisions when selecting contractors. I’ve refined this process through hundreds of projects, and each step serves a specific purpose in ensuring long-term performance.
Site Assessment and Preparation Planning
My process always begins with a comprehensive site evaluation conducted during dry conditions when I can properly assess surface and drainage issues. I measure crack density using a systematic grid approach, checking for areas where cracks comprise more than 25% of the surface area. These sections require pre-treatment or patching before overlay installation.
I use a probe to check base stability in areas showing surface distress. Soft or unstable areas indicate potential base failure that could compromise overlay performance. Drainage evaluation includes checking for proper slope (minimum 2% grade away from structures) and identifying areas where water currently pools or flows improperly.
Edge condition assessment determines how much preparation is needed at boundaries with concrete, landscaping, or structures. I measure height differences and plan for proper transitions that will accommodate the additional 1.5-2 inches of overlay thickness.
Surface Preparation and Repair
Crack filling represents the most critical preparation step for overlay longevity. I use hot rubberized crack filler for cracks wider than ¼ inch, ensuring complete penetration to prevent water infiltration that could cause overlay delamination. The material must cure completely before overlay installation, typically requiring 24-48 hours depending on crack width and weather conditions.
Patching severely damaged areas involves cutting out alligatored or failed sections and replacing with new hot mix asphalt. These patches must be compacted to proper density and allowed to cure before overlay installation. I typically cut patch areas at least 6 inches beyond visible distress to ensure we’re reaching sound pavement.
Surface cleaning removes loose debris, vegetation, and contaminants that could prevent proper bonding. I use mechanical brooms for large debris and compressed air for fine particles and dust. Oil stains require treatment with degreasing agents followed by absorbent material to ensure clean bonding surfaces.
Material Selection and Delivery Coordination
Hot mix asphalt selection depends on climate, traffic expectations, and budget considerations. I typically specify a dense-graded mix with ¾-inch maximum aggregate size for residential overlays. The asphalt cement grade varies by region – PG 64-22 for moderate climates, PG 70-28 for areas with temperature extremes.
Delivery coordination requires precise timing since hot mix asphalt has a limited working window. Material arrives at 275-300°F from the plant and must maintain adequate temperature for proper compaction. I coordinate truck arrival to match our paving progress, preventing material from cooling below workable temperatures.
Quality control begins at delivery with temperature verification and visual inspection for proper mix consistency. I reject loads showing excessive smoke, blue haze, or segregation that indicates overheating or poor mixing at the plant.
Installation and Compaction
Paving equipment setup includes adjusting screed height and extensions to maintain consistent 1.5-2 inch thickness across the entire surface. String lines help maintain proper grade and ensure smooth transitions at edges and joints.
Material placement proceeds systematically, with continuous forward motion to prevent cold joints and maintain uniform thickness. I monitor mat temperature continuously, as proper compaction requires material temperature above 225°F for breakdown rolling and above 180°F for finish rolling.
Compaction follows a specific sequence: breakdown rolling at maximum temperature for initial density, intermediate rolling for target density achievement, and finish rolling for surface smoothness. I use a combination of vibratory and static rolling depending on material temperature and thickness requirements.
Joint construction at edges and transitions requires special attention to prevent water penetration and ensure proper bonding. I hand rake and compact these areas carefully, ensuring the new overlay properly bonds with existing surfaces.
Quality Control and Finishing
Thickness verification involves checking multiple points across the surface to ensure consistent application meeting specifications. Density testing using nuclear gauge or core samples confirms proper compaction in critical areas.
Surface inspection identifies any areas requiring touch-up work while material temperature still allows for corrections. I look for segregation, low spots, or compaction issues that could affect long-term performance.
Edge finishing includes proper compaction and shaping where overlay meets existing concrete or landscape areas. Clean, well-compacted edges prevent water infiltration and enhance appearance.
Pro Tip: Temperature is everything in asphalt overlay success. I never begin paving when ambient temperatures are below 50°F or when rain is expected within 24 hours. Hot asphalt needs proper conditions to achieve maximum density and bonding with the existing surface.
Cost Analysis: What to Expect
Providing accurate cost information has become increasingly important as material prices have fluctuated significantly over the past few years. I help homeowners understand not just the upfront costs, but the total investment including preparation, installation, and long-term maintenance requirements.
Base overlay costs typically range from $3-6 per square foot for residential projects, but this range can vary significantly based on local material costs, site accessibility, and preparation requirements. A standard 1,200 square foot driveway overlay would cost $3,600-7,200 for basic installation, but I always emphasize that additional factors can impact this baseline estimate.
Preparation costs often surprise homeowners because they’re not always included in initial quotes. Extensive crack filling can add $0.50-1.00 per square foot, while patching severely damaged areas costs $4-6 per square foot for the affected sections. If your driveway requires significant preparation, these costs can increase your total project investment by 20-30%.
Site accessibility significantly impacts pricing. Driveways with limited access for paving equipment may require hand work or smaller equipment, increasing labor costs by 15-25%. Projects requiring material to be transported by wheelbarrow or small dumper can see cost increases of $1-2 per square foot due to additional labor requirements.
Thickness requirements affect material costs directly. Standard 1.5-inch overlay uses approximately 0.12 tons of asphalt per square foot, while 2-inch thickness requires 0.16 tons per square foot. With hot mix asphalt typically costing $80-120 per ton delivered, thickness decisions have measurable cost impacts.
Regional variations in material and labor costs create significant pricing differences across the country. Urban areas typically see higher costs due to increased labor rates and material transportation expenses. I’ve seen similar projects vary by 30-40% between rural and metropolitan markets.
Additional services that may be required include drainage adjustments ($200-500 per drain or catch basin modification), edge modifications where overlay meets concrete ($3-5 per linear foot), and landscape restoration along driveway edges ($2-4 per linear foot).
Seasonal timing affects pricing, with spring and fall typically commanding premium rates due to optimal weather conditions and high demand. Summer installation often costs 10-15% less, while winter work (where possible) may include weather protection costs that increase total project investment.
Long-term maintenance costs should be factored into your total ownership calculation. Seal coating every 3-4 years costs $0.25-0.40 per square foot, and minor crack filling averages $0.15-0.25 per linear foot. Over a 15-year lifespan, maintenance costs typically total $800-1,200 for an average driveway.
Financing considerations have become more important as project costs have increased. Many contractors offer payment plans, and some homeowners use home equity loans or lines of credit for larger projects. I recommend obtaining multiple quotes and understanding exactly what services are included in each estimate.
Pro Tip: Always request detailed written estimates that break down material, labor, and preparation costs separately. This transparency helps you compare contractors fairly and understand where you might save money through different preparation approaches or timing choices.
Professional vs DIY: Making the Right Choice
The question of professional installation versus DIY attempt comes up regularly, and I have strong opinions based on watching both successful professional jobs and failed DIY attempts over the years. While I appreciate the DIY spirit, asphalt overlay presents unique challenges that require specialized equipment and expertise.
Equipment requirements represent the primary barrier to successful DIY overlay installation. Hot mix asphalt must be delivered, spread, and compacted while maintaining specific temperatures. Professional paving equipment includes spreaders, rollers, and compactors that rental companies rarely stock. Hand spreading and compacting 2+ tons of asphalt across even a small driveway requires significant physical capability and precise timing.
Temperature control becomes critical during installation, and this is where most DIY attempts fail. Hot mix asphalt arrives at 275-300°F and must be spread and compacted before cooling below workable temperatures. Professional crews coordinate multiple pieces of equipment to complete this process efficiently. DIY installers often find their material has cooled below proper compaction temperature before they can complete the job.
Material ordering and delivery coordination requires industry knowledge that most homeowners lack. Asphalt plants typically have minimum order requirements (5-10 tons) that may exceed your project needs. Calculating exact material requirements, coordinating delivery timing, and managing hot material safely requires experience that prevents costly mistakes.
Quality control during installation determines long-term performance more than any other factor. Professional installers understand proper thickness control, compaction patterns, edge construction, and joint formation. I’ve seen DIY overlays fail within 2-3 years due to inadequate compaction, uneven thickness, or poor edge construction that allows water infiltration.
Safety considerations include working with 300°F material, operating heavy equipment, and managing truck traffic during delivery. Burns from hot asphalt can be severe, and improper equipment operation can cause serious injury. Professional crews have safety training, protective equipment, and insurance coverage that protects both workers and property owners.
Cost comparison between professional and DIY installation often surprises homeowners. While DIY material costs may be lower, equipment rental, tool purchase, and potential disposal of failed attempts can approach professional installation costs. When factoring in the likelihood of achieving professional-quality results, the cost advantage often disappears.
However, there are aspects of overlay preparation that skilled DIY enthusiasts can handle effectively. Crack cleaning, minor patching, and site preparation can reduce professional costs by $0.50-1.00 per square foot. Edge preparation, debris removal, and surface cleaning are within most homeowners’ capabilities.
I recommend a hybrid approach for cost-conscious homeowners: handle preparation work yourself and hire professionals for material delivery and installation. This approach can save 15-20% on total project costs while ensuring the critical installation phase is completed properly.
Pro Tip: If you’re considering DIY overlay, start by getting professional quotes and using that information to calculate realistic costs including equipment rental, material waste, and potential failure costs. Most homeowners find that professional installation provides better value when all factors are considered.
Common Mistakes to Avoid
Learning from others’ mistakes is far less expensive than making them yourself, and I’ve seen enough overlay failures to identify the most common problems that lead to premature pavement replacement. These mistakes often result from cutting corners during preparation or installation phases.
Inadequate surface preparation represents the most frequent cause of overlay failure that I encounter. Homeowners or contractors who skip proper crack filling see those cracks telegraph through the new surface within 1-2 years. Water infiltration through untreated cracks causes overlay delamination and accelerates pavement deterioration. I’ve removed failed overlays where you could literally see the outline of every unfilled crack in the original surface.
Ignoring drainage issues before overlay installation creates problems that compound over time. Adding 1.5-2 inches of height changes water flow patterns, and areas that previously drained adequately may begin pooling water. I’ve seen overlay installations where water began flowing toward the house foundation because the contractor didn’t adjust the drainage slope to accommodate the height increase.
Applying overlay over structurally unsound pavement wastes money and creates false confidence in a failing system. I regularly see homeowners apply overlay over pavement with base failures, thinking they can “patch over” the problem. Within 2-3 years, the underlying issues cause the overlay to crack and fail in the same patterns as the original surface.
Temperature violations during installation doom many otherwise good projects. Installing overlay when ambient temperatures are below 50°F or when rain is imminent prevents proper compaction and bonding. I’ve seen beautiful-looking installations fail within one winter because cold weather installation didn’t allow the material to properly densify and bond.
Thickness inconsistency creates weak points that fail prematurely under traffic loading. Areas where overlay is too thin (less than 1.5 inches) don’t provide adequate structural contribution and may crack under normal vehicle loads. Conversely, areas with excessive thickness waste material and can create drainage problems.
Poor compaction represents the most invisible but damaging installation mistake. Overlay that looks perfect initially but wasn’t properly compacted will ravel, crack, and deteriorate rapidly once exposed to traffic and weather. Proper compaction requires specific equipment, techniques, and timing that inexperienced installers often execute incorrectly.
Contaminated bonding surfaces prevent proper adhesion between old and new asphalt layers. Oil stains, loose debris, or vegetation left on the existing surface create weak bonds that allow water infiltration and overlay separation. I’ve removed overlay sections that peeled off like wallpaper because the bonding surface wasn’t properly cleaned.
Edge construction failures allow water penetration that undermines the entire installation. Poorly formed edges where overlay meets concrete or landscape areas create entry points for water that can cause extensive damage. Proper edge construction requires specific techniques and materials that ensure long-term water resistance.
Timing mistakes during installation create problems that aren’t immediately apparent but develop over time. Applying overlay too late in the season doesn’t allow adequate curing time before winter freeze-thaw cycles. Starting installation during unstable weather periods can result in rain damage or cold weather installation problems.
Material specification errors can affect performance for years. Using the wrong asphalt mix design for your climate or traffic conditions may result in premature rutting, cracking, or temperature susceptibility. I’ve seen overlays installed with summer-grade materials that became too brittle in winter conditions.
Pro Tip: The most expensive mistake I see is applying overlay as a “quick fix” without addressing underlying problems. Spend time and money on proper evaluation and preparation – these investments determine whether your overlay lasts 5 years or 15 years.
Maintenance Tips and Best Practices
Proper maintenance transforms a good overlay installation into a long-term pavement investment, and I’ve developed specific recommendations based on watching hundreds of overlays age over 15+ year periods. The maintenance approach for overlay differs slightly from new pavement due to the multilayer structure.
Initial curing protection requires special attention during the first 30 days after installation. While new overlay can support normal vehicle traffic after 24-48 hours, it continues gaining strength for several weeks. I recommend avoiding heavy loads, sharp turns, and parking in the same location repeatedly during this curing period. Power steering turns while stationary can scuff the surface before it fully hardens.
Seal coating timing represents one of the most important maintenance decisions for overlay longevity. Unlike new construction, I recommend waiting 12-18 months before applying the first seal coat to overlay surfaces. This delay allows complete curing and any minor settling to occur before sealing. Applying sealcoat too early can trap moisture and prevent complete bonding.
The first seal coat application should use high-quality coal tar or asphalt emulsion sealers applied at manufacturer-recommended coverage rates. I prefer coal tar sealers for their superior weather resistance and fuel spill protection, though asphalt emulsion products work well in moderate climates. Proper application requires temperatures above 50°F with no rain expected for 24 hours.
Crack monitoring becomes critical during the second and third years after overlay installation. Small cracks that appear are normal settling and should be filled promptly with rubberized crack filler. However, pattern cracking that mirrors the original surface may indicate preparation problems or base movement that requires professional evaluation.
Drainage maintenance takes on increased importance with overlay installations because the height change can alter water flow patterns. I recommend annual inspection of all drainage areas, particularly where overlay meets concrete or landscape areas. Clear debris from drainage channels and ensure water flows away from the pavement surface and building foundations.
Snow removal practices require modification for overlay surfaces during the first winter. New overlay surfaces can be more susceptible to damage from aggressive snow plowing or ice chipping. I recommend using plastic or rubber-edged blades and avoiding metal implements that might gouge the surface before it fully hardens.
Chemical resistance varies during the curing period, making prompt cleanup of fuel spills particularly important during the first year. Gasoline, oil, and hydraulic fluid can penetrate overlay more easily before the surface fully cures and develops maximum chemical resistance.
Long-term maintenance scheduling should include seal coating every 3-4 years, annual crack inspection and filling, and periodic professional evaluation every 5-6 years. This maintenance schedule typically extends overlay life to 12-15 years and maintains appearance and functionality throughout that period.
Seasonal inspection timing helps catch problems early when repairs are less expensive. I recommend spring inspection for winter damage, summer evaluation for heat-related issues, and fall preparation for winter weather protection. Each season presents different maintenance opportunities and challenges.
Traffic management continues to be important throughout overlay life. Avoiding repeated heavy loads in the same areas, minimizing sharp turning movements, and preventing fuel spills help preserve the overlay surface and extend service life.
Pro Tip: Keep detailed maintenance records including seal coat dates, crack filling locations, and any repairs performed. This documentation helps identify patterns and plan future maintenance timing. Good records also increase property value by demonstrating proper pavement care to potential buyers.
| Maintenance Task | First Year | Years 2-5 | Years 6-10 | Years 11-15 |
|---|---|---|---|---|
| Seal Coating | Wait 12-18 months | Apply every 3-4 years | Continue 3-4 year cycle | May need annual application |
| Crack Filling | Monitor monthly | Fill immediately as needed | Increase frequency | Consider overlay replacement |
| Drainage Check | Seasonal inspection | Annual inspection | Seasonal inspection | Professional evaluation |
| Professional Review | Not needed | Every 5-6 years | Every 3-4 years | Annual assessment |
Conclusion: Making the Smart Choice for Your Driveway
After walking you through every aspect of asphalt overlay from initial assessment through long-term maintenance, the key decision points become clear. Overlay represents an excellent investment when you have structurally sound existing pavement that needs surface renewal, offering 60-70% cost savings compared to complete replacement while providing 12-15 years of additional service life.
The critical factors that determine overlay success include honest assessment of your existing pavement condition, proper surface preparation, professional installation with attention to temperature and compaction requirements, and consistent long-term maintenance. When these elements align, asphalt overlay can transform an aging, cracked driveway into what appears to be completely new pavement at a fraction of replacement cost.
I’ve seen overlay installations that look and perform like new pavement after 15 years, and others that failed within 3 years due to poor preparation or installation shortcuts. The difference lies in understanding when overlay is appropriate, investing in proper preparation, and working with experienced contractors who understand the nuances of multilayer pavement construction.
The investment in professional evaluation and quality installation pays dividends through extended service life, maintained property value, and avoided costs of premature replacement. Whether you’re dealing with surface cracking, minor settling, or simply want to refresh an aging driveway, overlay offers a proven solution that bridges the gap between expensive replacement and temporary patch repairs.
If you’re considering overlay for your driveway, I recommend starting with professional evaluation to confirm your surface is a good candidate, obtaining detailed quotes that include all preparation work, and planning installation during optimal weather conditions for your region. With proper planning and execution, asphalt overlay can provide excellent value and performance for years to come.
The future of your driveway depends on making informed decisions today. Whether that means proceeding with overlay or investing in complete replacement, understanding your options ensures you choose the solution that best serves your needs, budget, and long-term property plans.
FAQ About Asphalt Overlay
How long does an asphalt overlay last compared to complete replacement?
In my experience, a properly installed overlay over a sound foundation typically lasts 12-15 years with regular maintenance, while complete replacement can last 20-25 years. The longevity depends heavily on the condition of your existing base, quality of installation, climate conditions, and maintenance consistency. I’ve seen overlays in excellent condition after 18 years and others that needed replacement after 8 years due to inadequate preparation or poor maintenance.
Can overlay be applied over any existing asphalt surface?
No, overlay success requires a structurally sound existing surface with minimal base failure. I evaluate surfaces using the “25% rule” – if more than 25% of the surface shows cracking or if there are signs of base settlement, overlay isn’t appropriate. Surfaces with extensive alligatoring, major rutting (over 1 inch deep), or soft spots that flex under foot pressure need complete replacement rather than overlay.
How much height does overlay add, and will it affect drainage?
Standard residential overlay adds 1.5-2 inches to your existing surface height, which can significantly affect drainage patterns. Water that previously flowed properly may begin pooling against foundations or in low areas. I always evaluate drainage during site assessment and may recommend adjustments to adjacent concrete surfaces, installation of additional drainage, or modifications to landscape grading to maintain proper water flow.
What’s the best time of year for overlay installation?
Late spring through early fall provides optimal installation conditions, with late spring being my preferred timing. This allows maximum curing time before winter freeze-thaw cycles while avoiding extreme summer heat that can make installation challenging. I avoid installation when ambient temperatures are below 50°F or above 85°F, and never install when rain is expected within 24 hours of completion.
How soon can I drive on new overlay?
Light vehicle traffic is typically acceptable after 24-48 hours, depending on installation temperature and weather conditions. However, I recommend avoiding heavy loads, sharp turns, and parking in fixed positions for the first 30 days while the overlay continues curing and gaining strength. Full structural strength develops over several weeks, so patience during the initial period prevents permanent surface damage.
Is overlay more cost-effective than replacement in all situations?
Overlay typically costs 40-60% less than replacement, but it’s only cost-effective when applied over structurally sound pavement. If your existing surface requires extensive preparation, has base failures, or needs complete reconstruction, replacement may provide better long-term value. I help homeowners calculate total cost of ownership over expected residence time to determine the most economical approach.
Can I apply overlay myself, or do I need professional installation?
While I appreciate DIY enthusiasm, overlay installation requires specialized equipment, precise timing, and temperature control that make professional installation strongly recommended. Hot mix asphalt must be spread and compacted within specific temperature ranges using heavy equipment that’s rarely available for rent. However, homeowners can often handle preparation work like crack cleaning and site preparation to reduce professional installation costs.