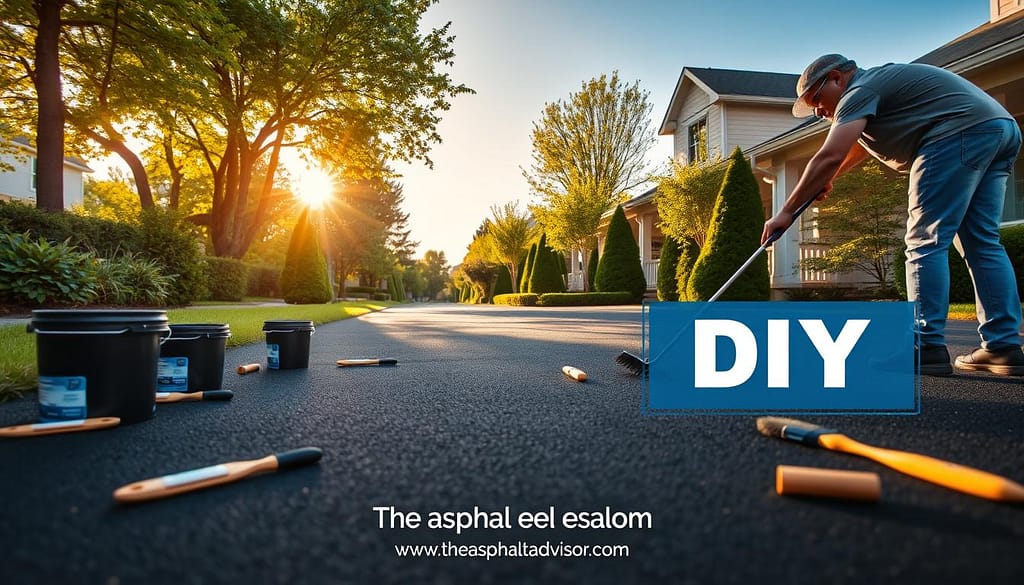
I remember the day I first noticed the cracks in my driveway. It was like watching the first wrinkles appear on a beloved face. That’s when I realized the importance of sealcoating. This protective layer isn’t just about aesthetics; it’s about preserving memories and investments. As I delved into the world of asphalt sealing methods, I discovered a whole new appreciation for the ground beneath my feet.
Sealcoat is like sunscreen for your driveway. It shields the asphalt from harmful UV rays, water damage, and chemical spills. The sealcoat application process is a bit like painting, but with far more significant benefits. It’s a preventative measure that extends the life of your pavement, keeping it looking fresh and functional for years to come.
As I explored driveway sealing techniques, I was amazed by the science behind this simple-looking black coating. It’s not just about making your driveway look good; it’s about protecting your investment and avoiding costly repairs down the road. Let’s dive into the essential guide to asphalt seal coat and uncover the secrets to a long-lasting, beautiful driveway.
Key Takeaways
- Sealcoating protects asphalt from UV rays, water, and chemicals
- The best time for sealcoating is during dry summer months
- Sealcoating can double the lifespan of a driveway or parking lot
- Professional application is recommended for optimal results
- The average cost ranges from $0.15 to $0.25 per square foot
- A typical sealcoat lasts 2 to 3 years before needing reapplication
Understanding Sealcoating: An Overview
Sealcoating is a key part of keeping asphalt in good shape. It turns old, rough surfaces into smooth, protected ones. This guide will cover the basics of sealcoating and why it’s important for asphalt care.
Definition of Sealcoating
Sealcoating is when a protective layer is put on asphalt. It’s a critical step in keeping asphalt surfaces safe. The layer is made of bitumen and special additives to make it last longer and dry faster.
Benefits of Sealcoating
Sealcoating has many benefits. It protects against weather damage and oil spills. It also makes the surface look better. By stopping oxidation, it makes asphalt last longer, saving money in the long run. Getting professional help can make the results last even longer than doing it yourself.
Different Types of Sealcoats
There are three main types of sealcoats used:
| Sealcoat Type | Characteristics | Best Use |
|---|---|---|
| Coal Tar-based | Highly resistant to fuel spills | Gas stations, industrial areas |
| Asphalt Emulsion-based | Environmentally friendly, flexible | Residential driveways, parking lots |
| Acrylic | Fast-drying, color customizable | Tennis courts, decorative pavements |
Each type has its own benefits, making them right for different places. The choice depends on what the project needs and the environment.
The Importance of Sealcoating for Asphalt
Sealcoating is a game-changer for asphalt maintenance. It can turn worn-out pavement into a smooth, attractive surface. Let’s explore why sealcoating is so important for your asphalt.
Extending the Life of Asphalt
Sealcoating acts as a shield for your asphalt. It protects against UV rays, water, and chemicals that can damage the surface. By sealcoating every two to three years, you can extend your pavement’s life by half. This is a smart investment, costing just $0.15 to $0.35 per square foot. New asphalt costs $1.5 to $2 per square foot.
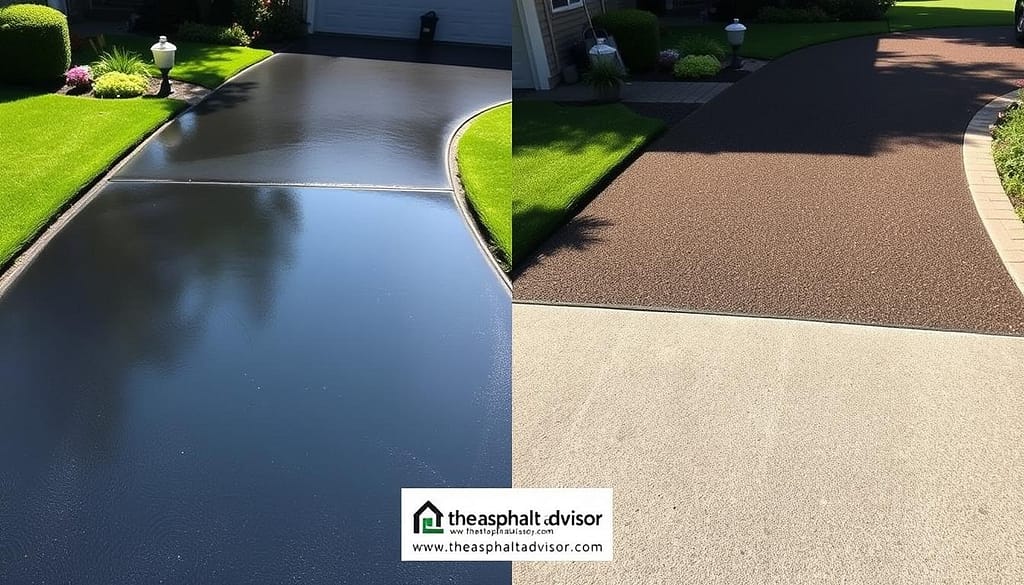
Enhancing Curb Appeal
A fresh sealcoat can greatly improve curb appeal. It brings back that rich, dark color we love about new asphalt. This can increase property value and make a great first impression for businesses. Sealcoating is a top practice for keeping a professional look.
Protecting Against Weather Elements
Weather can be tough on asphalt. Sealcoating creates a barrier against harsh conditions like freeze-thaw cycles, which can cause cracking. It’s best to apply sealcoat in spring or summer for faster drying. Remember, new asphalt needs 3-6 months to cure before its first sealcoat.
By following these sealcoating application tips, you’ll keep your asphalt looking great and lasting longer. It’s a small step that pays off big in the long run.
The Sealcoat Application Process Explained
The sealcoat application process is key to keeping asphalt surfaces in good shape. As an expert, I’ll walk you through the main steps of this process.
Preparing the Surface
Before you start, it’s important to prepare the surface well. This means cleaning the asphalt to get rid of dirt, debris, and oil spills. For the best results, I suggest filling cracks at least a week before sealing with cold pours. Bigger cracks might need 60 days to cure.
Choosing the Right Sealcoat Product
Choosing the right sealcoat is important. Usually, a liquid asphalt emulsion is the best choice. Sometimes, you might need a primer coat, like when dealing with oil stains.
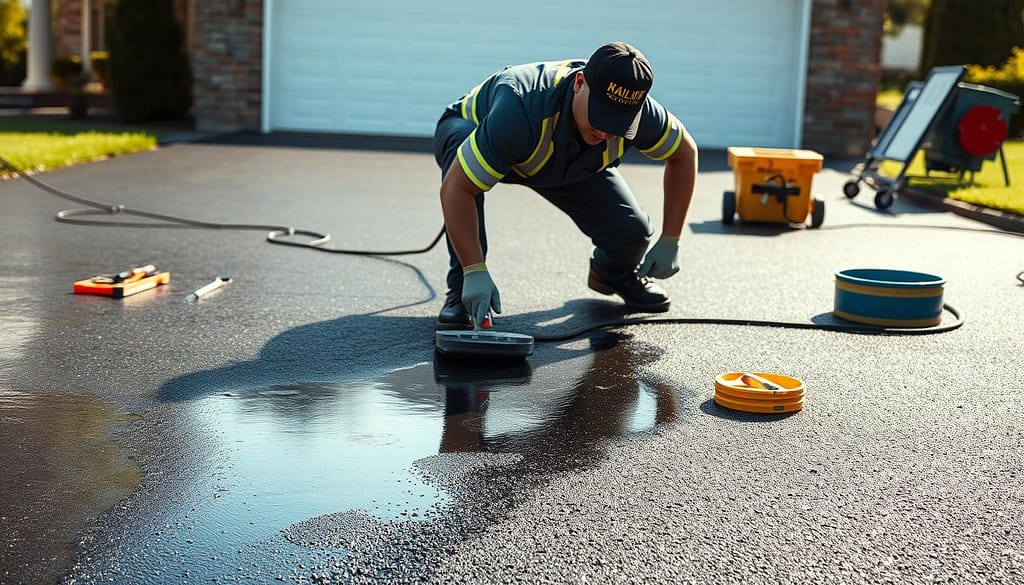
Applying the Sealcoat
The process of applying sealcoat involves two coats. The first coat covers about 40 square feet per gallon, and the second covers 60 square feet. To improve traction, mix 5 pounds of clean silica sand per gallon of sealer. Use a spray wand for even coverage and the right thickness.
- Allow a minimum of 2 hours between coats on residential driveways
- Wait 24 hours before opening to traffic
- Expect 30 minutes to 1 hour drying time at 70°F and 50% humidity
Remember, the weather can affect how long it takes for the sealcoat to cure. Keep the area closed to traffic until it’s fully cured. By following these steps, you’ll protect your asphalt surface for a long time.
Tools and Equipment Needed for Sealcoating
Having the right tools is key for successful sealcoating. Professional services use special gear for quality and efficiency.
Essential Tools for Preparation
Preparation is vital in sealcoating. I always have these tools ready:
- Broom and blower for debris removal
- Forced air crack router for crack cleaning
- Oil spot remover and bristle brush for stubborn stains
- Weed eater for edge trimming
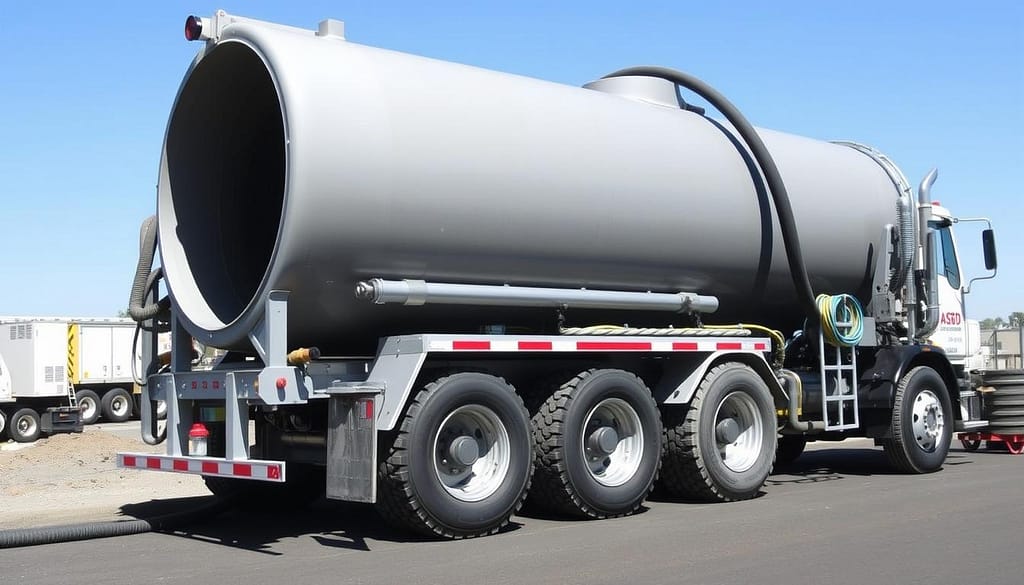
Application Equipment Options
I choose different equipment for different jobs:
- Sealcoat tank with spray wand for even application
- Squeegees for manual spreading
- Squeegee machines with diesel engines for larger areas
- Spray trailers with powerful engines for extensive projects
Safety Gear Considerations
Safety is a top priority in sealcoating. I wear:
- Long pants and long-sleeved shirts
- Hat and sunscreen for sun protection
- Gloves to prevent skin contact with sealant
- Eye protection when using spray equipment
Keeping tools organized saves time and boosts efficiency. It’s an investment for quality results on every job.
Preparing the Asphalt for Sealcoating
Getting your asphalt ready is essential for a successful sealcoating job. Before you start, make sure your surface is prepped. Here are the key steps to get your asphalt ready.
Cleaning the Surface
Cleaning is the first step in driveway sealing. Sealcoat won’t stick to a dirty surface. So, I remove all dirt, debris, and oil stains. Power washing is effective, but sometimes, special cleaning solutions are needed for tough stains.
Remember, priming the driveway by removing oil spots can really boost the effectiveness of your sealcoat application.
Filling Cracks and Potholes
Next, I fill and repair any cracks or potholes. It’s important to have a smooth, even surface. Allow six months for crack or pothole fillers to fully cure before applying sealer.
This waiting period ensures the repairs are stable and won’t interfere with the sealcoating process.
Drying Time Requirements
After cleaning and repairs, it’s important to wait for the surface to dry. I usually wait 24-48 hours, depending on the weather and the extent of repairs. The temperature outside must be at least 60 degrees Fahrenheit for a minimum of 24 hours before and after making repairs or applying sealer.
This ensures proper curing and adherence of the sealcoat.
| Preparation Step | Time Requirement | Temperature Requirement |
|---|---|---|
| Cleaning | 1-2 days | Above 50°F |
| Crack/Pothole Repair | 6 months | Above 60°F |
| Drying After Prep | 24-48 hours | Above 60°F |
Choosing the Right Sealcoat Product
Finding the right sealcoat product is key for protecting your asphalt. I’ll show you the different types, what to look for, and eco-friendly options. This will help you make a smart choice.
Types of Sealcoat Compounds
Sealcoat products vary in their makeup, each with its own benefits:
- Coal tar emulsion: Durable and fuel-resistant, but contains carcinogens
- Asphalt emulsion: Environmentally friendly and fast-curing
- Oil-based: Penetrates asphalt and repairs hairline cracks
- Acrylic: Ideal for sports courts and colored surfaces
Factors Influencing Product Choice
When picking a sealcoat, think about these important factors:
| Factor | Considerations |
|---|---|
| Climate | Temperature, humidity, UV exposure |
| Traffic volume | Light, medium, or heavy use |
| Environmental regulations | Local restrictions on VOCs and PAHs |
| Curing time | Traditional: 2-3 days; Quick-dry: Same day |
| Budget | Cost vs. longevity and performance |
Eco-Friendly Sealcoat Options
For those who care about the environment, consider these options:
- Asphalt emulsion sealcoats: Low VOCs, safer for plants and wildlife
- BioSealcoat: Made from soybean oil, passes EPA testing for low odor
- Water-based emulsions: Contain fewer harmful chemicals

Remember, the right sealcoating application tips and best practices depend on the product. Always follow the manufacturer’s instructions for the best results. By choosing wisely, you’ll protect your asphalt for a long time.
The Sealcoat Application Steps
Protecting your asphalt surface is key, and sealcoating is essential. As an expert, I’ll show you the important steps and share tips.
Step-by-Step Application Guide
First, clean the surface well and fix any cracks. Mix the sealcoat product well before you start. Use a squeegee or spray system to spread it evenly.
Tips for Even Application
Keep the pressure even when applying. Overlap your strokes a bit for full coverage. Work in small sections to keep the area wet.
Apply the first coat in one direction and the second in the opposite direction.
Common Mistakes to Avoid
Don’t make the sealcoat too thick, as it can crack. Don’t seal over bad surfaces or in bad weather. Wait at least 24 hours before using the sealed surface.
| Application Step | Key Point |
|---|---|
| Surface Preparation | Clean and repair surface |
| Product Mixing | Thoroughly mix sealcoat |
| Application Method | Use squeegee or spray system |
| Number of Coats | Apply two thin coats |
| Drying Time | Wait 24 hours before use |
Curing and Drying Time for Sealcoats
Understanding the curing process is key for both commercial and residential sealcoating. Let’s explore the drying and curing times for sealcoats.
Importance of Proper Curing
Proper curing makes sure the sealcoat sticks well to the asphalt. This is essential for your pavement’s long-term health and performance.
Typical Drying Times
Drying times for sealcoats depend on several factors. It takes 3-4 hours for the initial drying, allowing for light foot traffic. But, full curing takes 1-3 days. For the best results, wait 48 hours before driving on the newly sealed surface.
What Affects Drying Time?
Several factors can change drying times in both commercial and residential sealcoating:
- Temperature: Ideal conditions are between 50-90°F
- Humidity: Higher humidity levels slow down drying
- Sunlight exposure: Direct sunlight can affect the curing process
- Sealcoat thickness: Thicker applications require more drying time
I suggest planning your sealcoating project when there’s no rain for at least 48 hours. This ensures proper curing and maximizes the sealcoat’s protective benefits.
Maintenance After Sealcoating
Keeping your sealcoated driveway in top shape is essential. After sealcoating, following some simple care tips is key. This will help your driveway look great for many years.
Recommended Maintenance Practices
Here are some driveway sealing techniques to keep your driveway in good condition:
- Clean the surface monthly with a gentle spray of water
- Remove stains from oil, fuel, or antifreeze quickly
- Avoid heavy traffic for at least 24 hours after sealcoating
- Restripe the pavement once the coat has dried

Signs that Sealcoating Needs Repair
Watch for these signs that your sealcoat might need repair:
- Fading color
- Visible cracks forming
- Areas of wear or peeling
- Water pooling on the surface
Frequency of Resurfacing
I recommend resurfacing every 2-3 years. The frequency depends on climate, traffic, and the initial quality of the sealcoat. Regular checks can help spot problems early. With the right care, your driveway can last for decades, boosting your property’s value and look.
Cost Considerations for Sealcoating
When planning a sealcoating project, it’s important to know the costs. I’ll explain what affects prices and give insights on average costs in different areas.
Factors Affecting Cost
Several factors influence sealcoating prices. The size of the area, the condition of the asphalt, and where you are all matter. Professionals charge by square foot, from $0.08 to $0.30. DIY folks pay between $0.15 and $0.25 per square foot.
Average Prices by Region
Prices for sealcoating change based on where you are. This is because of labor costs and what materials are available. Here’s a look at average costs for a 10,000 square foot parking lot:
| Region | Average Cost |
|---|---|
| Northeast | $2,200 |
| Midwest | $1,900 |
| South | $1,800 |
| West | $2,400 |
Cost vs. Benefit Analysis
Sealcoating might seem expensive at first, but it saves money in the long run. It makes your asphalt last longer, avoiding expensive fixes. For instance, sealing a 600 square foot area costs $48 to $180, much less than replacing it.
Following some sealcoating tips can help you get the most out of it. This way, you can keep your asphalt looking good and save money.
Frequently Asked Questions About Sealcoating
Sealcoating is key for asphalt care. Let’s explore some common questions about this protective process.
How Often Should I Sealcoat?
For the best driveway care, sealcoat every two years. This keeps the protective layer strong and your asphalt looking new. If your asphalt is new, wait 12 months before the first sealcoat. This lets the asphalt settle right.
Is DIY Sealcoating Possible?
DIY sealcoating is doable, but it’s not always the best. Experts get better results. They have the right tools and know the best ways to sealcoat. This ensures even coverage and proper drying, vital for lasting protection.
What Should I Know Before Sealcoating?
Before you sealcoat, keep these points in mind:
- Allow 24-48 hours for the sealcoat to cure before walking on it
- Wait at least 48 hours before driving on a newly sealed driveway
- Full curing takes about six weeks
- Two coats provide better protection than one thick coat
- Proper surface cleaning is essential for good adhesion
| Factor | Recommendation |
|---|---|
| Sealcoating Frequency | Every 2 years |
| New Asphalt Wait Time | 12 months |
| Walking Wait Time | 24 hours |
| Driving Wait Time | 48 hours |
| Full Curing Time | 6 weeks |
While these tips are useful, talking to a pro can help you follow the best sealcoating practices for your needs.
Conclusion: Making the Most of Your Sealcoat Investment
I’ve talked a lot about sealcoating, and now it’s time to finish. Sealcoating is key for keeping asphalt surfaces in good shape. It’s not just about looks; it’s about protecting your investment and saving money over time.
Summary of Key Points
The sealcoat application process is vital for extending your asphalt’s life. Proper preparation, the right product, and correct application are essential. Sealcoat within the first two years after installation. Then, reapply every two to three years to keep the protective layer strong.
Final Tips for Homeowners
As a homeowner, think about getting professional sealcoating services for the best results. Companies like C. Brooks Paving offer expert services to protect your pavement. With the sealcoating industry growing at 4% and expected to reach $609.3 million by 2024, quality services are more available than ever.
Encouragement for Sealcoating
Don’t delay sealcoating – it’s a smart choice for your property. It boosts curb appeal, prevents expensive repairs, and keeps your property value up. By investing in regular sealcoating, you’re protecting your asphalt and making a smart financial choice for your home’s future.